How to Grow Jasmine from Cuttings: Master in 8 steps

How to Grow Jasmine from Cuttings

How to grow Jasmine from cuttings, Gardening enthusiasts often seek the satisfaction of propagating plants from cuttings, and jasmine, with its intoxicating fragrance and delicate blooms, is a popular choice. In this detailed guide, we will unveil the secrets to successfully growing jasmine from cuttings, empowering you to create a lush and fragrant garden oasis. Let’s delve into the fascinating world of propagating jasmine and unlock the steps to cultivate your own thriving jasmine plants.

Jasminum multiflorum - Wikipedia

Understanding Jasmine Propagation:

Before we delve into the practical steps of how to grow jasmine from cuttings, it’s essential to understand the science behind propagation. Jasmine, like many other plants, has the remarkable ability to develop roots and grow into new plants from stem cuttings. This natural process allows gardeners to multiply their jasmine collection and create abundance in their garden spaces.

Step 1: Selecting the Perfect Cuttings:

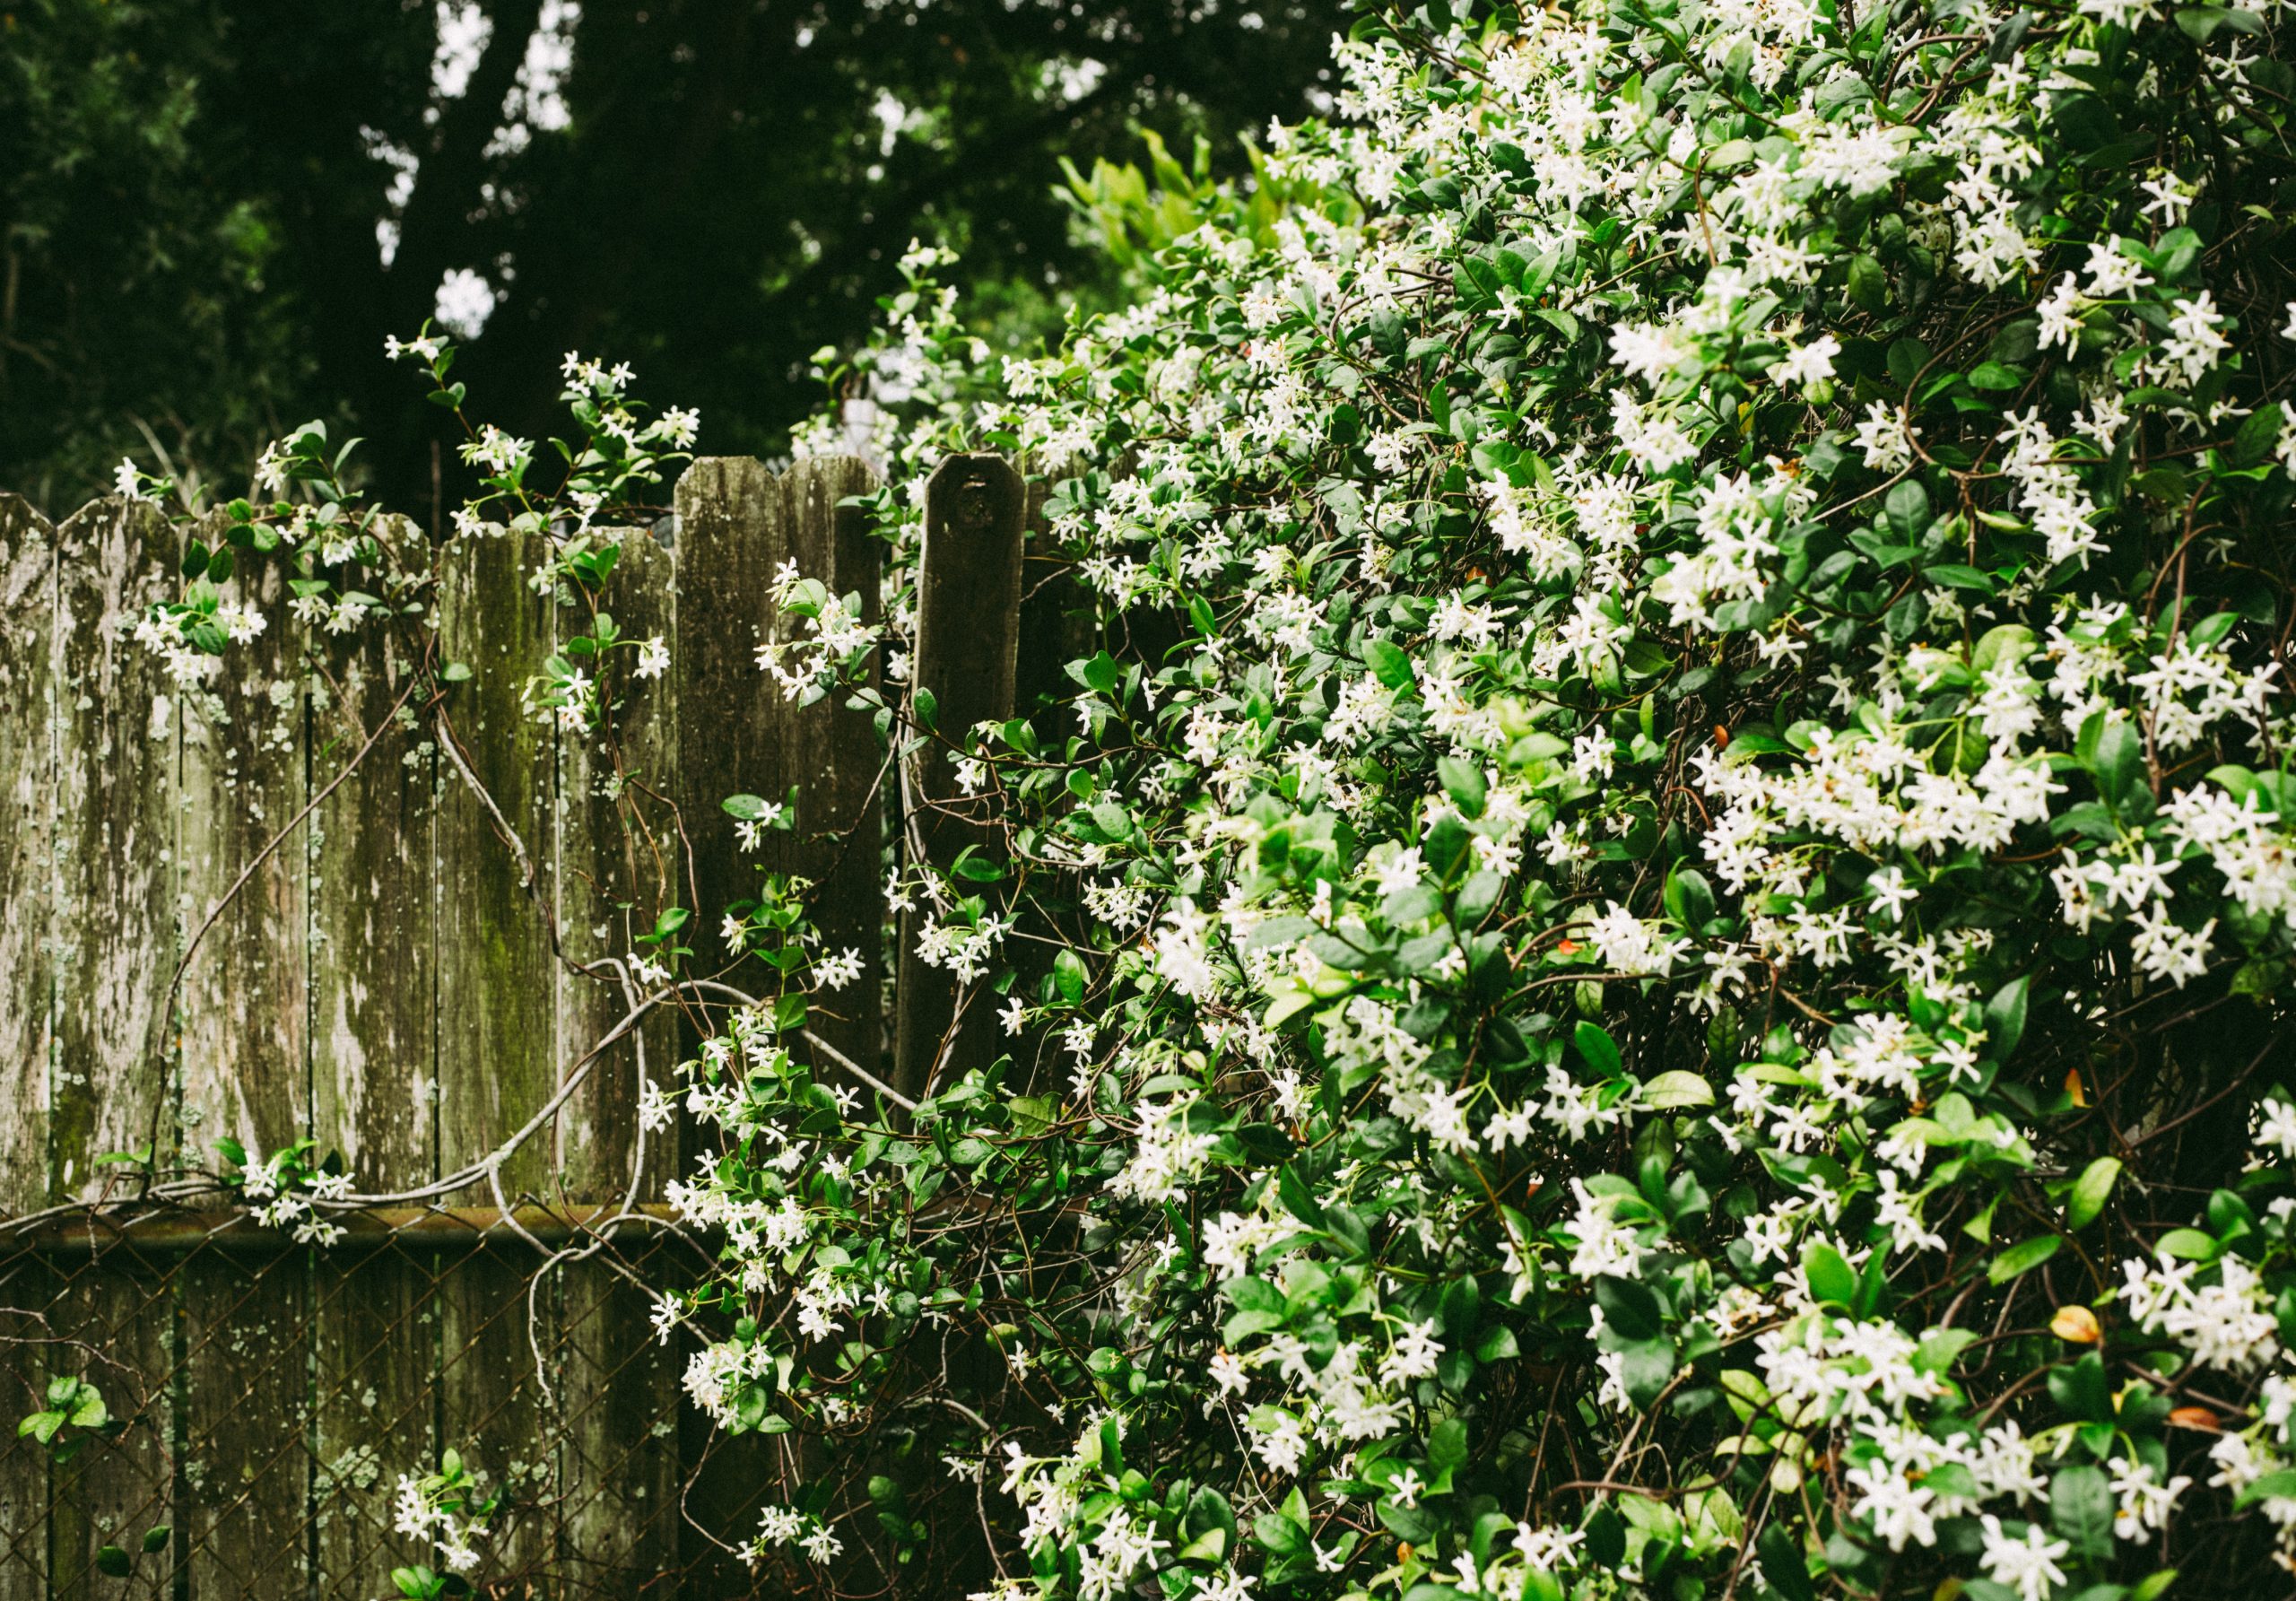
To embark on your journey of propagating jasmine from cuttings, you’ll need to start with the right materials. Look for healthy, vigorous stems on your existing jasmine plants. Ideally, choose stems that are about 6 inches long and have several sets of leaves. These stems should be free from any signs of disease or damage.

Step 2: Preparing Your Cuttings:

Once you’ve selected your ideal stems, it’s time to prepare them for propagation. Using sharp, clean scissors or pruning shears, make a clean cut just below a leaf node. Remove any leaves from the lower portion of the stem, leaving only a few leaves at the top. This encourages the cutting to focus its energy on root development rather than supporting foliage.

How to Propagate Star Jasmine from Cuttings

Step 3: Encouraging Root Growth:

To expedite the rooting process, it’s beneficial to use a rooting hormone. Dip the cut end of each stem into the rooting hormone powder, ensuring that it is thoroughly coated. The rooting hormone contains growth-promoting substances that stimulate root formation, increasing the chances of successful propagation.

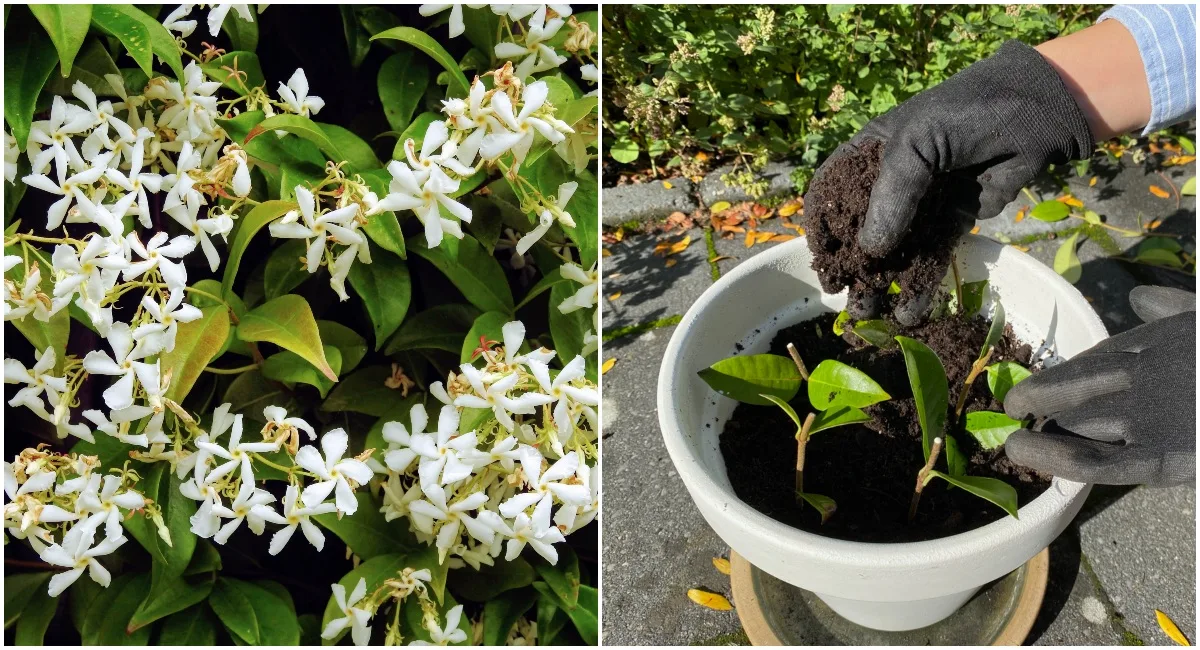
Step 4: How to Grow Jasmine from Cuttings, Planting Your Cuttings:

Now that your cuttings are prepared, it’s time to plant them in a suitable growing medium. Choose a well-draining potting mix that retains moisture without becoming waterlogged. Fill small pots or trays with the potting mix and make small holes using a pencil or your finger. Gently insert the prepared cuttings into the holes, ensuring that at least one node is buried beneath the soil.

Step 5: Providing Optimal Growing Conditions:

Successful propagation requires the right environmental conditions. Place your pots or trays in a warm, bright location, away from direct sunlight. Jasmine cuttings prefer indirect light during the rooting phase to prevent excessive stress. Keep the soil consistently moist but not waterlogged, as soggy conditions can lead to rotting.
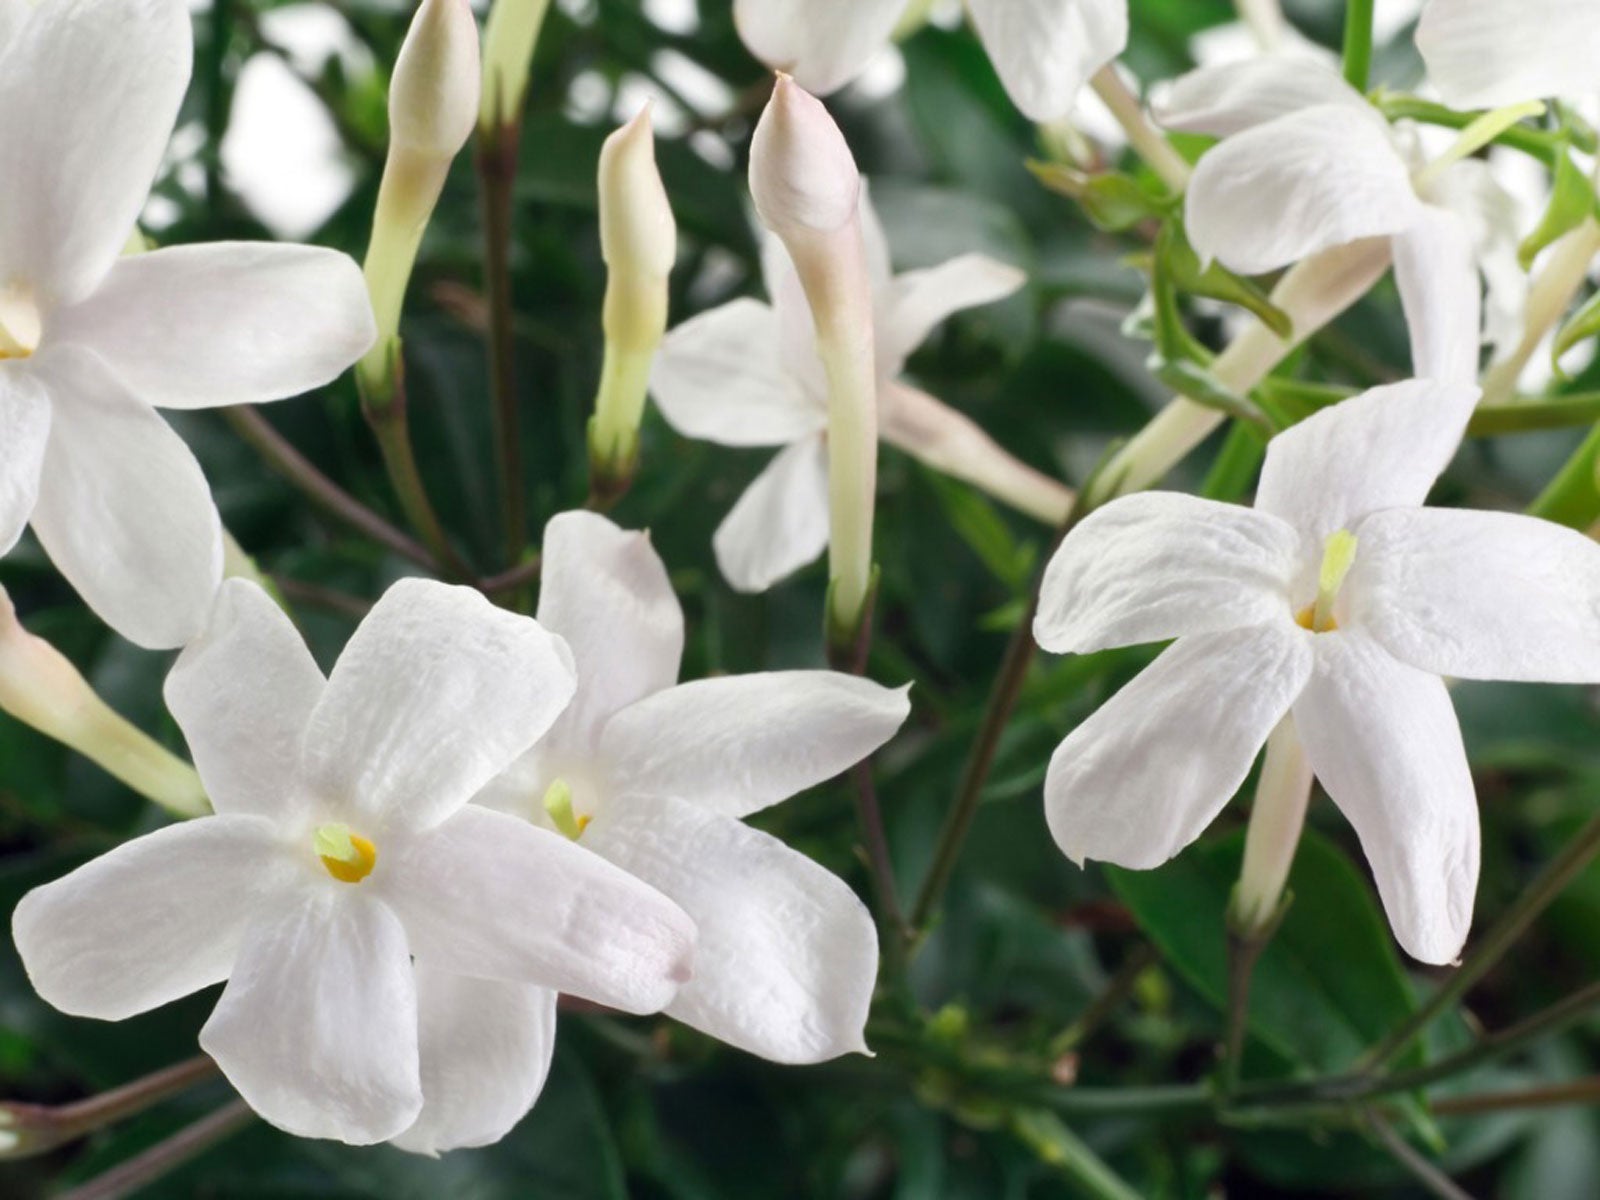
Jasmine Plant Care [6 Tips + FAQs] | How to Grow Jasminum Polyanthum | homify

Step 6: Monitoring and Maintenance:

As your jasmine cuttings take root and begin to establish themselves, it’s crucial to monitor their progress regularly. Check the soil moisture levels daily, watering as needed to keep it evenly moist. Avoid overwatering, as this can lead to root rot. Additionally, remove any dead or yellowing leaves to promote healthy growth.

Step 7: Transplanting Your Rooted Cuttings:

Once your jasmine cuttings have developed a robust root system and established themselves, they are ready for transplanting into larger containers or the garden. Choose a sunny spot with well-draining soil and space the plants appropriately to allow for adequate growth. Gently remove the cuttings from their pots, being careful not to disturb the roots, and transplant them into their new homes.

Step 8: Caring for Your Mature Jasmine Plants:

Congratulations! You’ve successfully propagated jasmine from cuttings and now have thriving plants ready to grace your garden with their fragrant blooms. To ensure continued success, provide your jasmine plants with regular care and maintenance. Water them deeply and infrequently, allowing the soil to dry out slightly between waterings. Fertilize them with a balanced, water-soluble fertilizer during the growing season to promote healthy growth and abundant flowering.

How to train jasmine to climb - JimsMowing.com.au

Culmination

Growing jasmine from cuttings is a rewarding endeavor that allows you to multiply your plants and fill your garden with the enchanting fragrance of jasmine blooms. By following the steps outlined in this guide and providing the right care and attention, you can enjoy the beauty of jasmine in your garden for years to come. So roll up your sleeves, gather your cuttings, and embark on a journey of propagation and growth with jasmine. Your fragrant garden oasis awaits!

Pumpkin Flower Power: A Deep Dive into Nature’s Floral Symphony

Pumpkin flowers

Pumpkin Flowers: Unveiling Nature’s Autumn Elegance

Pumpkin flowers, often overshadowed by their famous fruit, hold a unique and enchanting beauty that deserves a spotlight in your garden. In this journey, we’ll explore the intricate world of pumpkin blossoms, from their delicate appearance to the art of cultivation.

Kayabasa pumpkin flower early morning | Richard Parker | Flickr

The Anatomy of Pumpkin Flowers

1. Male and Female Blossoms:

Pumpkin plants produce distinct male and female flowers. The male blooms emerge first, featuring slender stems, while the females follow, distinguished by a miniature fruit at their base. Understanding this dynamic is key to successful pollination.

2. Petals and Colors:

Pumpkin flowers boast broad, vibrant petals in shades of yellow and orange, complementing the autumn palette. Their intricate design and rich colors make them a visual delight in any garden.

The Beauty of Pumpkin Flower Arrangements

1. Culinary Uses:

Pumpkin flowers are not only aesthetically pleasing but also edible. Harvest them in the morning when they’re most vibrant and add them to salads or use them as a unique garnish.

2. Decorative Displays:

Bring the essence of autumn indoors by incorporating pumpkin flowers into floral arrangements. Their distinctive appearance adds a touch of elegance to fall decor.

Unique Varieties and Cultivars

1. Atlantic Giant Pumpkin (Cucurbita maxima):

Known for colossal fruits, the Atlantic Giant also produces impressive, large flowers, making it a statement piece in any garden.

2. Baby Boo Pumpkin (Cucurbita pepo):

This miniature pumpkin variety not only features tiny fruits but also delicate, charming flowers, ideal for compact garden spaces.

Bloom of the Week: Pumpkin Flower – Darby Creek Trading

Growing and Caring for Pumpkin Flowers: A Gardener’s Guide

Pumpkin flowers, though overshadowed by their fruit, are gems in the garden. To cultivate these delicate blossoms successfully, consider the following steps:

Planting Conditions

1. Soil Requirements:

Choose well-drained soil with a neutral pH. Pumpkins prefer fertile soil enriched with organic matter. Ensure good drainage to prevent waterlogging.

2. Sunlight:

Pumpkin flowers thrive in full sunlight. Select a location that receives at least 6-8 hours of direct sunlight daily for optimal growth.

3. Spacing:

Plant pumpkin seeds or seedlings with adequate spacing to promote air circulation. This reduces the risk of diseases and ensures healthy growth.

Watering and Fertilization

1. Moisture Levels:

Maintain consistent soil moisture, especially during dry spells. Water at the base of the plant to prevent fungal issues. However, avoid overwatering to prevent root rot.

2. Fertilizer Application:

Use a balanced fertilizer during the growing season. Apply fertilizer when the plants begin to vine, and again when the first blossoms appear. Avoid excessive nitrogen, which can lead to excessive foliage at the expense of flowers.

Pollination Tips

1. Distinguishing Male and Female Flowers:

Identify male flowers by their slender stems and females by the small fruit at their base. Be aware that both types are crucial for successful pollination.

2. Hand Pollination:

Due to the separation of male and female blooms, manual pollination may be necessary. Transfer pollen from male to female flowers using a small brush or cotton swab to ensure fruit development.

Disease Prevention and Pest Management

1. Powdery Mildew Prevention:

Monitor for signs of powdery mildew, a common issue with pumpkin plants. Provide proper spacing, good air circulation, and consider applying a fungicide if needed.

2. Pest Control:

Keep an eye out for pests such as aphids or cucumber beetles. Natural predators like ladybugs can help, or use organic insecticides to deter pests without harming the blossoms.

A Brief Primer on Disease Management of Pumpkin | Purdue University  Vegetable Crops Hotline

Harvesting Pumpkin Flowers

1. Timing is Key:

Harvest male flowers freely for culinary use. For those wanting pumpkin fruit, leave some male flowers intact for pollination. Harvest in the morning when the blossoms are fully open.

2. Gentle Harvesting:

Handle pumpkin flowers with care to avoid damaging the delicate petals. Use scissors or pruners to snip the flowers from the stem, leaving a short stem attached.

Fall Pumpkin Planter Ideas | Garden Gate

Culinary Uses and Decorative Displays

1. Edible Delights:

Pumpkin flowers are not just ornamental; they are also edible. Harvest them in the morning and use them in salads, soups, or as a unique garnish.

2. Decorative Arrangements:

Bring the beauty of pumpkin flowers indoors by incorporating them into floral arrangements. Their vibrant colors and unique shape add a touch of elegance to fall decor.

Preserving Pumpkin Flowers

1. Drying Techniques:

Preserve the charm of pumpkin flowers by drying them. Hang them upside down in a dark, well-ventilated space to maintain their color and form.

2. Pressing for Keepsakes:

Create lasting memories by pressing pumpkin flowers between the pages of a book. Use these preserved blossoms for crafts or sentimental keepsakes.

Flower Becoming a Pumpkin | Learned something new at the pum… | Flickr

Pumpkin flowers, often overlooked, add a unique dimension to your garden. From their captivating beauty to culinary and decorative uses, these blossoms deserve a place in every gardener’s heart. Cultivate and cherish the enchanting journey of pumpkin flowers, enhancing your garden with the elegance of autumn.

Dwarf Spirea Magic: Growing and Caring Guide

Dwarf spirea

Dwarf spirea, with its dainty blossoms and compact size, is a delightful addition to any garden. Whether you’re a seasoned gardener or a novice green thumb, this comprehensive guide will walk you through everything you need to know about growing and caring for these charming perennials.

Baby's breath spirea (Spiraea thunbergii) Flower, Leaf, Care, Uses -  PictureThis

Understanding Dwarf Spirea

Overview:

Dwarf spirea, scientifically known as Spiraea japonica, belongs to the rose family and is renowned for its vibrant flowers and low-maintenance nature. These deciduous shrubs are perfect for gardeners looking to add a burst of color and elegance to their landscapes without the need for extensive care.

Varieties:

Before diving into the cultivation process, familiarize yourself with the different varieties of spirea available. Popular choices include Goldflame, Little Princess, and Magic Carpet, each offering unique foliage colors and growth habits.

Planting Dwarf Spirea:

Location:

Choose a well-drained area with ample sunlight for planting dwarf spirea. These resilient plants can adapt to various soil types, but they thrive in moderately fertile, slightly acidic to neutral soil.

Planting Process:

Prepare the Soil: Loosen the soil and incorporate organic matter for improved drainage.

Digging Holes: Dig holes slightly larger than the root balls of your dwarf spirea.

Placement: Space the plants according to their mature width, ensuring proper air circulation.

Snowmound' Dwarf Spirea

Essential Care Tips:

Watering:

It is relatively drought-tolerant once established, but regular watering during dry spells is crucial, especially for young plants. Aim for deep, consistent watering rather than frequent shallow watering.

Pruning:

Maintain the compact shape of dwarf spirea by pruning in late winter or early spring. Remove dead or damaged branches and cut back one-third of the oldest stems to encourage new growth.

Fertilizing:

Apply a balanced, slow-release fertilizer in early spring to promote healthy growth and vibrant blooms. Avoid excessive use of nitrogen, as it may lead to leggy growth.

Double Play Big Bang® Spirea - Hardy Flowering Shrub - 4" Pot - Proven  Winners - Hirt's Gardens

Dealing with Common Issues of Dwarf Spirea:

1. Pest Management:

It is generally resistant to pests, but occasional encounters with aphids or spider mites may occur. Swiftly address these issues with natural remedies such as insecticidal soap or neem oil, ensuring a pest-free environment for your petite perennials.

2. Disease Prevention:

While hardy, It can face challenges like powdery mildew. Prevent diseases by maintaining proper spacing between plants to encourage air circulation. In cases of infection, promptly treat with fungicides to safeguard the health of your spirea.

3. Pruning Practices:

Maintain the compact and attractive shape of your dwarf spirea by implementing regular pruning. Focus on removing dead or damaged branches, and cut back a third of the oldest stems in late winter or early spring. This not only enhances aesthetics but also stimulates new and healthy growth.

4. Adequate Watering:

Though relatively drought-tolerant, dwarf spirea benefits from consistent watering, especially during dry spells and for younger plants. Ensure deep watering rather than frequent shallow sessions to promote robust root development and overall plant vitality.

Plant of the Week: GLOW GIRL® Spirea - Plant of the Week

Landscaping Ideas with Dwarf Spirea

Enhance the visual appeal of your garden by incorporating dwarf spirea into various landscaping ideas:

1.Borders and Edges: Create neat borders or edges along pathways with the low-growing varieties like ‘Little Princess.’

2.Mixed Flower Beds: Pair dwarf spirea with other perennials for a vibrant and textured flower bed display.

3.Container Gardening: Plant dwarf spirea in containers for a portable burst of color on patios or balconies.

Flower with its captivating blossoms and easy maintenance, is a fantastic choice for any garden. Whether you’re a beginner or an experienced gardener, cultivating these petite perennials will surely add a touch of elegance to your outdoor space. Follow our guide, and watch your garden come alive with the beauty of dwarf spirea blooms.

How to Grow and Crae for Teddy Bear Sunflowers

Teddy Bear Sunflower

Teddy Bear Sunflowers, the whimsical darlings of gardens, bring a cuddly charm to summer’s golden aura. Join us on a journey through the art and heart of growing and caring for these delightful blooms, ensuring your garden radiates with the warmth of sunlit delight.

Two types of sunflowers | I was told the ones in the front a… | Flickr

Embracing Teddy Bear Sunflowers

Discover the joy of Teddy Bear Sunflowers (Helianthus annuus), a delightful variety known for its fluffy, golden blooms reminiscent of a teddy bear’s softness. These compact sunflowers add a touch of whimsy to gardens and bouquets. Let’s explore the secrets to growing and caring for these charming sunlit companions.

Characteristics of Teddy Bear Sunflowers:

Fluffy Blooms:

Teddy Bear Sunflowers boast fully doubled, fluffy blooms, giving them a distinct appearance.

Compact Size:

Perfect for smaller spaces and containers, Teddy Bears stand shorter than traditional sunflowers.

Bright Yellow Petals:

Vibrant yellow petals infuse landscapes with a burst of sunshine, creating a cheerful ambiance.

Growing Teddy Bear Sunflowers: A Gentle Guide

1. Selecting the Right Location:

. Choose a sunny spot with well-draining soil to ensure optimal growth.
. Teddy Bear Sunflowers thrive in full sunlight, so select a location with at least 6-8 hours of direct sunlight daily.

2. Planting Seeds:

. Sow seeds directly into the soil after the last frost has passed, ensuring a warm and welcoming environment for germination.
. Plant seeds at a depth of 1 inch and space them about 6-12 inches apart, providing ample room for each sunflower to flourish.

Silver Falls Seed Company - Sunflower - Dwarf Sungold Teddy Bear

3. Watering Routine:

. Maintain a consistent watering routine, keeping the soil consistently moist but not waterlogged.
. Water at the base of the plants to prevent moisture on the foliage, reducing the risk of fungal issues.

4. Fertilization:

. Teddy Bear Sunflowers benefit from a balanced, all-purpose fertilizer applied during the growing season.
. Follow package instructions for application rates, promoting healthy growth and robust blooms.

Caring for Teddy Bear Sunflowers: Tips for Success

Support for Stems:

Provide support, like stakes, to prevent bending and keep the compact Teddy Bears upright.

Deadheading:

Regularly remove spent blooms to encourage continuous flowering and redirect energy toward new buds.

Pest Management:

Keep a vigilant eye for pests like aphids, addressing infestations promptly with natural remedies or insecticidal soap.

Overcoming Challenges: Common Issues and Solutions

Powdery Mildew:

Ensure proper air circulation and spacing to combat powdery mildew.
Apply fungicides as needed, following recommended guidelines.

Root Rot:

Prevent root rot by maintaining well-draining soil and avoiding overwatering.
Allow the topsoil to dry between watering for a healthy root environment.
Harvesting Teddy Bear Sunflowers: Bringing Sunshine Indoors

Bacterial Stem Rot, Sclerotinia Basal Rot and Sunflower Rust Developing in  Sunflower

Timing for Harvest:

Harvest when blooms are fully open and petals feel firm, ideally in early morning or late evening.

Cutting Technique:
Use clean, sharp scissors for longer stems and a longer vase life, removing excess foliage to prevent water contamination.

Reveling in Teddy Bear Sunflowers’ Radiance

Cultivating Teddy Bear Sunflowers is a journey of joy, marked by fluffy blooms and sunlit charm. With care and attention, these sunflowers will grace your garden with golden radiance. Embrace the warmth they bring to your outdoor haven, basking in the glow of nature’s whimsical treasures as you nurture these teddy bear-like blooms.

Purple Irises: Graceful Blooms and Simple Care

Purple Irises

The Captivating World of Purple Irises

In the realm of floral enchantment, few flowers captivate the soul like the purple iris. Known for its regal appearance and vibrant hues, the purple iris adds an elegant touch to gardens worldwide. In this exploration, we delve into the allure of purple irises, their rich symbolism, and essential care tips for cultivating these mesmerizing blooms in your own garden.

Purple iris flowers, Pisgah Forest (1) | Somebody decided to… | Flickr

Understanding Purple Irises: A Brief Overview

Purple irises, belonging to the Iris genus, are perennial flowering plants renowned for their striking beauty and diverse color variations. While the genus encompasses a spectrum of colors, it’s the purple iris that often steals the spotlight, exuding a sense of regality and sophistication.

Key Characteristics of Purple Irises:

Color Variations: Purple irises exhibit a wide range of purple shades, from deep and velvety hues to lighter, more ethereal tones.

Elegant Form: The distinctive flower structure includes three upright petals (standards) and three downward-facing petals (falls), creating a unique and elegant appearance.

Symbolism: The purple iris carries symbolic significance, representing wisdom, respect, and admiration. It’s often associated with the Greek goddess Iris, the messenger of the gods.

Blooming Season: Depending on the variety, purple irises typically bloom in late spring to early summer, adding a burst of color to the garden landscape.

Free Stock Photo of Iris Flowers | Download Free Images and Free  Illustrations

Popular Varieties of Purple Irises:

‘Deep Purple Bearded Iris’: Renowned for its intense, velvety purple blooms and distinctive bearded features.

‘Blue Rhythm Iris’: A striking hybrid with rich blue-purple petals and a captivating fragrance.

‘Royal Robes Tall Bearded Iris’: Boasting regal, deep purple hues, this variety adds a touch of majesty to garden borders.

Cultivating Purple Irises: Essential Care Tips

Sunlight and Soil:

Purple irises, with their regal presence, demand a carefully chosen abode. Select a well-draining soil that not only cradles the rhizomes but also ensures proper aeration. Embrace their robust nature by planting them where they can bask in the glory of ample sunlight. These resilient flowers thrive in the dance of full to partial sun conditions, absorbing the energy they need to unfold their vibrant petals.

Watering Wisdom:

While irises boast a certain resilience to drought, a thoughtful approach to watering is key. Consistency becomes paramount, especially during dry spells and the blooming season. Provide a lifeline of hydration to your irises, allowing them to flourish with grace. Moisture, timed and tenderly delivered, ensures that these blooms continue to enchant with their radiant hues.

Bearded Iris Growing Guide | Garden Gate

Dividing and Transplanting Ballet:

Every 3-4 years, engage in a delicate ballet with your irises to prevent the garden stage from becoming overcrowded. This choreography involves the art of division. Gently unearth the rhizomes, separating them with the precision of a seasoned gardener. The perfect time for this performance is in the late summer or early fall, a period when the blooms have concluded their show, and the plants prepare for a season of rest. Transplanting during this interlude promises the best results, offering your irises a fresh canvas for their next vibrant performance.

Mulching Symphony:

Embrace the harmony of the garden by orchestrating a mulching symphony around the base of your purple irises. This protective layer serves as a shield, guarding against the caprices of weather. Mulch, a composition of organic matter or stones, is a maestro in retaining moisture, suppressing the crescendo of weeds, and providing insulation to the precious rhizomes during the winter’s quietude. In this symphony, mulch becomes the unsung hero, ensuring your irises flourish in an environment of stability and nourishment.

Pest and Disease Vigilance:

Every garden has its silent threats, and the world of purple irises is no exception. Keep a vigilant eye on the garden stage for pests like iris borers seeking to disrupt the harmony. To maintain the health of your floral performers, adopt the principles of good garden hygiene. Regular checks, meticulous cleaning, and a proactive stance against potential diseases are the guardians of your iris garden’s well-being. In this watchful symphony, prevention takes center stage, allowing your purple irises to command the spotlight with their uninterrupted elegance.

Iris Pests | Plant Addicts

In the grand production of cultivating purple irises, these comprehensive care guidelines weave a tapestry of mindful cultivation. As you embark on this floral journey, remember that each element, from sunlight to soil, from watering to division, contributes to the flourishing story of your garden adorned with the regal allure of purple irises.

Embracing the Timeless Beauty of Purple Irises

In the tapestry of garden flora, purple irises weave a story of elegance, symbolism, and enduring beauty. Whether adorning borders, bouquets, or symbolic gardens, these regal blooms stand as a testament to the captivating allure of nature’s palette. By understanding their characteristics and following essential care guidelines, you can cultivate a garden adorned with the timeless charm of purple irises, creating a haven of enchantment in your outdoor space.

How to Grow and Care for Calico Aster

Calico Aster (Symphyotrichum lateriflorum), with its dainty blossoms and vibrant hues, is a captivating addition to any garden. Known for its resilience and ability to attract pollinators, this native wildflower can be a stunning focal point in your landscape. In this comprehensive guide, we’ll delve into the art of cultivating and caring for Calico Aster, unlocking the secrets to a flourishing and picturesque garden.

Understanding Calico Aster:

Calico Aster, also called Side-flowering Aster, is a North American native perennial that belongs to the Asteraceae family. With its delicate white or light purple flowers adorned with a striking maroon center, this plant adds a touch of whimsy to late-season gardens. As a deciduous plant, Calico Aster undergoes a transformation throughout the seasons, making it an engaging and dynamic choice for your outdoor space.

calico aster

Choosing the Right Location:

To ensure the optimal growth of your Aster, select a location that receives ample sunlight. These plants thrive in full sun to partial shade, making them versatile enough to be incorporated into various garden designs. Well-draining soil is crucial for preventing root rot, so amend heavy soils with organic matter to enhance drainage.

Planting Calico Aster:

When planting  Aster, aim for a spacing of 18 to 24 inches between each plant. This allows for proper air circulation and prevents overcrowding as the plant matures. Water the newly planted Calico Aster thoroughly and provide a layer of mulch to help retain moisture and suppress weed growth.

Watering and Moisture:

While Calico Aster is relatively drought-tolerant once established, consistent moisture is essential during its initial growth period. Water the plant regularly, especially during dry spells, ensuring the soil remains consistently moist. Be cautious not to overwater, as Calico Aster is susceptible to root rot in waterlogged conditions.

calico aster

Fertilizing:

Calico Aster typically doesn’t require heavy fertilization. In early spring, apply a balanced, all-purpose fertilizer to give the plant a nutrient boost as it begins its growing season. Avoid excessive nitrogen, as this can lead to leggy growth and fewer blooms.

Pruning and Maintenance:

Pruning plays a crucial role in maintaining the shape and vigor of Aster. Pinch back the stems in late spring or early summer to encourage bushier growth and more abundant flowering. Deadheading spent blooms not only promotes continuous blooming but also prevents self-seeding.

Pest and Disease Management:

Calico Aster is generally resistant to pests and diseases, but it’s essential to monitor for common issues such as aphids or powdery mildew. In case of infestation, consider using organic remedies like neem oil or insecticidal soap. Proper spacing and good air circulation also contribute to disease prevention.

Royalty-Free photo: White daisy with good morning text overlay | PickPik

Attracting Wildlife:

One of the remarkable qualities of Aster is its ability to attract pollinators, such as bees and butterflies, to your garden. Embrace the biodiversity these beautiful blooms bring by incorporating  Aster into pollinator-friendly landscapes.

Conclusion:

Growing and caring for Aster is a rewarding endeavor that adds natural beauty and ecological value to your garden. By following these guidelines on location, planting, watering, fertilizing, pruning, and pest management, you’ll be well on your way to creating a thriving haven for this enchanting native wildflower. Embrace the journey of cultivating Aster and witness the magic it brings to your outdoor space.

Cultivating Captivating Blue Azaleas in Your Garden

Gardening enthusiasts seeking to add a touch of mystique and elegance to their outdoor sanctuaries need look no further than the mesmerizing world of blue azaleas. These enchanting blooms, with their captivating hues ranging from deep indigo to delicate sky blue, can transform any garden into a haven of serenity and beauty. In this comprehensive guide, we’ll explore the art of cultivating and caring for these stunning blue azaleas, unlocking the secrets to a garden awash with sapphire splendor.

Choosing the Right Blue Azaleas Varieties

Before embarking on your blue azalea journey, it’s crucial to choose the right varieties for your garden. Popular selections include the ‘Blue Danube,’ ‘Bluebird,’ and ‘Rosebud.’ Each variety boasts unique characteristics, from bloom size to growth habits. Consider factors such as climate, soil conditions, and available space when making your selection to ensure optimal growth and a harmonious integration into your garden landscape.

blue azaleas

Optimal Growing Conditions

Blue azaleas thrive in specific growing conditions that mimic their native habitats. These plants prefer well-draining, acidic soil rich in organic matter. To achieve this, amend your soil with compost or well-rotted leaves. Ensure your chosen location provides partial shade, as too much direct sunlight can scorch the delicate blooms. Consistent moisture is also key, so mulch the base of the plants to retain soil moisture and regulate temperature.

Planting with Precision

Planting blue azaleas with care sets the foundation for their growth and vibrancy. Dig a hole twice the size of the root ball and place the plant in the hole, ensuring the top of the root ball sits slightly above the soil surface. Backfill the hole with a mixture of soil and organic matter, then water thoroughly. Proper spacing between plants allows for adequate air circulation, reducing the risk of diseases.

Watering Wisdom

Maintaining optimal soil moisture is vital for the health of your blue azaleas. Water consistently, especially during dry spells, and ensure the soil remains consistently moist without becoming waterlogged. Mulching helps retain moisture and suppress weeds while providing insulation to the roots.

blue azaleas

Fertilizing for Brilliance

Blue azaleas benefit from regular feeding during the growing season. Use a balanced, acidic fertilizer formulated for azaleas and apply it in early spring as new growth begins. Follow the package instructions for quantities, and avoid over-fertilizing, as this can lead to salt buildup and root damage. A second application in late spring can support ongoing healthy growth and vibrant blooms.

Pruning Practices

Pruning is essential for shaping and maintaining the health of your blue azaleas. Perform light pruning after the bloom period to shape the plants and remove dead or diseased wood. Avoid heavy pruning during the growing season, as this can compromise next year’s flower buds. Deadheading spent blooms encourages additional flowering and keeps the plants looking tidy.

Guarding Against Pests and Diseases

Vigilance is key in preventing pests and diseases that may affect your blue azaleas. Keep an eye out for common azalea pests such as lace bugs and spider mites, treating them promptly with insecticidal soap or neem oil. Proper spacing, good air circulation, and avoiding overhead watering can help prevent fungal diseases.

blue azaleas

Reveling in Blue Blooms

With thoughtful care and attention to detail, your garden can soon be graced with the breathtaking beauty of blue azaleas. These captivating blooms not only add a touch of sophistication to your outdoor space but also serve as a testament to the rewards of dedicated gardening. From the moment the first buds unfurl to reveal their sapphire splendor, you’ll find yourself immersed in the enchanting world of blue azaleas.

In conclusion, cultivating captivating blue azaleas in your garden is an art that combines science, patience, and a deep appreciation for the wonders of nature. As you embark on this journey, remember that each azure blossom is a testament to your commitment and care, turning your garden into a canvas painted with the brilliance of sapphire hues.

Growing a Vibrant Yellow Rose Bush in Your Garden

In the world of gardening, few blooms exude the timeless charm and warmth that a vibrant yellow rose bush brings to a garden. If you’ve ever dreamed of creating your own haven of golden hues, this comprehensive guide will walk you through the steps to successfully cultivate and nurture a stunning yellow rose bush in your garden.

Choosing the Right Yellow Rose Variety

Before you start your journey to a vibrant yellow garden, it’s essential to select the right rose variety. Not all yellow roses are created equal, and factors such as size, fragrance, and blooming patterns can vary widely. Some popular choices include the ‘Golden Celebration,’ ‘Midas Touch,’ and ‘Sunsprite.’ Research the specific characteristics of each variety to find the one that suits your preferences and garden conditions best.

three pink flower free image | Peakpx

Selecting the Ideal Location

Yellow roses, like their counterparts, thrive in locations with plenty of sunlight. Ensure your chosen spot receives at least 6 to 8 hours of direct sunlight daily. Well-draining soil is crucial for healthy root development, so amend your soil with organic matter if necessary. Adequate air circulation is also vital to prevent diseases, so avoid overcrowding and plant your yellow rose bush with enough space around it.

Planting with Care

When planting your yellow rose bush, dig a hole that is twice the diameter of the root ball. Loosen the roots gently before placing the plant in the hole, making sure the graft union (the bulging part where the rose is grafted onto the rootstock) is at least two inches below the soil surface. Backfill the hole with soil and water thoroughly to help the roots establish themselves.

Watering and Feeding Schedule

Yellow roses appreciate consistently moist soil, so water your bush regularly, especially during dry spells. However, it’s crucial to avoid waterlogged conditions, as this can lead to root rot. A layer of organic mulch around the base of the plant can help retain moisture and suppress weeds.

To encourage robust growth and abundant blooms, feed your yellow rose bush with a balanced fertilizer in early spring, just as new growth begins. Repeat this feeding in late spring and early summer, following the package instructions for quantities.

yellow rose bush

Pruning for Optimal Growth

Pruning plays a vital role in shaping your yellow rose bush and promoting healthy growth. Perform a hard pruning in late winter or early spring to remove dead or diseased wood and shape the plant. Throughout the growing season, deadhead spent blooms regularly to encourage continuous flowering.

Dealing with Pests and Diseases

Keep a watchful eye on your yellow rose bush for any signs of pests or diseases. Aphids and spider mites are common culprits, but they can be easily controlled with insecticidal soap or neem oil. Fungal diseases, such as blackspot, can be prevented by providing adequate air circulation and avoiding overhead watering.

Enjoying the Fruits of Your Labor

With proper care and attention, your yellow rose bush will reward you with a profusion of radiant blooms, filling your garden with a burst of sunshine. Whether you’re a seasoned gardener or a novice with a green thumb, the joy of growing a vibrant yellow rose bush is a gratifying experience that enhances the beauty of any outdoor space.

Yellow Rose Bush

In conclusion, creating a garden adorned with the splendor of a yellow rose bush is a journey filled with nurturing, patience, and the simple joys of watching nature unfold. By following these guidelines, you’ll be well on your way to cultivating a vibrant haven that not only captivates the eyes but also warms the heart with the timeless beauty of yellow roses.

How to Maximize Gardenia Blooms in Your Garden

Gardenia Blooms, with their captivating fragrance and elegant blooms, are cherished additions to any garden. If you’re a garden enthusiast aiming to enhance the beauty of your gardenia plants, unlocking the secrets to maximizing their blooms is key. In this comprehensive guide, we’ll delve into effective strategies to ensure your garden is adorned with an abundance of vibrant and fragrant gardenia blossoms.

RUBIACEAE 茜草科 - Fortune's Cape Jasmine (Gardenia jasminoid… | Flickr

1. Optimal Planting Conditions:

To set the stage for prolific blooming, ensure your gardenias are planted in optimal conditions. Choose well-draining, acidic soil enriched with organic matter. Provide a location with partial shade, protecting the plants from harsh afternoon sun.

2. How to Maximize Gardenia Blooms,Adequate Watering:

Gardenias thrive in consistently moist soil, especially during the growing season. Deep, regular watering is essential, ensuring the soil remains evenly moist without becoming waterlogged. Mulching around the base of the plants helps retain moisture.

3. Balanced Fertilization:

Apply a balanced, acidic fertilizer formulated for gardenias during the growing season. This provides essential nutrients, promoting healthy growth and robust blooming. Avoid over-fertilizing, as it may lead to excessive foliage at the expense of flowers.

How To Grow And Care For Gardenias

4. Pruning Techniques:

Strategic pruning is crucial for maximizing gardenia blooms. Regularly remove spent flowers to encourage continuous blooming. Additionally, selectively prune to shape the plant, improve air circulation, and remove any dead or diseased branches.

5. Pest and Disease Management:

Gardenia Blooms, Keep a vigilant eye for pests such as aphids and whiteflies, which can affect blooming. Implement natural pest control methods or use insecticidal soap when necessary. Regularly inspect for signs of diseases like powdery mildew and take prompt measures to address any issues.

6. Sunlight Exposure:

While gardenias prefer partial shade, they still require adequate sunlight to bloom. Ensure they receive at least 4-6 hours of indirect sunlight daily. Adjust the planting location based on your specific climate and sunlight availability.

7. Temperature Considerations:

Gardenia Blooms in warm temperatures. If you’re in a region with cold winters, consider planting cold-hardy varieties or providing winter protection. Avoid exposing gardenias to frost, as it can damage flower buds.

8. Consistent Monitoring:

Regularly monitor the overall health of your gardenia plants. Promptly address any signs of stress, nutrient deficiencies, or pest infestations. Healthy plants are more likely to produce an abundance of blooms.

Mottisfont Abbey Rose Gardens, Hampshire, UK | A charming … | Flickr

Maximizing gardenia blooms involves a holistic approach encompassing proper care, attention to detail, and strategic interventions. By providing optimal growing conditions, addressing potential issues promptly, and implementing thoughtful pruning and fertilization practices, you can enjoy a garden adorned with the exquisite beauty and fragrance of flourishing gardenia blossoms. Embrace these strategies to transform your garden into a haven of floral splendor.

How to Grow and Care for Orange Lily Flower

In the vibrant palette of garden blooms, the orange lily flower stands out as a beacon of warmth and elegance. If you’ve ever dreamed of adorning your garden with these radiant flowers, this guide is your key to success. Growing and caring for orange lilies requires a combination of passion and knowledge. Let’s delve into the secrets of cultivating these stunning blossoms and ensuring they thrive in your garden.

Selecting the Right Variety:

The first step in your orange lily flower journey is choosing the right variety for your garden. From the bold and bright Asiatic lilies to the fragrant and graceful Trumpet lilies, options abound. Consider factors such as size, color intensity, and fragrance to find the perfect match for your garden aesthetic. Popular orange lily varieties include the ‘Orange Pixie,’ ‘African Queen,’ and the show-stopping ‘Orange Electric.’

orange lily flower

Planting Your Orange Lily Bulbs:

Timing and location are critical when planting orange lily bulbs. Choose a well-drained soil location that receives ample sunlight. Plant bulbs in the fall, approximately 6 to 8 inches deep and spaced about 12 inches apart. Ensure the pointed end of the bulb is facing upward and cover with soil. Water thoroughly after planting to initiate root growth.

Soil and Sunlight Requirements:

orange Lily Flower thrive in well-draining soil enriched with organic matter. Aim for a slightly acidic to neutral pH level. These flowers appreciate full sunlight but can tolerate partial shade. Adequate sunlight not only promotes robust growth but also intensifies the vivid orange hues of the blossoms. Be mindful of the soil moisture, allowing it to dry out between waterings to prevent issues like root rot.

Watering and Feeding:

Consistent and adequate watering is essential for the health of your orange lilies. Water the plants at the base, keeping the foliage dry to minimize the risk of diseases. During dry periods, increase watering frequency, ensuring the soil remains consistently moist. To enhance blooming, apply a balanced fertilizer in early spring when new growth emerges, and again after the flowering season.

orange lily free image | Peakpx

Supporting Your Lily Stems:

As your orange lilies grow, they may benefit from support to prevent the stems from bending or breaking, especially in windy conditions. Install stakes or cages around the plants, being careful not to damage the bulbs or emerging shoots. Tie the stems gently to the support structures using soft garden twine, providing stability and allowing the flowers to stand tall and proud.

Deadheading for Continuous Blooms:

To encourage a prolonged bloom period, practice deadheading, the removal of spent flowers. Snip off faded blooms just below the base of the flower head. This not only promotes continuous flowering but also redirects the plant’s energy into bulb development. As the season progresses, remove the entire stalk once all the flowers on it have bloomed and faded.

Managing Pests and Diseases:

While orange lilies are generally hardy, keeping an eye out for common pests like aphids and diseases such as botrytis is crucial. Inspect the plants regularly and treat any issues promptly. Neem oil or insecticidal soap can be effective and environmentally friendly solutions to combat pests without harming beneficial insects.

Winter Care:

orange Lily Flower are generally hardy, but providing some winter care ensures their well-being during colder months. Apply a layer of mulch around the base of the plants to insulate the soil and protect the bulbs from frost. In extremely cold regions, consider lifting the bulbs and storing them indoors until the following spring.

Royalty-Free photo: Red orchid flower selective focus photography | PickPik

Orange lily flower Conclusion:

Growing and caring for orange lily flower is a rewarding endeavor that adds a burst of color and elegance to any garden. By following these expert tips, you’ll be well on your way to cultivating a stunning display of radiant orange blooms. Let your garden glow with the warmth and beauty of these remarkable orange lily flower, creating a haven of natural splendor for you to enjoy throughout the seasons. Happy gardening!