How To Grow Dragon Fruit in Pots

how to grow dragon fruit in pots

How to Grow Dragon Fruit in Pots: Tips and Tricks

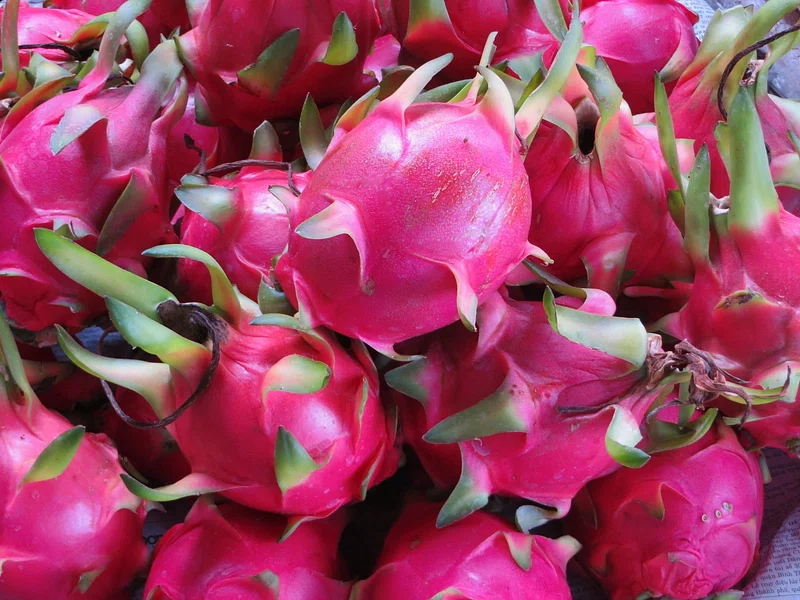
Dragon fruit, also known as pitaya or pitahaya, is a unique and exotic fruit that has gained popularity for its striking appearance and delicious taste. If you’re a gardening enthusiast or someone with limited space, you’ll be delighted to know that you can grow dragon fruit in pots. In this comprehensive guide, we’ll walk you through the step-by-step process of cultivating these vibrant cacti fruits in containers.

pyroleppard User Profile | DeviantArt

Choosing the Right Pot:

how to grow dragon fruit in pots, The first step in grow dragon fruit in pots is selecting the right container. Opt for a large pot with drainage holes to ensure proper water drainage. Dragon fruit plants have shallow root systems, so a wide and shallow pot is ideal. A container with a diameter of at least 15-24 inches is recommended to provide ample space for the plant to spread its roots.

Selecting the Right Soil:

Dragon fruit thrives in well-draining soil with a slightly acidic to neutral pH. Consider using a cactus mix or create your own by combining potting soil with perlite or sand to enhance drainage. This prevents waterlogged soil, a condition that dragon fruit plants do not tolerate well.

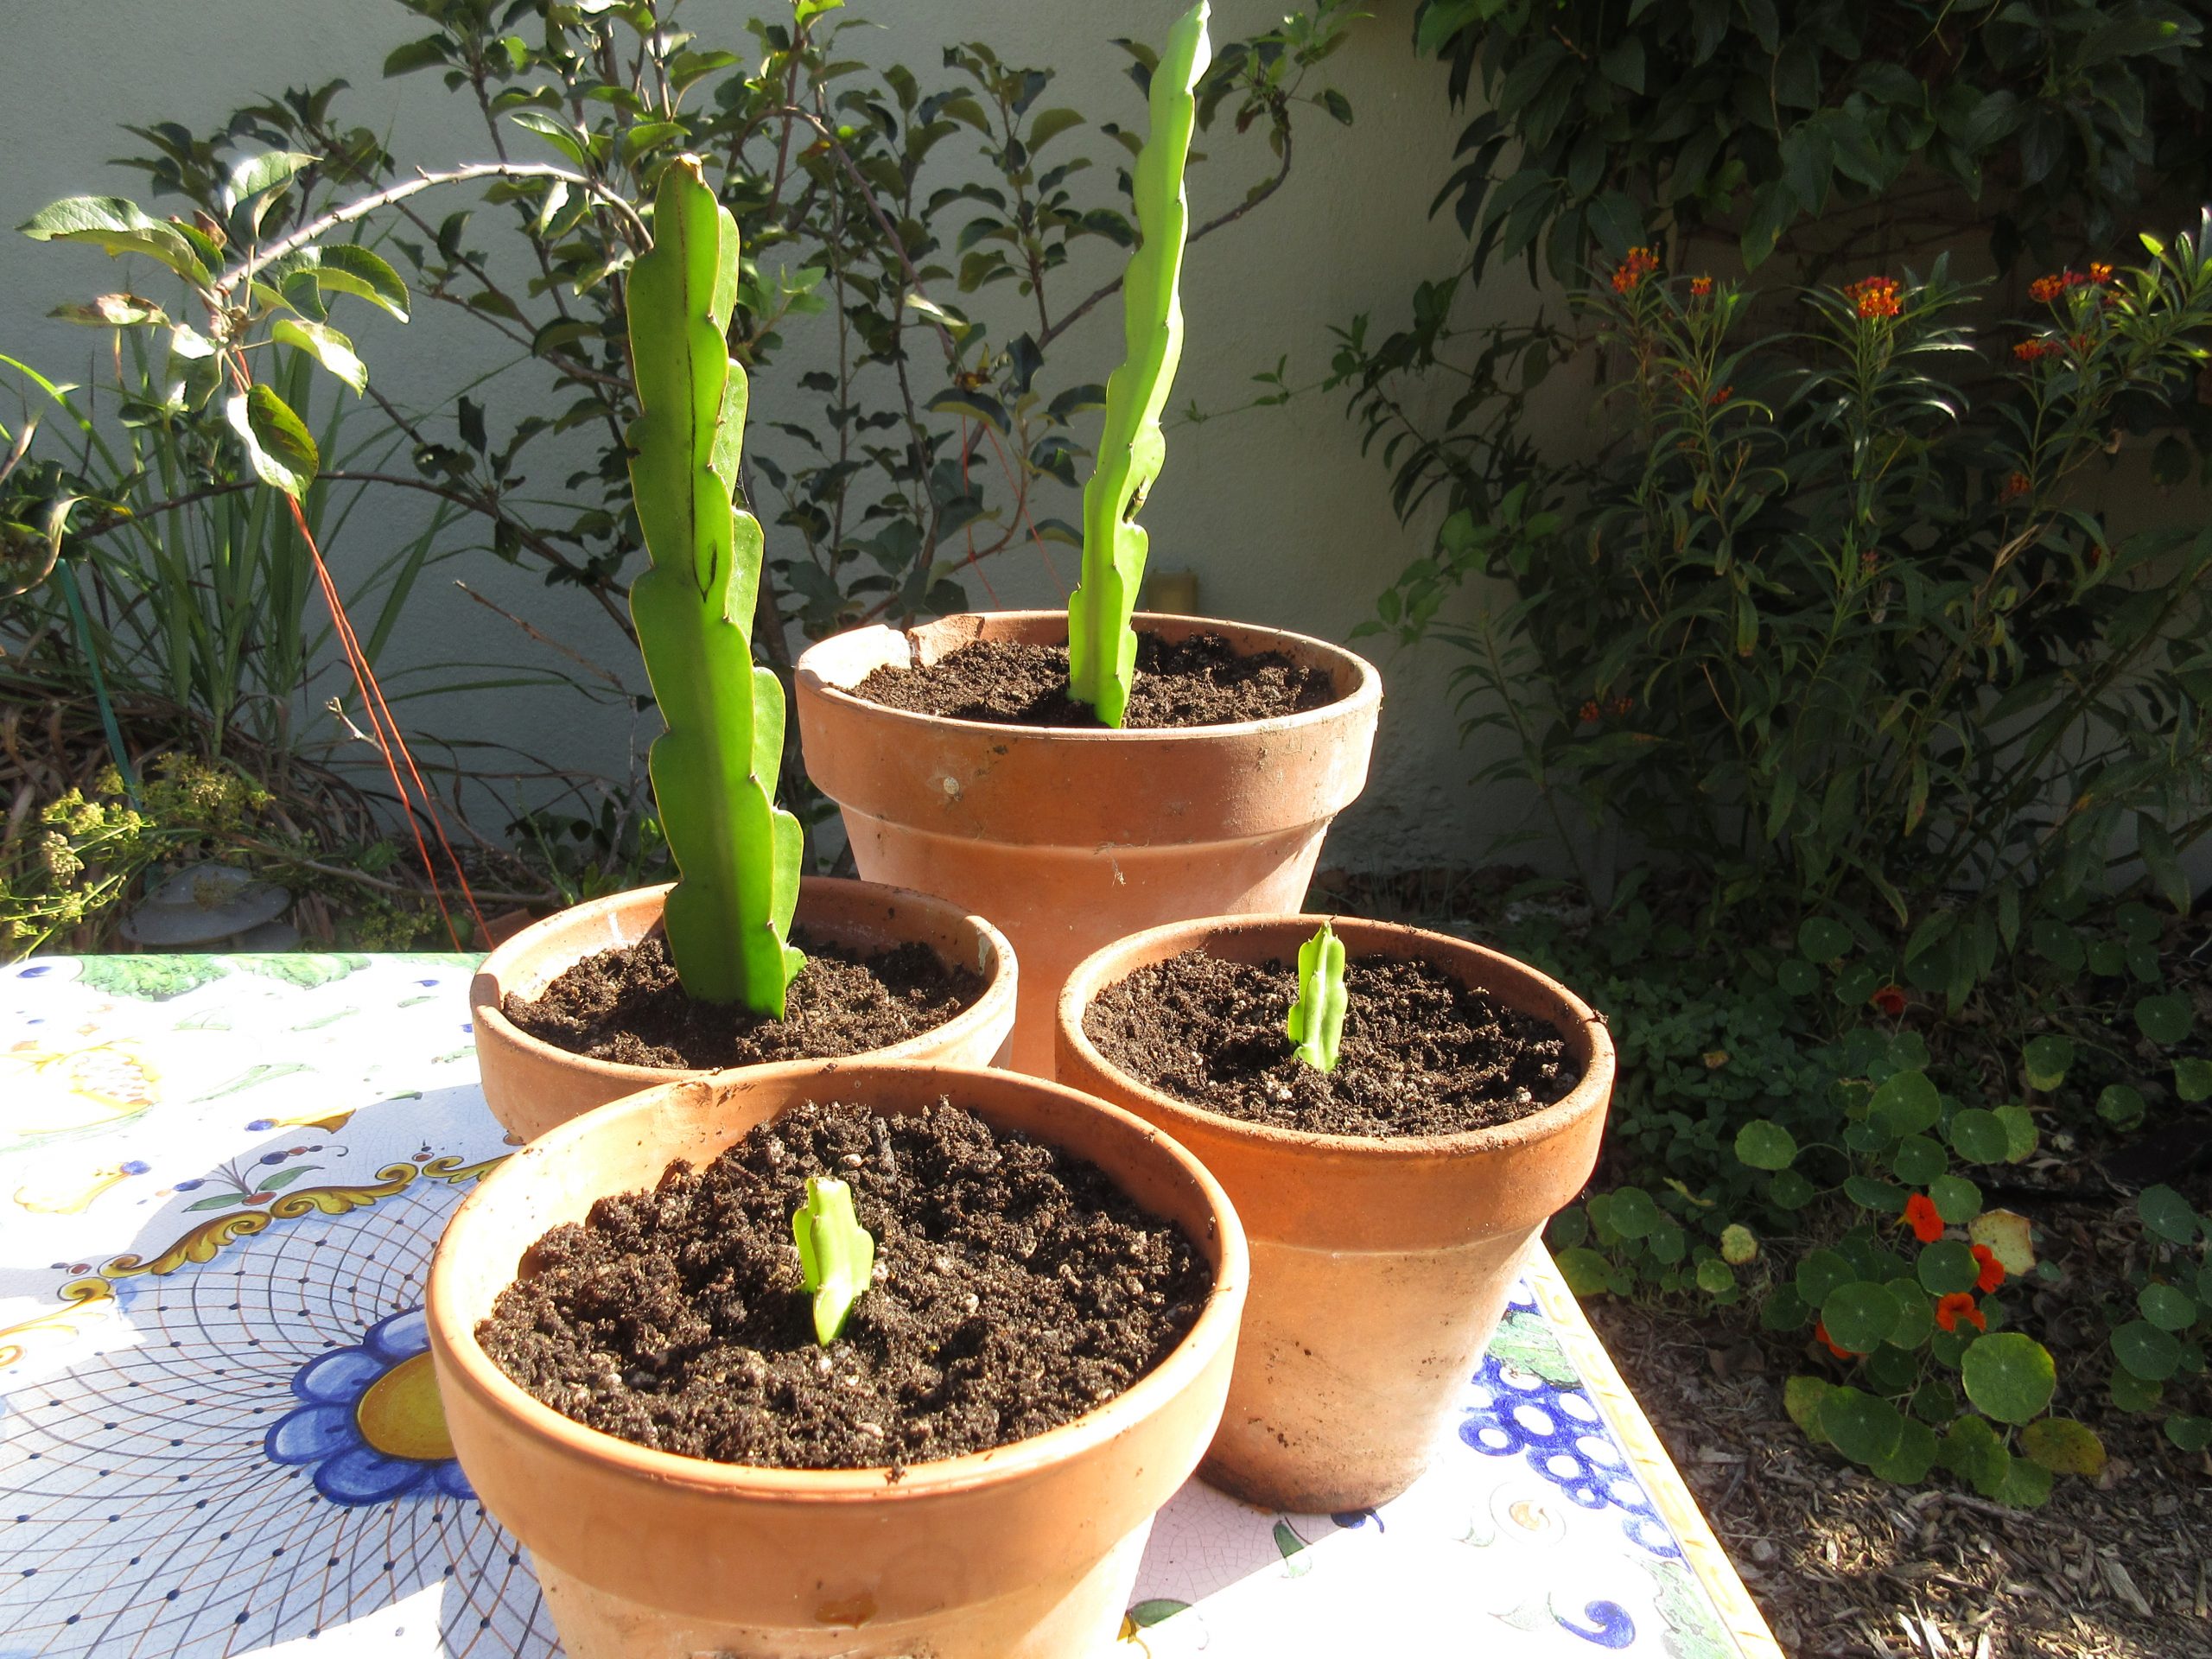
Planting the Dragon Fruit Cutting:

Dragon fruit is typically grown from cuttings rather than seeds. Obtain a healthy cutting from a mature dragon fruit plant, ensuring it is at least 12-18 inches long. Allow the cutting to dry for a day or two before planting to reduce the risk of rot.

Plant the cutting in the prepared pot, burying it about 2-4 inches deep. Position the cutting at a slight angle to encourage root development. Water the plant lightly, and avoid overwatering during the initial weeks to prevent root rot.

Propagating Dragon Fruit From Cuttings - Gardenerd

Providing Optimal Growing Conditions:

Dragon fruit plants thrive in warm, sunny climates, so choose a location that receives full sunlight. If you’re growing dragon fruit indoors, place the pot near a south-facing window or use grow lights to provide sufficient light.

Maintain a consistent watering schedule, allowing the soil to dry out between watering sessions. Overwatering is a common mistake, so it’s crucial to strike a balance.

Supporting the Growing Plant:

how to grow dragon fruit in pots, As your dragon fruit plant matures, it will need support to prevent sprawling. Install a trellis or stakes in the pot to provide stability for the growing cactus. This not only aids in maintaining an upright structure but also enhances air circulation around the plant.

How to Grow Dragon Fruits in Pots [Simple] - Farming Method | How to grow dragon fruit, Dragon fruit tree, Dragon fruit plant

Fertilizing the Dragon Fruit:

how to grow dragon fruit in pots, During the growing season (spring and summer), feed your dragon fruit with a balanced, water-soluble fertilizer every 4-6 weeks. Reduce or eliminate fertilization during the dormant season (fall and winter) when the plant’s growth slows down.

Harvesting Your Dragon Fruit:

Patience is key when growing dragon fruit. The plant typically starts producing fruit within one to two years. Harvest the dragon fruit when the skin color changes and the fruit gives slightly to gentle pressure. Use pruning shears to cut the fruit from the plant.

How to Grow Dragon Fruit in Pots - Step by Step Process Explained

how to grow dragon fruit in pots, To Grow dragon fruit in pots is a rewarding experience that allows you to enjoy this exotic fruit even in limited space. By providing the right conditions, proper care, and a little patience, you can savor the vibrant colors and delicious flavors of home-grown dragon fruit right from your own potted garden. Happy growing!

How to Grow Cotton: Mastering the Art of From Seeds to Fibers

From Seeds to Fibers: Mastering the Art of How to Grow Cotton in Your Backyard

How to grow cotton, Begin your journey into the world of textile growing with our tips for growing cotton indoors. In addition to its importance as a commercial crop, growing sunflowers in your backyard allows you to enjoy the complex process of turning seeds into soft, versatile fibers. From choosing the right seeds to harvesting white flowers, this step-by-step guide will help you grow a successful and profitable cotton crop by bringing the basics of textile design into your home.

Cotton Field Images | Free Photos, PNG Stickers, Wallpapers & Backgrounds - rawpixel

Step 1: How to grow cotton, Choose the right cotton

It is important to choose seeds carefully to start your flower planting career. Choose a good, disease-resistant variety suitable for your region. Consider the climate, soil conditions and type of cotton you plan to grow.

Step 2: Prepare the soil

How to grow cotton, Prepare the soil and canvas for your cotton masterpiece. Cotton grows in well-drained soil with a slightly acidic to neutral pH. Till the soil to a depth of at least 4 inches and mix in organic matter (such as compost) to provide aeration, drainage and nutrients.

Step 3: Planting

Now that the soil has turned into a carpet, it is time to plant your seeds. To ensure a warm and favorable environment, cottonseed is sown directly into the ground after the last frost. Plant the seeds about 1 inch deep, 4 to 6 inches apart, and in rows about 3 feet apart to allow for growth and development.

Step 4: Watering and Moisture Management

Flowers are thirsty plants, especially during germination. Keep the soil moist and do not overwater. Plants become more drought tolerant as they mature, but regular watering, especially during the dry season, is still important to ensure good fiber development.

Step 5: Fertilize Regularly

How to grow cotton, Fertilize evenly throughout the growing season. Nitrogen, phosphorus and potassium are important for beautiful flowers. Adjust fertilizer according to soil results and changes in your cotton.

File:COTTON FIELD WITH IRRIGATION wide (49168759326).jpg - Wikimedia Commons

Step 6: Weed Control

Weeds do not welcome competitors in the flower bed. Water regularly to control plant growth and ensure they don’t steal essential nutrients and moisture from your flower beds. Mulching can effectively influence plant growth while retaining soil moisture.

Step 7: Pruning and Thinning

How to grow cotton, The art of growing cotton with pruning and thinning techniques. Plant seeds sparsely and densely to increase air circulation and light permeability. Prune lower branches as the plant grows to improve air flow and reduce disease.

Step 8: Pest Management

How to grow cotton, All artists encounter pests in their creativity. Monitor flowers for pests such as boll weevils, aphids and boll weevils. Use integrated management strategies, such as introducing beneficial insects and using organic pesticides, to maintain a healthy balance.

Step 9: Protection

Protection is a protective layer made of cotton fabric. Protect your plants from diseases such as cotton root rot and fusarium wilt. Practices such as planting, proper spacing, and the use of disease-fighting agents can help create a healthy, disease-free flower bed.

Step 10: Flowers and pollination

As your cotton reaches the flower stage, the canvas fills with flowers such as hibiscus. Encourage pollination by creating an inviting environment for bees and other natural pollinators to create cocoons for future fibers.

Decline of Bees, Other Pollinators Threatens U.S. Crop Yields | Rutgers University

Step 11: Cocoon Development and Harvesting

The Culmination of Your Cotton Masterpiece When the bolls mature and burst, they reveal the fluffy white fibers inside. Cotton is harvested when the bolls are fully opened and the fibers are soft and ready. Whether you choose to harvest by hand or use a chainsaw to harvest a larger crop, this is the end of your journey.

Step 12: Ginning and Fiber Processing

The transition from harvest to finished product involves ginning and fiber processing. Cotton fibers are separated from their seeds by the ginning process. Cleaning the fibers and preparing them for various uses such as spinning into yarn or textile production is a true testament to the artisanal nature of cotton farming.

20200822-NRCS-LSC-0570 | A harvester unloads cotton bolls in… | Flickr

Growing flowers indoors is more than growing; An exploration of the beautiful world of textiles. Each step in this guide helps you understand and appreciate the journey of how to grow cotton. Grow your own cotton and witness the artistry and craftsmanship that transforms your backyard into a canvas for comfort and creativity.

Radiator Plant Guide: Care Tips for Thriving Foliage

Radiator Plant

The Radiator Plant, also known as Peperomia, is a delightful addition to indoor gardens, cherished for its vibrant foliage and ease of care. In this guide, we’ll delve into the world of Radiator Plants, exploring their characteristics, ideal growing conditions, and essential care tips to ensure they thrive in your home.

8 Care Tips for the Beautiful Watermelon Peperomia Plant - Dengarden

The Charm of Radiator Plants:

Radiator Plants belong to the Peperomia genus, a diverse family of small, easy-to-care-for houseplants. Known for their captivating foliage and unique leaf shapes, these plants are popular choices for both novice and experienced plant enthusiasts.

Unique Characteristics of Radiator Plants:

Radiating Leaf Variety:

The charm of Radiator Plants unfolds through a captivating array of leaf shapes, each telling a botanical tale. From the whimsical heart-shaped leaves to the elegant teardrop formations, the diversity adds a botanical artistry that graces your indoor space. As you gaze upon these leaves, each with its unique silhouette, the visual tapestry of your home comes alive with an enchanting allure.

Vibrant Color Palette:

The foliage of Radiator Plants transforms your space into a living canvas adorned with nature’s hues. The leaves boast an extravagant palette, ranging from the profound depths of green to the intricate dance of variegated patterns. This lively spectrum creates a dynamic and vibrant display, turning every leaf into a brushstroke of botanical artistry. Radiator Plants, with their kaleidoscopic foliage, bring a burst of life to your surroundings, uplifting the ambiance with natural elegance.

There's a Unique Radiator Plant for Everyone - FineGardening

Compact Size, Abundant Charm:

In the world of indoor greenery, Radiator Plants stand out not just for their beauty but also for their thoughtful design. Embracing a compact growth habit, these plants become veritable gems for small spaces. Whether adorning a cozy apartment, gracing an office desk, or adding a touch of greenery to urban dwellings, Radiator Plants prove that abundance of charm can thrive within limited spaces. Their petite stature adds versatility, allowing you to incorporate nature’s beauty seamlessly into any corner of your life.

Ideal Growing Conditions:

Light Requirements: Radiator Plants thrive in medium to bright, indirect light. Avoid direct sunlight, as it can scorch the leaves.

Temperature: Keep your plant in a warm environment, with temperatures between 65-75°F (18-24°C) for optimal growth.

Soil: Use well-draining potting mix to prevent waterlogging, as Radiator Plants prefer slightly moist but not waterlogged soil.

Watering Routine:

Moderate Watering: Allow the top inch of the soil to dry out before watering. Overwatering can lead to root rot, so maintain a moderate watering routine.

Humidity: Radiator Plants appreciate higher humidity levels, making them excellent choices for bathrooms or kitchens.

Propagation Techniques:

Leaf Cuttings: Propagate your Plant by taking leaf cuttings, ensuring the cutting has a node for successful root development.

Division: Divide mature plants to create new ones, ensuring each division has both roots and leaves.

Common Issues and Detailed Solutions:

Overwatering Woes:
The visual distress of yellowing leaves often signals an overwatering concern. To address this, delve into the intricacies of your plant’s moisture needs. Fine-tune your watering routine by allowing the top inch of the soil to thoroughly dry between watering sessions. This adjustment ensures a delicate balance, preventing waterlogged conditions and promoting a healthier root environment.

Pest Predicaments:
Vigilance against common pests such as spider mites or aphids is paramount for the well-being of your plant. Establish a routine leaf inspection, paying meticulous attention to the undersides where pests often hide. Should any infestations be detected, swift and targeted action becomes crucial. Employ organic or chemical treatments as needed, ensuring your plant remains pest-free and thrives in an environment of optimal health.

Radiator Plant - Peperomia - TruKisan

Radiator Plant Radiance:

Cultivating the beauty of Radiator Plants in your home is a rewarding experience. Their charming foliage, coupled with straightforward care requirements, makes them an excellent choice for plant enthusiasts of all levels. Elevate your indoor garden with the allure of Radiator Plants, and enjoy the radiant beauty they bring to your living space.

How to Flourish Weeping Bottlebrush in Your Garden?

In the realm of ornamental trees, the weeping bottlebrush (Callistemon viminalis) stands out as a graceful and unique addition to any garden. With its cascading foliage and vibrant bottlebrush-shaped blooms, this tree adds an elegant touch to landscapes. If you’ve been captivated by the charm of the weeping bottlebrush, let’s explore the secrets to nurturing and flourishing this captivating tree in your own garden.

weeping bottlebrush

Choosing the Right Location For Weeping Bottlebrush:

The first step to a thriving weeping bottlebrush is selecting the perfect location. These trees prefer full sunlight, so choose a spot in your garden that receives at least 6 to 8 hours of direct sunlight each day. Ensure the soil is well-draining, as weeping bottlebrushes are sensitive to waterlogged conditions. Planting in an elevated area can help prevent water stagnation and promote optimal growth.

Soil Preparation and Planting:

Prepare the soil by incorporating organic matter, such as well-rotted compost, to improve drainage and fertility. Weeping bottlebrush trees are adaptable to various soil types but thrive in slightly acidic to neutral soil. When planting, dig a hole twice the width of the root ball and at the same depth. Gently place the tree in the hole, backfill with soil, and water thoroughly to settle the soil.

Watering Routine:

Establishing a proper watering routine is crucial during the initial stages of weeping bottlebrush growth. Water deeply immediately after planting and continue to provide consistent moisture until the tree is well-established. Once established, weeping bottlebrushes are relatively drought-tolerant, but regular watering during dry spells will promote optimal health and blooming.

Mulching for Moisture Retention:

Mulching around the base of your weeping bottlebrush tree serves multiple purposes. It helps retain soil moisture, regulates soil temperature, and suppresses weed growth. Apply a layer of organic mulch, such as bark chips or straw, around the base of the tree, keeping it a few inches away from the trunk. Replenish the mulch as needed, especially after heavy rainfall or as it decomposes over time.

Pruning for Form and Health:

Weeping bottlebrush trees have a natural tendency to develop a weeping, cascading form. However, strategic pruning can enhance their shape and promote overall tree health. Prune dead or damaged branches regularly and shape the tree by selectively trimming longer branches to maintain an attractive silhouette. Pruning is best done after the tree has finished flowering, typically in late spring or early summer.

Fertilizing Tips:

Weeping bottlebrush trees generally do not require heavy fertilization. However, applying a balanced, slow-release fertilizer in spring can boost growth and flowering. Follow the manufacturer’s recommendations for application rates, and be sure to water the tree well after fertilizing. Avoid excessive use of high-nitrogen fertilizers, as this can lead to lush foliage at the expense of blooms.

Pest and Disease Management:

While weeping bottlebrushes are relatively resistant to pests and diseases, occasional issues may arise. Keep an eye out for pests such as scale insects or aphids, and treat promptly with insecticidal soap or neem oil if necessary. Ensure good air circulation around the tree to prevent fungal diseases. Regular inspections and early intervention will help maintain a healthy and thriving weeping bottlebrush.

green weeping willow free image | Peakpx

Seasonal Considerations:

Weeping bottlebrush trees are hardy in warm climates but may experience cold damage in frost-prone regions. If you’re in an area with occasional frost, consider providing protection during winter months. Applying a layer of mulch around the base and covering the tree with frost cloth on especially cold nights can help shield it from freezing temperatures.

Conclusion:

Cultivating a weeping bottlebrush in your garden is a rewarding endeavor that brings a touch of elegance and charm to your landscape. By following these guidelines on location, soil preparation, watering, pruning, and overall care, you’ll be well on your way to flourishing weeping bottlebrush trees. Embrace the unique beauty of this cascading marvel and enjoy the vibrant blooms that will grace your garden for years to come. Happy gardening!

Is Ponytail Palm Safe for Cats?

Is Ponytail Palm Safe for Cats

Ponytail palm, scientifically known as Beaucarnea recurvata, are renowned for their unique appearance and low-maintenance care. However, when you share your living space with feline companions, concerns about pet safety arise. In this article, we will explore the question, “Is Ponytail Palm Safe for Cats?” and provide insights into the potential risks and precautions associated with having these distinctive plants around your beloved pets.

Ponytail Palms: How to Care for a Ponytail Palm | The Old Farmer's Almanac

Understanding Ponytail Palms:

Ponytail palms are popular houseplants characterized by their long, arching leaves that resemble a cascading ponytail. While these plants are generally non-toxic to humans, it’s essential to evaluate their safety for pets, especially cats, known for their curious nature.

Toxicity Considerations:

Fortunately, ponytail palms are considered non-toxic to cats. The ASPCA (American Society for the Prevention of Cruelty to Animals) lists them as safe for pets. This means that if your cat nibbles on or comes into contact with the plant, it is unlikely to cause severe harm.

Potential Irritation:

While the ponytail palm is generally safe, it’s crucial to note that some cats may have mild gastrointestinal reactions if they ingest any plant material. These reactions may include vomiting or diarrhea. If you notice such symptoms, it’s advisable to consult with a veterinarian promptly.

Are ponytail palms poisonous? : r/cats

Preventive Measures:

To create a safe environment for both your plant and your cat, consider the following preventive measures:

Elevate the Plant: Place the ponytail palm in a location that is not easily accessible to your cat, such as on a high shelf or in a hanging container.

Monitor Behavior: Keep an eye on your cat’s behavior around the plant. If your feline friend shows excessive interest or attempts to chew on the leaves, it might be best to relocate the plant.

Cats and houseplants are rarely a good mix

The ponytail palm is generally safe for cats, making it a suitable choice for households with feline companions. However, individual cats may react differently, so it’s essential to observe their behavior and take preventive measures if needed. By balancing your love for plants with your commitment to pet safety, you can create a harmonious and green living space for both you and your cat.

Bottle-Grown Greens: Money Plant with Ease

Bottle-Grown Greens: Growing Money Plants with Ease

Money plants, with their cascading vines and heart-shaped leaves, are not only aesthetically pleasing but also incredibly easy to grow in bottles. Elevate your indoor gardening game by following this comprehensive guide on how to grow money plants in bottles, turning your space into a lush and green haven.

File:Money Plant (Epipremnum aureum 'N' Joy') 1.jpg - Wikimedia Commons

Selecting the Right Bottle for Money plants:

The first step in this endeavor is choosing the right bottle for your money plant. Opt for a transparent bottle with a wide mouth to provide ample space for the plant to grow and for you to observe its development. Ensure the bottle is clean and free from any residues.

Preparing the Potting Mix:

Money plants thrive in well-draining soil. Prepare a potting mix by combining equal parts of garden soil, cocopeat, and perlite. This mixture ensures good aeration, moisture retention, and supports the plant’s growth.

Propagating Money Plant Cuttings:

Money plants can be easily propagated from stem cuttings. Select a healthy parent plant and snip a section with at least two leaves. Remove any leaves near the bottom and place the cutting in water until roots develop. Once roots are established, transfer the cutting to the prepared potting mix in the bottle.

Planting in the Bottle:

Create a hole in the potting mix using a stick or your finger and gently insert the rooted money plant cutting. Ensure the cutting is planted deep enough to provide stability. Water the plant sparingly at this stage to avoid overwatering.

File:Money plant in a bottle.jpg - Wikimedia Commons

Choosing the Right Location:

Place the bottle in a location with indirect sunlight. Money plants thrive in bright, filtered light but can adapt to lower light conditions. Avoid exposing them to direct sunlight for extended periods, as this may scorch the leaves.

Watering and Maintenance:

Water the money plant when the top inch of the soil feels dry. Overwatering can lead to root rot, so it’s crucial to maintain a balanced watering routine. Rotate the bottle occasionally to encourage even growth, and wipe the leaves with a damp cloth to keep them clean.

plants – PLD INDIA

Providing Support and Training:

As the money plant grows, it may benefit from support. Install small stakes or a moss pole in the bottle to help the vines climb. You can also guide the vines by gently securing them with soft ties. Regularly check and adjust the support as needed.

Fertilizing the Money Plant:

During the growing season (spring and summer), feed your money plant with a balanced liquid fertilizer every 4-6 weeks. Dilute the fertilizer to half or quarter strength to prevent over-fertilization.

Decorating with Bottle Gardens:

Money plants in bottles are not just about greenery; they can also be aesthetically pleasing. Experiment with different bottle shapes, sizes, and arrangements to create an attractive display. Consider placing multiple bottles together for a dynamic and visually appealing indoor garden.

Amazing ideas for money plant / money plant decoration ideas / glass bottle  decoration - YouTube

Enjoying the Indoor Greenery:

Growing money plants in bottles is not just a gardening activity; it’s a delightful way to bring nature indoors. The cascading vines and heart-shaped leaves create a calming and visually appealing atmosphere. With minimal care, your money plant in a bottle will thrive, adding a touch of greenery to your living space.

Growing money plants in bottles is a creative and satisfying endeavor suitable for both novice and experienced gardeners. Follow these steps, and you’ll soon witness the transformation of a simple bottle into a lush, green showcase for the versatile and resilient money plant. Happy gardening!


Jasmine Joy: A Guide to Growing Mogra Plants Successfully

Jasmine Joy: A Complete Guide on How to Grow Mogra Plants Successfully

Mogra, also known as Jasmine, is renowned for its fragrant blooms and enchanting beauty. Cultivating Mogra plants at home can bring a touch of elegance and a soothing aroma to your garden. Here’s a comprehensive guide on how to grow Mogra plants successfully, ensuring a flourishing display of delicate blossoms.

Mogra Flower | Jay | Flickr

Choosing the Right Mogra Variety:

Begin your Mogra journey by selecting the right variety for your garden. Common varieties include Jasminum sambac, Grand Duke of Tuscany, and Arabian Jasmine. Each type has unique characteristics, so choose the one that suits your climate and preferences.

Selecting the Planting Location:

Mogra plants thrive in warm, tropical climates, requiring ample sunlight. Choose a well-drained spot that receives at least 6-8 hours of sunlight daily. If you’re cultivating Mogra in a container, ensure it has proper drainage holes.

Preparing the Soil:

Mogra plants prefer slightly acidic to neutral soil with good fertility. Enrich the soil with well-rotted compost or organic matter to improve its texture and nutrient content. Adequate soil preparation sets the stage for healthy root development.

Planting Mogra Seeds or Cuttings:

You can propagate Mogra plants from seeds or cuttings. If using seeds, soak them in water for a few hours before planting. For cuttings, select healthy, non-flowering stems and plant them directly into the soil or a well-draining potting mix.

How To Grow Mogra Jasmine Plant From Cuttings | Mogra | Jasmine - YouTube

Providing Regular Watering:

Mogra plants appreciate consistent moisture, especially during the growing season. Water the plants regularly, allowing the soil to dry out slightly between waterings. Avoid waterlogged conditions, as excessive moisture can lead to root rot.

Feeding Mogra Plants:

To promote healthy growth and abundant flowering, feed your Mogra plants with a balanced fertilizer during the growing season. Apply the fertilizer according to package instructions, typically every 4-6 weeks. Cease fertilization during the dormant winter months.

Training and Pruning:

Mogra plants can be trained to a desired shape and size through regular pruning. Prune after the flowering season to shape the plant and remove dead or crowded branches. This not only enhances the plant’s appearance but also encourages new growth.

Protecting Mogra from Pests and Diseases:

Keep an eye out for common pests like aphids and whiteflies. Use organic pest control methods or insecticidal soap to manage infestations. Well-spaced planting and proper air circulation help prevent diseases like powdery mildew.

Star jasmine mosaic | a viral disease of Star jasmine (Jasmi… | Flickr

Harvesting Mogra Flowers:

The reward for your Mogra-growing efforts is the fragrant blossoms. Harvest the flowers in the early morning when the fragrance is most potent. Use them to make garlands, perfumes, or simply enjoy the aromatic beauty in your home.

Growing Mogra plants requires attention to detail and a love for nurturing fragrant blooms. By following these steps, you can cultivate a thriving Mogra garden, transforming your outdoor space into a scented sanctuary. Happy gardening!

Texas Lilac Tree

Texas Lilac Tree

The Texas lilac tree (Sophora secundiflora), also known as the Texas mountain laurel, is a flowering evergreen tree. The leaves are alternate, opposite or in whorls of three. Leaves are lance to oval shaped, 4-8 inches long with serrated margins and green on top and paler below. Flowers can be lavender or white, forming pendulous racemes. Fruits are dark purple berries, 4-6 inches long.

Texas lilac is a common midland species which prefers moist soil conditions, with a light and well drained soil. It is often grown in semi-shade or full sun, but does not tolerate moisture standing in the soil. The sambucus can be propagated by seed. The seeds germinate and develop very slowly. Texas Lilac grows best in a warm winter, so that the temperature does not drop below around. The shade temperature should not go below around, and must be maintained at or above.

Vitex tree serves as Texas' answer to the lilac


The tree is tolerant of salt spray or wind, making it a good choice for coastal areas. The bark can be used as a dye for wool, producing red yarns. It is also used in flavoring drinks an in medicinal uses for minor illnesses.

About Texas Lilac Tree

The Texas Lilac Tree is a flowering evergreen tree. Its leaves are alternate, opposite or in whorls of three. The leaves are lance to oval shaped, 4-8 inches long with serrated margins and green on top and paler below. Flowers can be lavender or white, forming pendulous racemes. Fruits are dark purple berries, 4-6 inches long. Texas Lilac is a common midland species which prefers moist soil conditions, with a light and well drained soil. It is often grown in semi-shade or full sun, but does not tolerate moisture standing in the soil. The sambucus can be propagated by seed. 

The seeds germinate and develop very slowly. Texas Lilac grows best in a warm winter, so that the temperature does not drop below around. The shade temperature should not go below around, and must be maintained at or above. The bark can be used as a dye for wool, producing red yarns. It is also used in flavoring drinks an in medicinal uses for minor illnesses.

The Texas Lilac tree is the state flower of Texas, but it was originally from Mexico and was accidently planted in the south. It grows best in moist soil and usually does not tolerate wet conditions, but can grow well on sandstone hillsides and limestone outcrops. The tree has many uses including making medicines and other products such as dyes.

Benefits Of  Texas Lilac Tree

  1. It is a beautiful tree with various colors.
  2. It is a medicinal plant. The flowers are used to make medicines to treat colds, stomach ache and other infections.
  3. It has many uses such as dyeing wool, making medicines and other products such as dyes and it has also been used in traditional medicine since before the 18th century when the Europeans discovered it.
  4. It is a useful tree if you love gardening or you want to grow trees.
  5. It has many uses and is a medicinal plant which can be used to treat many diseases. 
  6. It does not require very much water and it is drought tolerant.
  7. It is a beautiful tree with various colors, however the Texas lilac tree flowers at its peak in winter time when it drops its leaves so that it can flower as early as possible before the foliage begins to come out in the spring time. 

How fast do Texas lilac trees grow?

The Texas Lilac Tree is a flowering evergreen tree. The leaves can be 4–8 inches long and has serrated margins with green on top and paler below. Flowers are lavender or white, forming pendulous racemes. Fruits are dark purple berries, 4–6 inches long. Texas lilac is a common midland species which prefers moist soil conditions, with a light and well drained soil. It should not be planted in standing water, but requires plenty of moisture for the best growth. It is often grown in semi-shade or full sun, but does not tolerate moisture standing in the soil. The sambucus can be propagated by seed

Texas lilac grows best in a warm winter, so that the temperature does not drop below around. The shade temperature should not go below around, and must be maintained at or above. It is tolerant of salt spray or wind, making it a good choice for coastal areas.

How Many Types Of Texas Lilac Tree Are There?

Texas lilac tree is the state flower of Texas, but it was originally from Mexico and was accidently planted in the south. It grows best in moist soil and usually does not tolerate wet conditions, but can grow well on sandstone hillsides and limestone outcrops. The tree has many uses including making medicines and other products such as dyes. These trees are hardy and usually do not have any pest or disease problems.

Origins of Texas Lilac Tree 

The Texas Lilac Tree is a flowering evergreen tree. Its leaves are alternate, opposite or in whorls of three. The leaves are lance to oval shaped, 4–8 inches long with serrated margins and green on top and paler below. Flowers can be lavender or white, forming pendulous racemes. Fruits are dark purple berries, 4–6 inches long. Texas Lilac is a common midland species which prefers moist soil conditions, with a light and well drained soil. It is often grown in semi-shade or full sun, but does not tolerate moisture standing in the soil. The sambucus can be propagated by seed

The seeds germinate and develop very slowly. Texas Lilac grows best in a warm winter, so that the temperature does not drop below around. The shade temperature should not go below around, and must be maintained at or above. The bark can be used as a dye for wool, producing red yarns. It is also used in flavoring drinks an in medicinal uses for minor illnesses.

Propagation of Texas Lilac Tree 

Texas Lilac grows best in a warm winter, so that the temperature does not drop below around. The shade temperature should not go below around, and must be maintained at or above. The bark can be used as a dye for wool, producing red yarns. It is also used in flavoring drinks an in medicinal uses for minor illnesses.


Mass Cane Plant Care

Mass Cane Plant Care

Mass Cane plant care Plan ; If you have ever considered growing a cane plant, this article is for you. Cane plants are extremely common in Louisiana, and they can be found across the U.S., too. If you’re considering growing one yourself, it’s important to know how to care for it correctly to ensure the most beautiful and healthy growth possible.

Cane plants are commonly called “sweet potato vines,” and they do have a potato-like appearance, but they’re not sweet potatoes at all. They’re actually members of the banana family, which is known for its sturdy leaves, and stems that can reach up to 15 feet.

How To Care For A Mass Cane Plant

Cane plants can be used in a variety of ways. The most popular use is to place the plant in full sun, and let it stretch out across the ground. This can be used as an impromptu fence for small animals and children, or to cover up unsightly objects. Cane plants are also commonly used to create privacy screens by growing them along a fence or wall. The vines are just one example of the many uses of cane plants.

Cane plants grow best in areas that are warm and wet, so place them where they will receive as much sun as possible. Since these plants are tropical and tropical plants need a lot of water, every day is a good day for watering a cane plant. Drip system drip systems work great for this purpose because the water drips evenly; however, you can also choose to use an overhead sprinkler if the area has hard-standing or soil that won’t absorb too much water.

How much light do mass-cane plants need?

Mass cane plants are tropical plants, so they need a lot of light. If you do not have the time or energy to give them enough sunlight, consider using them indoors. Growing them indoors is simple; just place the plant in a sunny spot in your home with plenty of water and wait for it to grow.

Mass Cane plant care will also need to be watered regularly outside if it is growing in a pot or on top of hard-standing. If this is not possible, you can use an overhead sprinkler. Keep in mind that when you are growing it outside, it will need a lot more water than if you were to grow it indoors.

Although cane plants do not grow as large as other plants with branches, they are popular ornamental additions to any garden and they can also be used in pots or containers. When growing in pots, there are two options; you can either place the pot in a shady spot, or under fluorescent lights and move it outside when temperatures rise.

How often should I water mass cane plant?

Cane plants can be quite thirsty when they’re growing, but you don’t need to provide them with constant water. Water simply enough so that the soil is moist. As cane plants are tropical plants, they need a lot of water and should receive around four gallons of water per week in full-sun exposure.

If you do not have the time to water your cane plant regularly, you can use an overhead sprinkler for occasional watering. When deciding how often, it’s important to consider the climate in which you live. In warm areas, Mass Cane plant care will not need to be watered as frequently as they would in areas colder and drier.

How and when do I fertilize my mass cane plant?

Regular fertilization of a cane plant is not necessary, but a light dose of fertilizer once or twice a month can help the plant to grow taller and bushier quickly. In the spring, feed your cane plant a fertilizer with a higher nitrogen level. In the summer and fall, use a 50-50 ratio of nitrogen to phosphorus.

Mass cane plants are aggressive growers, so they need to be tied up once they reach 12 feet in length. When you tie them, place the rope or string around the base at least four times before anchoring it in the ground or tying it off against a fence.

Mass Cane Plant Care Plan

Mass cane plant care is hard work, but the end result will be worth it if you have enough patience. If you follow these instructions, you should end up with a plant that grows up to 15 feet in diameter.

Choose a location to place the cane plant that receives plenty of sunlight every day. The ideal spot for a mass cane plant is one that receives at least eight hours of sunlight every day, and does not receive any direct sun from noon to three in the afternoon in warmer months.

Choose a spot that you want to cover in vines, and ensure that the foliage will be able to touch the ground or reach up to the fence or wall.

Remove any unwanted weeds, sticks and other debris from the area before you plant your cane plant. Make sure that there is plenty of dirt around the area where you are going to plant as well. If it is dry outside, make sure to give your cane plant some water so it can acclimate itself before planting.

How to Care and Plant a Sweet Treat, Sugar Cane

Why are the tips of my mass cane leaves turning brown?

  1. Roots on top of the soil

You need to dig deeper around your mass cane plant and make sure that the soil is one foot deeper than where you are growing it. The roots will thrive better when they are in a deep, sandy soil.

  1. Not enough water

If your Mass Cane plant care is not getting enough water, the leaves will start to turn brown because they have no food to draw from. Make sure that you are watering the plant regularly.

  1. Not enough sun exposure

If your mass cane plant is not getting enough sunlight exposure, the tips of its leaves will start to turn brown. Make sure that it is in a sunny spot and that it is not receiving too much exposure during the hottest part of the day. A little bit of shade at noon time the summer months is okay, but if it’s too dark, try moving your mass cane plant to a more sunny area in your yard.

  1. Too much water

Mass Cane plant care, like other tropical plants, need a lot of water. If you are watering your cane plant too often, the leaves will start to turn brown. Make sure that you have wide-open drainage and drainage around the roots of your mass cane plant so the water can drain through them easily.

  1. Too much fertilizer

Mass cane plants are sensitive to high levels of nitrogen, so make sure that any fertilizer that you use does not contain too many nitrogen compounds, or this will cause the leaf tips to turn brown.


Low Acid Tomatoes

Low Acid Tomatoes

Many people suffer from stomach ailments, such as heartburn, that are worsened by certain foods. The problem is, it can be hard to figure out what your triggers are – all food tastes the same coming back up. Luckily there’s a solution: eat more low acid tomatoes!

Tomatoes With Low Acidity

Low acid tomatoes have less of an effect on the stomach and intestines, meaning that they’re not as likely to cause painful digestive problems for those who suffer from IBS or ulcers. Tomatoes contain an important antioxidant called lycopene. Blood cholesterol can be reduced by 11%, the risk of a stroke is lowered by 30% and of course, the acid that exacerbate heartburn is absent.

We’ve all heard that acid reflux is a leading cause of heartburn in America, so why not take a few steps to avoid it altogether? Start by adding low acid tomatoes to your diet!

“Low acid tomatoes,” as the name implies, usually come from the New World . They may be as small as golf-ball sized or as big as normal size tomatoes. There are more than 100 varieties of low acid tomatoes out there so you can probably find one that suits your tastes.

Here's Why You Should Consider Eating More Tomatoes

They’re Non-GMO

You’ll have to peel them. That’s okay, though. To take out most of the acid, cover them with water and put them to sleep for a few hours. Drain the water, add some salt and use as you would any other tomato.

What to Avoid

As it turns out, there’s a reason why most recipes for low acid tomatoes call for cooking them: in order to survive the acid and bacteria that can cause food-borne illness, the low acid tomato needs to be cooked.

If you are concerned about your stomach, then you should cook your tomato before eating it.

Low Acid Tomatoes Do Not Contain High Fructose Corn Syrup (There’s a Way Around That)

You’ll have to peel them. That’s okay, though.

Benefits

Benefit of low acid tomatoes is that they’re delicious. Some of the more common low acid varieties are Roma, Passport, and Blue Lake. These tomatoes have a stronger flavor than regular tomatoes, but they’re great for making sauces, ketchups, and even soups!

I like to peel them and add them to sandwiches for some extra flavor. They’re also great in salads when you’re looking for a little extra bite!

According to “Food Processing Magazine,” low acid tomatoes are also good for preserving quality because they aren’t exposed to as much bacteria during storage and shipping. Benefits of Low Acid Tomatoes Include Weight Loss

You’ll be in for some other surprises if you switch to low acid tomatoes. One study shows that the risk of skin cancer decreases with increased tomato consumption. The reason is thought to be beta carotene, found in tomatoes and related vegetables.

Of course, people avoid low acid tomatoes because they think that the lack of acid will make the tomato not taste as good.

If you want to enjoy tasty tomato treats without worrying about heartburn or ulcers, start eating low acid tomatoes today! All you need to do is check your local supermarket or farmer’s market. The low acid varieties tend to be in the front of the store, so you should be able to find them easily.

More Growing Tips for Tomatoes

There are certain things a tomato plant needs in order to grow. The first is the soil; if it’s too acidic, it can reduce the tomatoes’ lycopene content, which may affect its flavor.

But what, then, is an optimal pH level for tomatoes? To answer this question, experts have conducted tests. They examined the pH levels of domestic tomatoes in different countries. In one case, it was found that tomatoes grown in Japan had a pH level of 6.6 and were therefore acidic, whereas domestic ones grown in India had a level of 7.4 and were alkaline . In other words, the lower the pH level of fruit or vegetables are who grow them and expend most of their nutrients on growth rather than on absorption .

Second is the weather; tomatoes don’t do well in cold climates. This may be a problem for you if you’re living in a blizzard-prone area of the world (or close to it) during the spring and early summer where temperatures remain below 50 degrees F.

The third problem is soil moisture. You need to water your tomato plants regularly, but not too much or they may get root rot (a common problem with tomatoes).

The Best Tomatoes for Low Acid | ehow

How to Grow Low Acid Tomatoes?

So as you can see, there are many factors that affect the growth of tomato plants and whether they have a low acid content. With this in mind, how do you go about producing low acid tomatoes? The first thing is to choose a suitable growing region . In temperate areas such as the U.S. and U.K., the best time to grow tomatoes from seed is from March to September.

If you want to grow low acid tomatoes, don’t plant them in soil that’s too rich as it will make them more prone to sun scald . Also keep the plants thinned out so the remaining ones have sufficient access to nutrients.

For a longer growing season, start growing your tomato plants indoors in March and transplant them outside once the weather warms up in late May or early June.

Tomatoes and Acid Reflux: Why Do Tomatoes Trigger Heartburn?

Here are some of their key findings:

The risk of food-borne illness is reduced when tomatoes are ripening in the daytime, and the risk is increased when the fruits are ripe at night.

When tomatoes have reached full maturity, their pH level drops . This acidification makes them more susceptible to bacteria and fungi .

Soil with high organic matter was found to be slightly more acidic than soil low in organic matter . The same was true for high nitrogen levels.

Low acid tomatoes are one of the most heartburn-inducing foods. It’s only natural to want to avoid them if you suffer from acid reflux.

While some people enjoy the flavor of low acid tomatoes, they can cause problems for others. The best course of action is to avoid them altogether so you don’t have to worry about what your stomach may be feeling for a few hours after you’ve eaten them.


Hope you like this blog post! for more, please follow us.