Ultimate Guide: How to Grow Coconut in Your Home Garden

how to grow coconut

How to grow Coconut, Coconut trees, with their towering forms and lush green fronds, conjure up vivid images of tropical paradises and serene sandy beaches. However, what many don’t realize is that these iconic trees can be cultivated right in the comfort of your own backyard. Delving into the realm of coconut cultivation not only infuses your garden with an exotic allure but also grants you access to a fresh and bountiful supply of coconuts. Embark on this journey with us as we unveil the secrets to successfully growing coconut trees in your home garden, step by step.

1. Selecting the Right Variety

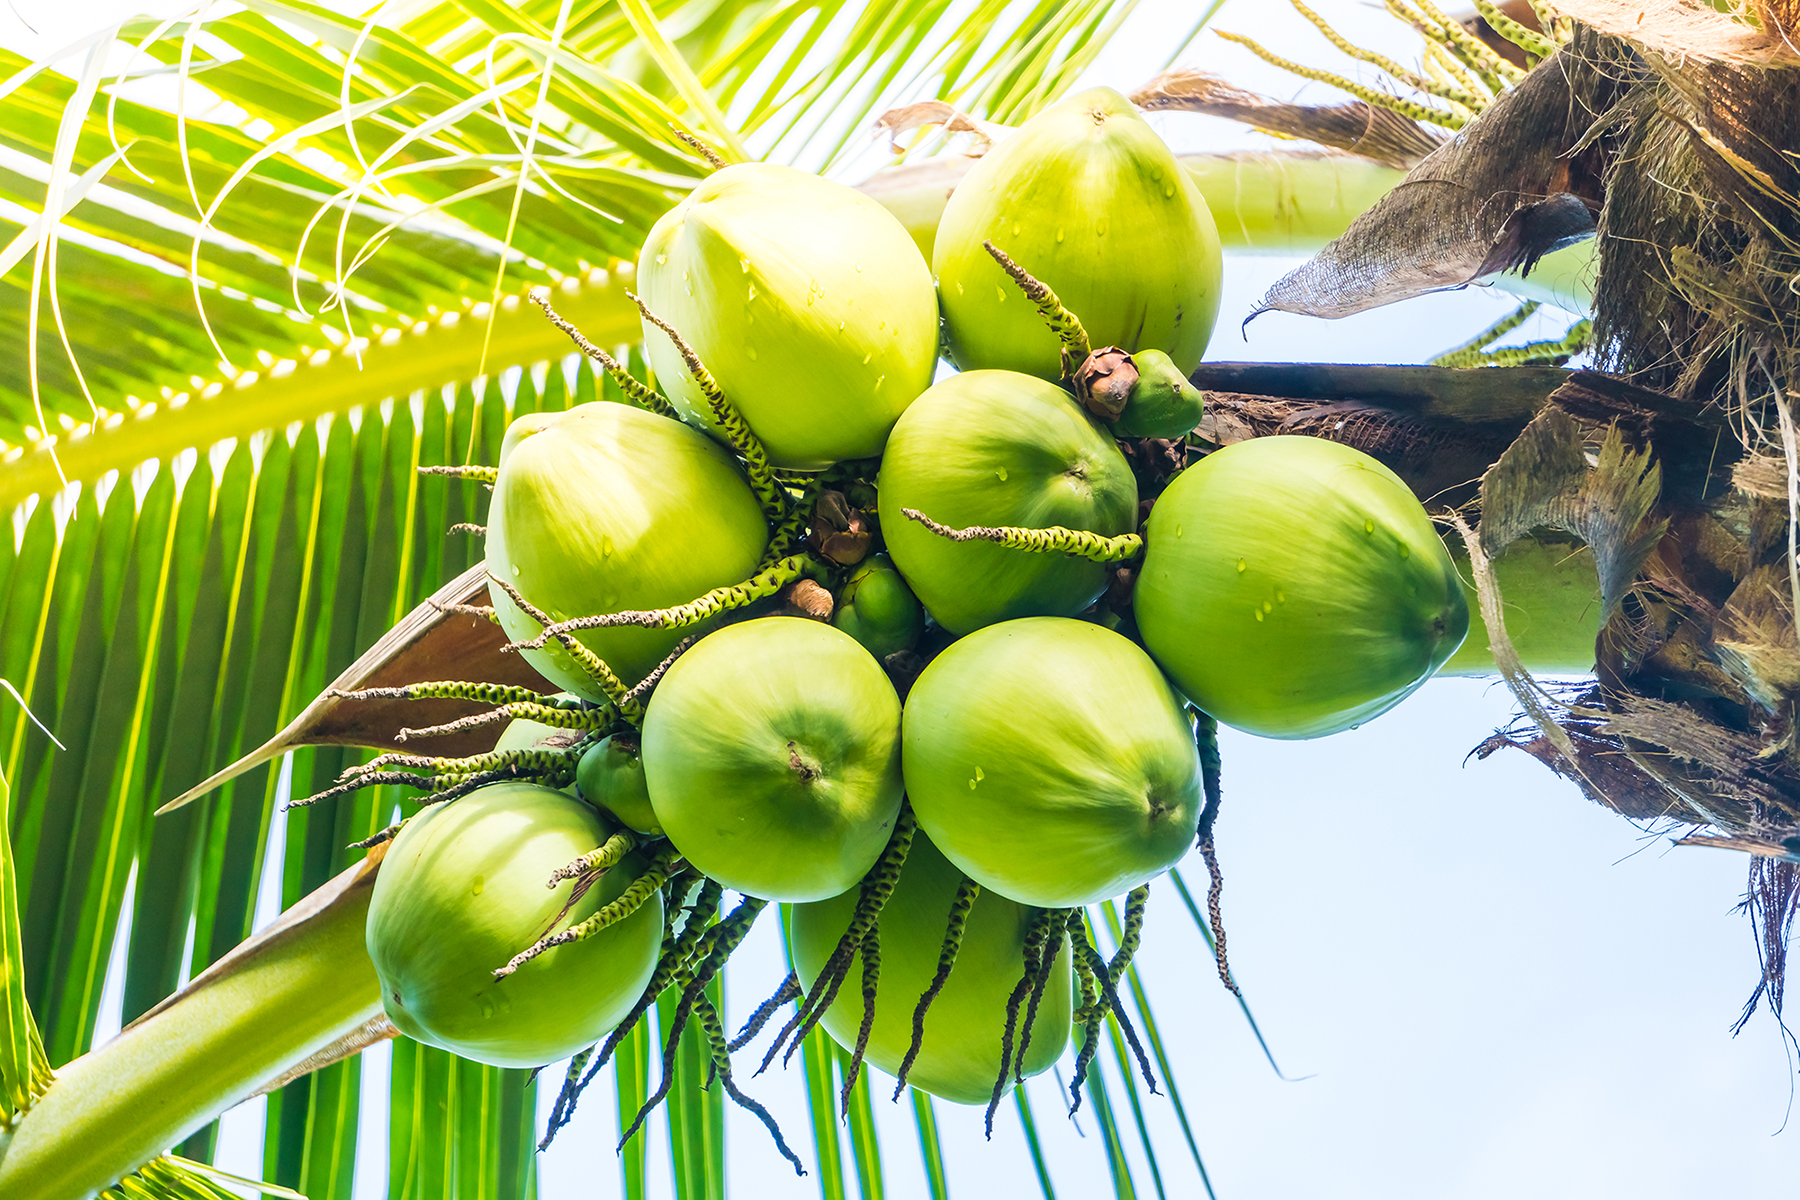
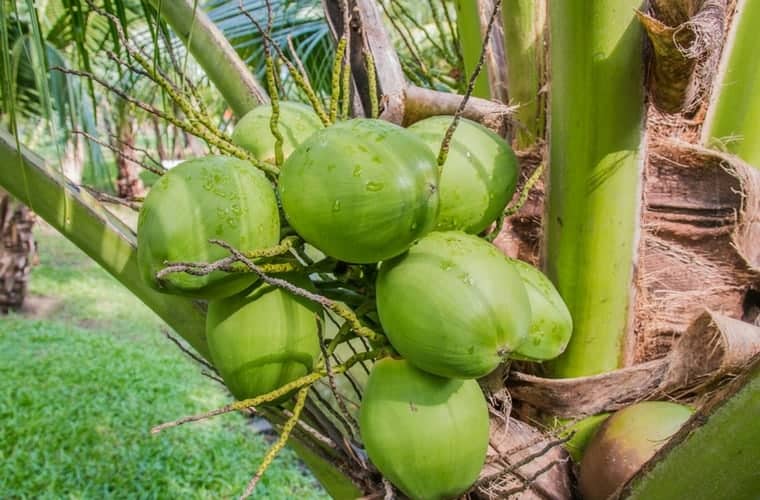
Embarking on the coconut-growing endeavor begins with the crucial step of selecting the appropriate coconut variety tailored to your specific climate conditions. With a myriad of choices available, ranging from tall to dwarf varieties, it’s essential to match the characteristics of the coconut tree with the environmental nuances of your region. While tall varieties flourish in tropical climates, their dwarf counterparts exhibit adaptability, thriving in subtropical regions and even within the confines of indoor spaces.

How To Grow Coconut From Seed | Storables

2. Climate and Location

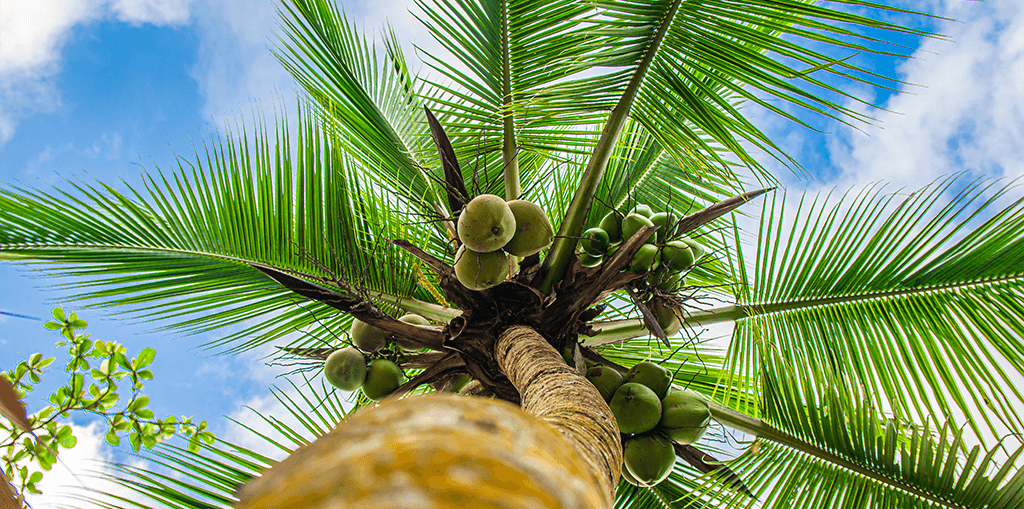
Thriving in warm, tropical climates replete with ample sunlight and moisture-laden air, coconut trees demand a nurturing environment devoid of frost. Thus, meticulous consideration must be given to the location of your coconut tree, ensuring it basks in the radiant warmth of the sun while being shielded from harsh cold spells. For those residing in cooler climates, the provision of a greenhouse or indoor setting can serve as a viable alternative, fostering optimal conditions for coconut cultivation, especially when learning “How to Grow Coconut.

3. Soil Preparation

The foundation for successful coconut cultivation lies in the preparation of the soil, a task that warrants careful attention to detail. Crafting a nutrient-rich blend entails the harmonious amalgamation of compost, sand, and perlite, thereby facilitating superior drainage and ensuring the optimal growth of coconut trees. Additionally, catering to the preferences of coconut trees, the soil’s pH level should ideally range between 5.5 to 7.0, offering an acidic to neutral milieu conducive to robust growth.

4. How to grow Coconut, Planting

With preparations complete, the momentous occasion of planting your coconut tree arrives, symbolizing the commencement of a transformative journey. The act of planting necessitates the excavation of a hole twice the width and depth of the root ball, providing ample room for the nascent tree to establish its roots firmly. Tenderly nestling the tree within its newfound abode, diligent backfilling ensues, ensuring the soil envelops the base snugly. Subsequent hydration, via thorough watering, serves as a nurturing gesture, fostering the tree’s initial stages of growth.

Four benefits of coconut water - Plant Love Radio

5. Watering

An indispensable aspect of coconut tree care revolves around the consistent provision of moisture, particularly during the formative years of growth. Sustaining a delicate balance, the soil must remain adequately moist, albeit refrain from succumbing to waterlogged conditions. As the winter months usher in dormancy, a judicious reduction in watering frequency aligns with the tree’s altered physiological needs, safeguarding against potential inundation.
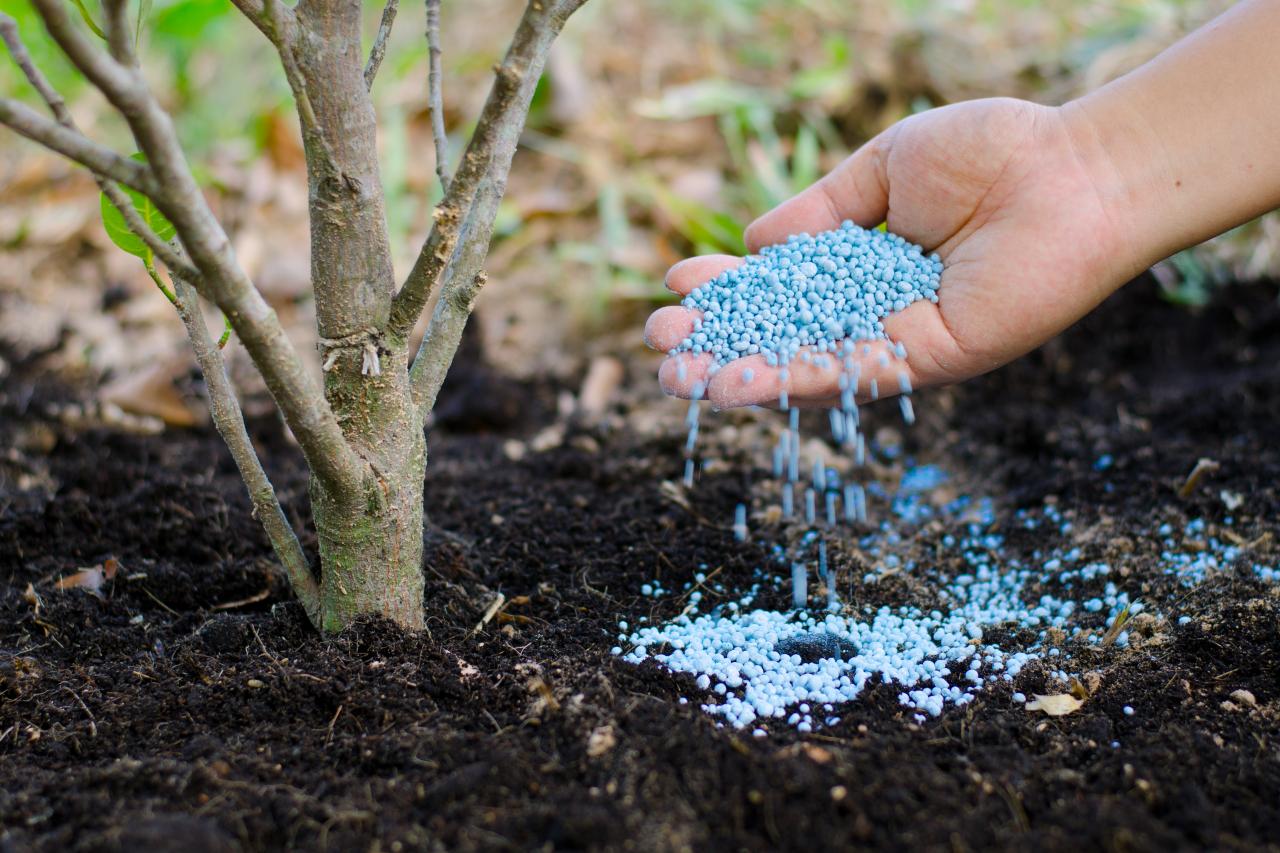
6. Fertilizing

How to grow Coconut, Augmenting the nutritional profile of the soil necessitates periodic fertilization, a practice underscored by the infusion of a balanced fertilizer rich in potassium and magnesium. Executed at three-month intervals throughout the growing season, this regimen complements the tree’s inherent nutritional requirements, bolstering its vitality and resilience.

7. Pruning

Promoting the tree’s aesthetic appeal and physiological vigor, regular pruning emerges as an imperative facet of coconut tree maintenance. Targeting dead or damaged fronds, this corrective measure stimulates new growth while mitigating the risk of disease proliferation. Additionally, the removal of suckers arising from the base of the tree fosters the cultivation of a singular, robust trunk, epitomizing the epitome of coconut tree elegance.

8. Pollination

While nature often orchestrates the intricate dance of pollination, intervention may be warranted in certain scenarios, particularly for those nurturing dwarf coconut varieties within indoor confines. Facilitating the dissemination of pollen, a gentle shaking motion during the flowering phase suffices, ensuring the seamless progression towards fruit-bearing fruition.

9. Pest and Disease Management

Vigilance serves as the cornerstone of effective pest and disease management, with coconut trees, albeit resilient, susceptible to the occasional infestation or ailment. From the menace of coconut mites to the insidious onset of root rot, prompt detection and remedial action are paramount, safeguarding the tree’s well-being and productivity.

How to Grow a Coconut Palm | Living Color Garden Center

10. Harvesting

The culmination of years of nurturing, leading to the eagerly anticipated moment of harvesting, marks the fruition of your laborious efforts in mastering “How to Grow Coconut”. With the coconut’s husk transitioning to a rich brown hue and gracefully detaching from the tree, the time for harvest has arrived. Armed with a machete or knife, the husk yields to deft incisions, revealing nature’s bounty within—fresh, invigorating coconut water and luscious, nutrient-rich flesh await your indulgence.

Conclusion

In conclusion, embarking on the journey of coconut cultivation within the confines of your home garden heralds a gratifying odyssey, replete with botanical marvels and culinary delights. By adhering to the tenets outlined within this comprehensive guide, you are poised to unlock the secrets to successful coconut cultivation, paving the way for a bountiful harvest and an enduring connection with nature’s tropical treasures. So, with sleeves rolled up and spirits ignited, let the adventure commence as you delve into the wondrous world of homegrown coconuts, where every step brings you closer to the paradisiacal allure of the tropics, right in your very own backyard.
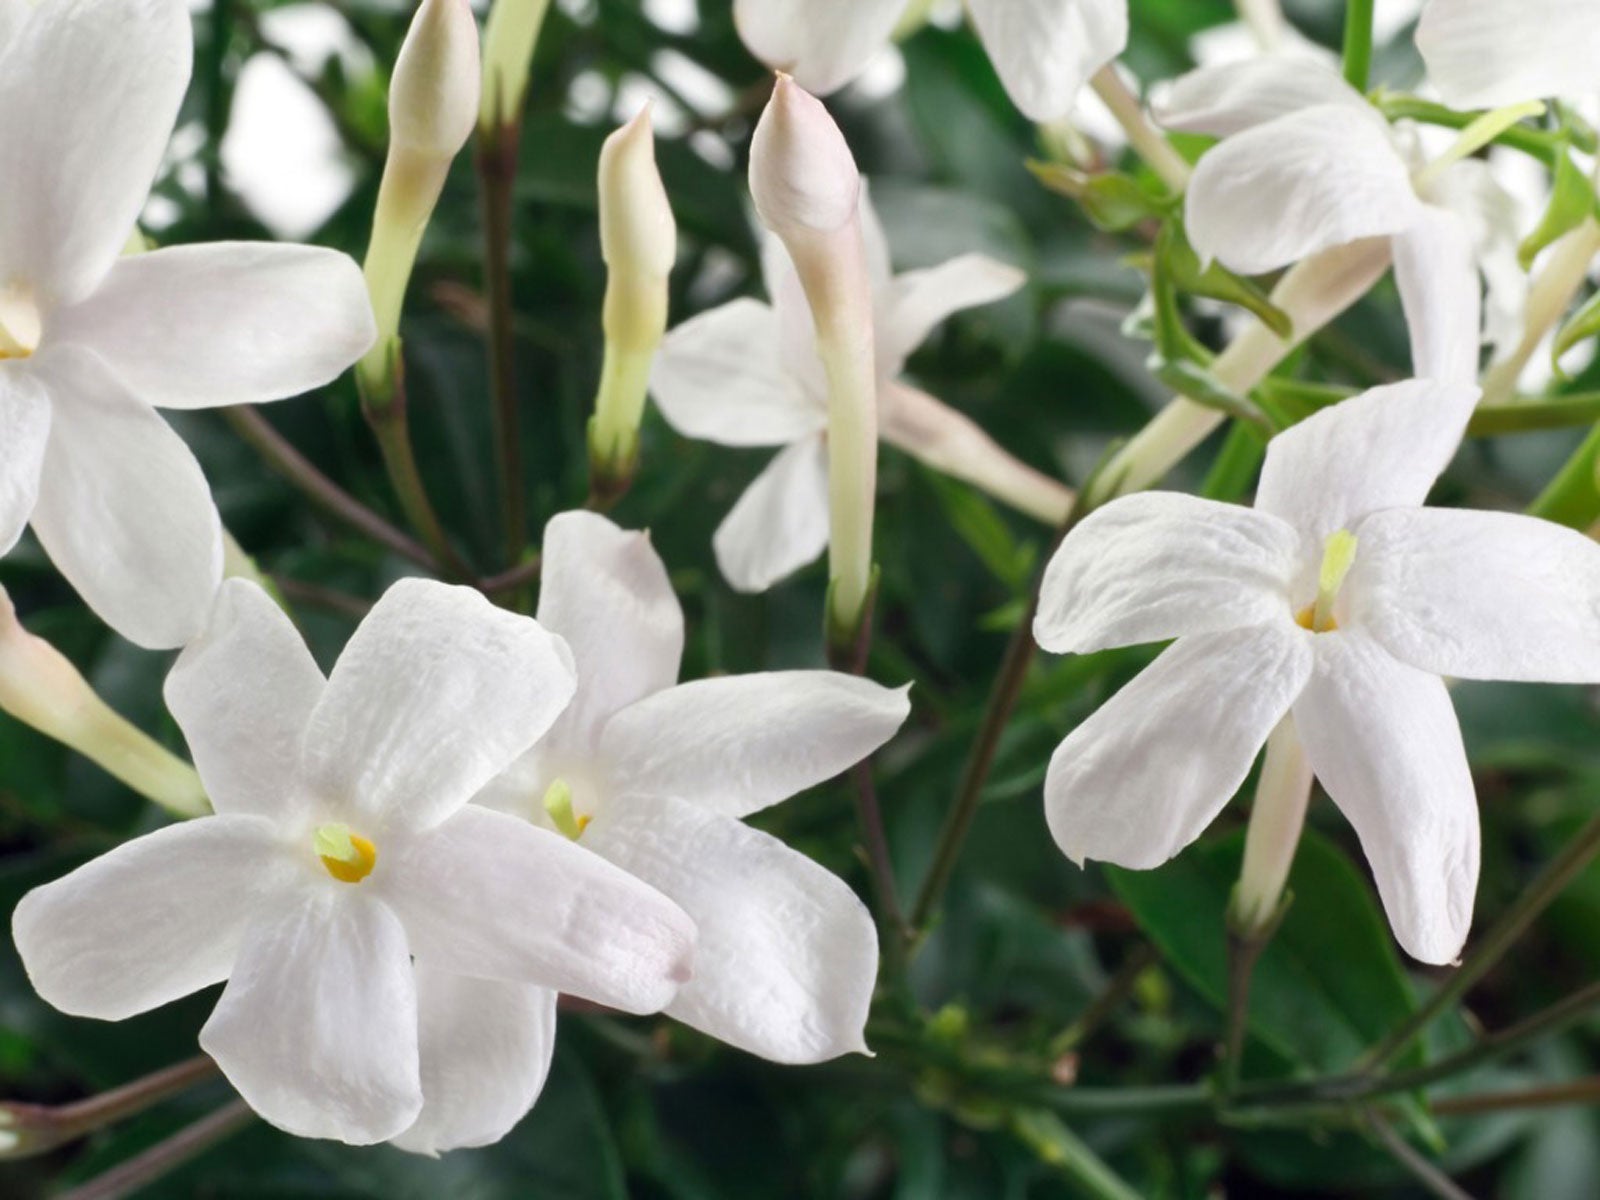
How to Grow Algae: A Comprehensive Guide for Beginners

How to Grow Algae

How to grow Algae, often overlooked, can be a valuable addition to any gardener’s repertoire. Despite its reputation for being a nuisance in ponds and aquariums, algae holds significant potential for sustainable gardening practices. Whether you’re an experienced gardener looking to diversify your cultivation or a novice eager to explore new horizons, this guide will walk you through the process of growing algae step by step.

What is Algae and How Can You Avoid It? - Healthy Ponds

Understanding Algae

To truly grasp the intricacies of algae cultivation, it’s crucial to delve deeper into the fundamental aspects of these remarkable organisms, including how to grow algae. Algae, despite their seemingly simple nature, exhibit a fascinating array of characteristics and behaviors that make them a subject of great scientific interest and practical application.

How to grow Algae, Introduction to Algae

At its core, algae are a diverse group of photosynthetic organisms that thrive in a multitude of aquatic environments, spanning from the depths of oceans to the tranquil surfaces of freshwater lakes. Despite their taxonomic diversity, algae share common features such as chlorophyll-based photosynthesis and a lack of complex structures found in higher plants.

Diversity in Form and Function

One of the most striking aspects of algae is their astonishing diversity in form and function. From the unicellular marvels like Chlorella and diatoms to the towering kelps that form underwater forests, algae come in an impressive array of shapes, sizes, and ecological roles. This diversity is not merely superficial but reflects adaptations to specific environmental niches and evolutionary strategies honed over millions of years.

Navigating Algal Taxonomy

Navigating the complex taxonomy of algae can be a daunting task due to their sheer diversity. Algae encompass multiple taxonomic groups, including green algae (Chlorophyta), red algae (Rhodophyta), brown algae (Phaeophyceae), and diatoms (Bacillariophyta), among others. Understanding the classification and phylogenetic relationships among these groups is essential for selecting the right species for cultivation and research purposes.

RISD grad designs the easiest way to grow your own algae

Selecting Optimal Algal Strains

Choosing the right algal strains for cultivation is a critical step that can significantly impact the success of your endeavors. Factors such as growth rate, lipid content, nutritional profile, and environmental tolerance should be carefully considered when selecting strains. Advances in biotechnology and genetic engineering offer exciting opportunities for tailoring algal strains to specific applications, whether it be biofuel production, bioremediation, or pharmaceuticals.

Optimizing Growth Conditions

Creating an optimal growth environment is essential for maximizing algal productivity and biomass yield. Factors such as light intensity, photoperiod, temperature, pH, and nutrient availability play pivotal roles in shaping algal growth and metabolism. Sophisticated cultivation systems, such as photobioreactors and closed-loop pond systems, offer precise control over these parameters, enabling researchers and cultivators to fine-tune conditions for optimal performance.

Exploring Algal Metabolism

Understanding the metabolic pathways and physiological processes underlying algal growth is essential for optimizing cultivation strategies and harnessing algae’s full potential. Algae exhibit remarkable metabolic versatility, capable of synthesizing a diverse array of compounds, including lipids, carbohydrates, proteins, and pigments. Studying algal metabolism not only sheds light on fundamental biological processes but also holds promise for developing sustainable biotechnological applications.

This Common Aquatic Plant Could Produce Buckets of Biofuel | Scientific American

Harnessing Algal Biotechnology

The burgeoning field of algal biotechnology holds immense promise for addressing pressing global challenges, ranging from renewable energy production to environmental remediation. Algae serve as versatile platforms for producing biofuels, nutraceuticals, pharmaceuticals, and high-value chemicals. Moreover, their ability to sequester carbon dioxide and nutrients makes them valuable players in efforts to mitigate climate change and restore ecosystems.

Conclusion

In conclusion, delving into the intricacies of algae reveals a world of untapped potential and scientific marvels. By understanding their biology, ecology, and biotechnological applications, we can unlock new avenues for sustainable development and environmental stewardship. Whether it’s through cultivating algae for biofuels, purifying wastewater, or studying their ecological roles, algae offer a wealth of opportunities for innovation and discovery in the quest for a greener, more sustainable future.

How to Grow Parijat Plant Successfully: Unlock the Secrets

how to grow parijat plant

Introduction

How to grow Parijat plant, Parijat, also known as Nyctanthes arbor-tristis or the Night-flowering Jasmine, is a fascinating and revered plant in many cultures. Renowned for its fragrant blossoms and ethereal beauty, cultivating Parijat plants can be a rewarding experience for any gardener. However, like any other plant, Parijat requires specific care and attention to thrive. In this comprehensive guide, we will delve into the intricacies of growing Parijat plants successfully, from understanding its origins to mastering its cultivation techniques.

Parijat Plant, Night Flowering Jasmine - Nestreeo.com

Understanding the Parijat Plant

Before diving into the intricacies of cultivating the Parijat plant, let’s grasp its traits and needs. Originating from South Asia, notably India and Bangladesh, Parijat is a petite tree or shrub in the Oleaceae family. Recognized for its fragrant, nocturnal, star-shaped white blossoms, it’s crucial to understand these characteristics when learning how to grow Parijat plant.

Choosing the Right Location

Selecting an appropriate location is crucial for the successful cultivation of Parijat plants. These plants thrive in warm, tropical climates and prefer well-drained soil with good moisture retention. Choose a spot in your garden that receives partial sunlight to full sunlight for at least a few hours each day.

How to grow Parijat plant, Preparing the Soil

Prepare the soil before planting your Parijat sapling. Ensure that the soil is well-drained and rich in organic matter. Incorporate compost or aged manure into the soil to improve its fertility and texture. Parijat plants prefer slightly acidic to neutral soil with a pH level between 6.0 and 7.5.

Planting Parijat Saplings

When planting Parijat saplings, dig a hole slightly larger than the root ball of the plant. Gently place the sapling in the hole, ensuring that the top of the root ball is level with the surrounding soil. Backfill the hole with soil and pat it gently to remove any air pockets. Water the newly planted sapling thoroughly to help it establish roots.

Let us Grow the Kalp Vriksha or Parij,harsingar,Night Jasmine in our homes | Blog.Nurserylive.com | gardening in india

Watering and Moisture

Proper watering is essential for the healthy growth of Parijat plants. While they prefer slightly moist soil, they are susceptible to root rot if overwatered. Allow the soil to dry slightly between watering sessions, and avoid waterlogging the soil. During dry spells or hot weather, increase the frequency of watering to keep the soil consistently moist.

Fertilization

Fertilize Parijat plants regularly to promote healthy growth and abundant flowering. Use a balanced fertilizer formulated for flowering plants, and apply it according to the manufacturer’s instructions. Avoid over-fertilizing, as excessive nutrients can lead to lush foliage at the expense of flowers.

Pruning and Maintenance

Regular pruning is essential to maintain the shape and health of Parijat plants. Remove dead or diseased branches, as well as any overcrowded or crossing branches. Pruning also encourages new growth and enhances flowering. Conduct pruning during the plant’s dormant season, typically in late winter or early spring.

Pest and Disease Management

Parijat plants are relatively resistant to pests and diseases, but occasional problems may arise. Keep an eye out for common pests such as aphids, scale insects, and whiteflies. If infestations occur, treat them promptly with insecticidal soap or neem oil. Additionally, ensure good air circulation around the plants to prevent fungal diseases such as powdery mildew.

Parijat Tree 101 : Steps To Grow Night-Flowering Jasmin

Harvesting Flowers

One of the most rewarding aspects of growing Parijat plants is harvesting their fragrant flowers. Parijat flowers bloom at night and begin to wither by morning, so it’s best to harvest them in the early morning hours. Gently pluck the flowers from the plant and use them fresh or dry them for future use in teas, potpourri, or floral arrangements.

Conclusion

Growing Parijat plants can be a deeply fulfilling endeavor for gardeners seeking to add beauty and fragrance to their outdoor spaces. By following the guidelines outlined in this comprehensive guide, you can cultivate healthy and thriving Parijat plants in your garden. Remember to provide the right growing conditions, including sunlight, well-drained soil, and appropriate care. With patience and dedication, you’ll be rewarded with the enchanting beauty and heavenly fragrance of Parijat flowers in your garden for years to come.

Unlocking the Secrets: How to Grow Passion Fruit Like a Pro

Passion Fruit

How to Grow Passion Fruit

Passion fruit, with its exotic flavor and vibrant appearance, is a delightful addition to any garden. Whether you’re a seasoned gardener or a novice enthusiast, learning how to grow passion fruit can be a rewarding experience. In this comprehensive guide, we’ll explore everything you need to know about cultivating this tropical delicacy in your own backyard.

Is passion fruit good for you? | BBC Good Food

Understanding Passion Fruit

Passion fruit (Passiflora edulis) belongs to the Passifloraceae family and is native to South America. It thrives in subtropical and tropical regions, but with proper care, it can also be grown in more temperate climates.

Selecting the Right Variety

How to grow passion fruit, The first step in growing passion fruit is selecting the right variety for your climate and preferences. Two main types are purple passion fruit (Passiflora edulis) and yellow passion fruit (Passiflora edulis f. flavicarpa). Consider factors such as temperature tolerance, fruit size, and flavor profile when making your selection.

Finding the Perfect Location

Passion fruit vines require a sunny location with well-drained soil. Choose a spot that receives at least 6 to 8 hours of sunlight daily. Additionally, ensure adequate support for the vines to climb, such as trellises, fences, or arbors.

Soil Preparation and Planting

Prepare the soil by incorporating organic matter, such as compost or aged manure, to improve fertility and drainage. Passion fruit prefers slightly acidic to neutral soil with a pH range of 6.5 to 7.5. Plant your passion fruit vines during the warm season, spacing them 10 to 15 feet apart to allow for adequate growth.

Propagating Passion Fruit To Create More Vines

Watering and Fertilizing

Established passion fruit vines have moderate water requirements but benefit from consistent moisture, especially during flowering and fruiting periods. Water deeply once or twice a week, depending on weather conditions. Apply a balanced fertilizer every 4 to 6 weeks during the growing season to promote healthy growth and fruit development.

Training and Pruning

As passion fruit vines grow, train them to climb their support structure using ties or gentle guiding. Prune the vines regularly to remove dead or diseased growth and encourage branching. This helps maintain a manageable size and promotes airflow, reducing the risk of fungal diseases.

Pollination and Fruit Set

Passion fruit flowers are usually self-pollinating, but understanding how to grow passion fruit involves maximizing fruit set. For optimal results, consider cross-pollination by bees. During flowering, gently shake the vines to distribute pollen. Patience is key, as it may take months for the flowers to develop into mature fruits.

Pest and Disease Management

Keep an eye out for common pests such as aphids, spider mites, and fruit flies, which may infest passion fruit vines. Monitor for signs of disease, including fungal infections like Fusarium wilt and bacterial spot. Practice good garden hygiene, such as removing fallen leaves and fruits, to minimize pest and disease pressure.

Harvesting and Enjoying Your Passion Fruit

Passion fruits typically ripen 70 to 80 days after flowering, depending on the variety and growing conditions. Harvest fruits when they reach full color and slightly wrinkled skin. Store them at room temperature until fully ripe, then refrigerate for extended shelf life. Enjoy the sweet-tart flavor of fresh passion fruit in juices, desserts, or as a topping for yogurt and ice cream.

Grow it yourself: Passion Fruit | CANNA Gardening USA

Conclusion

Now that you know how to grow passion fruit, it’s time to put your knowledge into practice and embark on your passion fruit-growing journey. By following the steps outlined in this guide and adapting them to your specific growing conditions, you can successfully cultivate thriving passion fruit vines in your garden. Embrace the exotic allure of passion fruit and savor the fruits of your labor in every sweet and tangy bite. Happy gardening!

Unlock the Secrets: How to Grow Apricots from Seed with Expert Gardening Tips

How to Grow Apricots from Seed

How to grow Apricots from seed, Apricots, with their delicate flavor and juicy texture, are a delight to grow in your own backyard. While many gardeners opt for purchasing saplings or young trees from nurseries, growing apricots from seeds can be a rewarding and cost-effective endeavor. In this comprehensive guide, we’ll walk you through the step-by-step process of growing apricots from seed, from selecting the right seeds to nurturing your saplings into healthy, fruit-bearing trees.

Apricot - Wikipedia

Selecting the Right Apricot Seeds

Before you embark on your apricot-growing journey, it’s essential to start with quality seeds. You can obtain apricot seeds from fresh fruit purchased at the grocery store or farmer’s market. Opt for organic apricots whenever possible, as they are free from harmful chemicals and pesticides that could affect seed viability. With these high-quality seeds, you’ll be on the right track to mastering how to grow Apricots from seed.

When selecting apricot seeds, choose ones that are plump, firm, and free from blemishes or signs of mold. Keep in mind that not all apricot seeds will germinate successfully, so it’s a good idea to collect several seeds to increase your chances of success.

Preparing Apricot Seeds for Planting

Once you’ve gathered your apricot seeds, it’s time to prepare them for planting. Start by removing the seeds from the fruit and washing them thoroughly to remove any pulp or residue. After washing, allow the seeds to air dry completely before proceeding.

Some gardeners recommend scarifying apricot seeds to improve germination rates. Scarification involves gently scratching or nicking the seed coat to help water penetrate and kickstart the germination process. You can accomplish this by carefully filing or sanding one end of the seed until you see a slight change in color.

Choosing the Right Growing Medium

Apricot seeds thrive in well-draining soil that is rich in organic matter. A sandy loam or loamy soil mix is ideal for apricot seed germination and early growth. If you’re planting apricot seeds indoors, choose a container with drainage holes to prevent waterlogging.

Fill your chosen container with the potting mix, leaving about an inch of space at the top for watering. Moisten the soil lightly before planting the apricot seeds.

How to grow Apricots from seed, Planting Apricot Seeds

Planting apricot seeds is a straightforward process. Make a small indentation in the soil with your finger or a pencil, about an inch deep. Place the apricot seed in the indentation, then cover it lightly with soil.

Water the newly planted seeds gently until the soil is evenly moist but not waterlogged. Place the container in a warm, sunny location, such as a south-facing windowsill or greenhouse, to encourage germination.

All About Apricot Seeds | Apricot Power

Caring for Apricot Seedlings

Once your apricot seeds have germinated, it’s time to provide them with the care they need to thrive. Here are some essential tips for nurturing apricot seedlings:

Watering: Keep the soil consistently moist but not waterlogged. Water the seedlings whenever the top inch of soil feels dry to the touch.

Light: Apricot seedlings require plenty of sunlight to grow strong and healthy. Ensure they receive at least six to eight hours of direct sunlight per day.

Temperature: Apricot seedlings prefer warm temperatures, ideally between 70-85°F (21-29°C).

Protect them from drafts and sudden temperature fluctuations

Fertilization: Once the seedlings develop their first set of true leaves, you can begin fertilizing them with a balanced liquid fertilizer diluted to half strength. Repeat every two weeks during the growing season.

Thinning: If you planted multiple seeds in the same container, thin out the weakest seedlings to allow the strongest ones more room to grow.

Transplanting: Once the seedlings have grown to about 6 inches tall and have several sets of true leaves, you can transplant them into larger containers or into the garden if the weather permits.

Transplanting Apricot Seedlings Outdoors

When transplanting apricot seedlings outdoors, choose a sunny, well-drained location with fertile soil. Ensure the planting site is free from competing weeds and has adequate space for the apricot tree to grow to its full size.

Dig a hole twice as wide and just as deep as the root ball of the seedling. Gently remove the seedling from its container, taking care not to disturb the roots too much. Place the seedling in the center of the hole and backfill with soil, pressing down gently to remove any air pockets.

Water the newly transplanted seedling thoroughly to help settle the soil around the roots. Mulch around the base of the tree to retain moisture and suppress weeds.

Pruning and Training Apricot Trees

Proper pruning and training are essential for shaping apricot trees and promoting healthy growth and fruit production. Here are some key tips for pruning and training apricot trees:

Initial Pruning: In the first year after transplanting, focus on removing any dead or damaged branches and shaping the tree’s overall structure. Aim for an open-center or vase shape to allow sunlight and air to penetrate the canopy.

Subsequent Pruning: In subsequent years, prune apricot trees during the dormant season (late winter to early spring) to remove any crossing or overcrowded branches. Thin out the canopy to improve airflow and reduce the risk of disease.

Training: Use stakes or trellises to support young apricot trees and encourage upright growth. Train the main trunk to grow straight and stake any lateral branches that may need support.

Renewal Pruning: As apricot trees age, they may develop woody or unproductive branches. Conduct renewal pruning every few years to remove older wood and stimulate new growth.

Pest and Disease Management

Like all fruit trees, apricots are susceptible to a range of pests and diseases that can affect their health and productivity. Here are some common pests and diseases to watch out for:

Aphids: These small, soft-bodied insects feed on apricot leaves and shoots, causing distortion and yellowing of the foliage. Control aphids with insecticidal soap or horticultural oil.

Fungal Diseases: Apricot trees are prone to fungal diseases such as powdery mildew, brown rot, and leaf curl. Practice good sanitation by removing and disposing of infected plant material, and apply fungicides as needed according to label instructions.

Fruit Pests: Birds, squirrels, and other animals may be attracted to ripening apricots. Protect your fruit with bird netting or deterrents to prevent damage.

The Backyard Orchard - Apricot Pests | USU

Harvesting Apricots

With proper care and maintenance, apricot trees typically begin producing fruit within 3-4 years of planting. Apricots are ready to harvest when they are fully ripe and have a deep orange color. They should easily detach from the tree with a gentle twist.

Harvest apricots carefully to avoid bruising or damaging the fruit. Store ripe apricots in the refrigerator for up to a week or preserve them by drying, freezing, or canning.

Conclusion

Growing apricots from seed is a rewarding and enjoyable experience that allows you to witness the entire lifecycle of these delicious fruit trees. By following the steps outlined in this guide and providing your apricot seedlings with the care they need

How to Grow Jasmine from Cuttings: Master in 8 steps

How to Grow Jasmine from Cuttings

How to grow Jasmine from cuttings, Gardening enthusiasts often seek the satisfaction of propagating plants from cuttings, and jasmine, with its intoxicating fragrance and delicate blooms, is a popular choice. In this detailed guide, we will unveil the secrets to successfully growing jasmine from cuttings, empowering you to create a lush and fragrant garden oasis. Let’s delve into the fascinating world of propagating jasmine and unlock the steps to cultivate your own thriving jasmine plants.

Jasminum multiflorum - Wikipedia

Understanding Jasmine Propagation:

Before we delve into the practical steps of how to grow jasmine from cuttings, it’s essential to understand the science behind propagation. Jasmine, like many other plants, has the remarkable ability to develop roots and grow into new plants from stem cuttings. This natural process allows gardeners to multiply their jasmine collection and create abundance in their garden spaces.

Step 1: Selecting the Perfect Cuttings:

To embark on your journey of propagating jasmine from cuttings, you’ll need to start with the right materials. Look for healthy, vigorous stems on your existing jasmine plants. Ideally, choose stems that are about 6 inches long and have several sets of leaves. These stems should be free from any signs of disease or damage.

Step 2: Preparing Your Cuttings:

Once you’ve selected your ideal stems, it’s time to prepare them for propagation. Using sharp, clean scissors or pruning shears, make a clean cut just below a leaf node. Remove any leaves from the lower portion of the stem, leaving only a few leaves at the top. This encourages the cutting to focus its energy on root development rather than supporting foliage.

How to Propagate Star Jasmine from Cuttings

Step 3: Encouraging Root Growth:

To expedite the rooting process, it’s beneficial to use a rooting hormone. Dip the cut end of each stem into the rooting hormone powder, ensuring that it is thoroughly coated. The rooting hormone contains growth-promoting substances that stimulate root formation, increasing the chances of successful propagation.

Step 4: How to Grow Jasmine from Cuttings, Planting Your Cuttings:

Now that your cuttings are prepared, it’s time to plant them in a suitable growing medium. Choose a well-draining potting mix that retains moisture without becoming waterlogged. Fill small pots or trays with the potting mix and make small holes using a pencil or your finger. Gently insert the prepared cuttings into the holes, ensuring that at least one node is buried beneath the soil.

Step 5: Providing Optimal Growing Conditions:

Successful propagation requires the right environmental conditions. Place your pots or trays in a warm, bright location, away from direct sunlight. Jasmine cuttings prefer indirect light during the rooting phase to prevent excessive stress. Keep the soil consistently moist but not waterlogged, as soggy conditions can lead to rotting.

Jasmine Plant Care [6 Tips + FAQs] | How to Grow Jasminum Polyanthum | homify

Step 6: Monitoring and Maintenance:

As your jasmine cuttings take root and begin to establish themselves, it’s crucial to monitor their progress regularly. Check the soil moisture levels daily, watering as needed to keep it evenly moist. Avoid overwatering, as this can lead to root rot. Additionally, remove any dead or yellowing leaves to promote healthy growth.

Step 7: Transplanting Your Rooted Cuttings:

Once your jasmine cuttings have developed a robust root system and established themselves, they are ready for transplanting into larger containers or the garden. Choose a sunny spot with well-draining soil and space the plants appropriately to allow for adequate growth. Gently remove the cuttings from their pots, being careful not to disturb the roots, and transplant them into their new homes.

Step 8: Caring for Your Mature Jasmine Plants:

Congratulations! You’ve successfully propagated jasmine from cuttings and now have thriving plants ready to grace your garden with their fragrant blooms. To ensure continued success, provide your jasmine plants with regular care and maintenance. Water them deeply and infrequently, allowing the soil to dry out slightly between waterings. Fertilize them with a balanced, water-soluble fertilizer during the growing season to promote healthy growth and abundant flowering.

How to train jasmine to climb - JimsMowing.com.au

Culmination

Growing jasmine from cuttings is a rewarding endeavor that allows you to multiply your plants and fill your garden with the enchanting fragrance of jasmine blooms. By following the steps outlined in this guide and providing the right care and attention, you can enjoy the beauty of jasmine in your garden for years to come. So roll up your sleeves, gather your cuttings, and embark on a journey of propagation and growth with jasmine. Your fragrant garden oasis awaits!

How to grow walnut: A Beginner’s Guide in 10 Simple Steps

how to grow walnut

How to grow walnut, Unlock the secrets of successful walnut cultivation with our comprehensive guide tailored for beginners. In this article, we’ll walk you through the process of growing walnuts in 10 easy-to-follow steps, ensuring a bountiful harvest for years to come.

Step 1: How to grow walnut, Selecting the Right Location

Choosing the perfect spot for your walnut tree is crucial for its overall health and productivity. Opt for a sunny location with well-drained soil and ample space for the tree to establish its roots and spread comfortably. Consider factors such as sunlight exposure, air circulation, and proximity to other plants.

How to Chandler Walnut Tree Pruning and Fertilizing? - YouTube

Step 2: Preparing the Soil

Prepare the soil meticulously to create an optimal growing environment for your walnut tree. Begin by loosening the soil to a depth of at least 18 inches using a shovel or garden fork. Incorporate organic matter such as compost or aged manure to improve soil fertility, structure, and drainage. This step is essential for providing the necessary nutrients and moisture retention for healthy root development.

Step 3: Choosing the Variety

how to grow walnut, Selecting the right walnut tree variety is crucial to ensure successful growth and productivity in your specific climate and growing conditions. Common walnut varieties include English, Black, and Persian walnuts, each with its unique characteristics and requirements. Consider factors such as climate, soil type, and available space when choosing the variety best suited to your garden or orchard.

Step 4: Planting the Tree

Plant your walnut tree during the dormant season, typically in late winter or early spring, to promote optimal root establishment and growth. Before planting, dig a hole slightly larger than the tree’s root ball and carefully position the tree at the same depth as it was in the nursery container. Ensure the tree is planted firmly and water thoroughly after planting to settle the soil around the roots.

How to plant walnut saplings & Mistakes Made | Misbell

Step 5: Providing Adequate Water

Water is essential for the healthy growth and development of walnut trees, especially during the establishment phase. Ensure your walnut tree receives sufficient water, particularly during hot and dry periods, to prevent stress and dehydration. Water deeply and regularly, allowing the soil to dry out slightly between waterings to avoid waterlogging and root rot.

Step 6: Fertilizing Regularly

Regular fertilization is essential to provide walnut trees with the necessary nutrients for vigorous growth and abundant fruit production. Feed your walnut tree with a balanced fertilizer formulated for fruit trees, following the manufacturer’s instructions for application rates and timing. Apply fertilizer in early spring before new growth begins to support healthy foliage and fruit development throughout the growing season.

Walnut Archives » iran dried fruit

Step 7: Pruning for Structure

Pruning is a vital aspect of walnut tree care, helping to promote strong branch structure, improve air circulation, and enhance overall tree health and productivity. Prune your walnut tree annually during the dormant season to remove dead, diseased, or damaged branches and thin out crowded areas to allow for better light penetration and air movement. Additionally, shaping the tree’s canopy can help encourage upward growth and facilitate easier harvesting and maintenance.

Step 8: Protecting Against Pests and Diseases

Monitoring your walnut tree regularly for signs of pests and diseases is essential for early detection and prevention of potential problems. Common pests that affect walnut trees include aphids, walnut husk flies, and various fungal infections, which can cause damage to foliage, flowers, and fruit if left untreated. Implementing integrated pest management strategies such as proper sanitation, biological controls, and cultural practices can help minimize pest and disease pressures while reducing the need for chemical interventions.

Step 9: Harvesting Your Walnuts

Patience is key when it comes to harvesting walnuts, as they require adequate time to mature and develop their characteristic flavor and texture. Wait until the husks surrounding the nuts split open and the nuts inside turn brown before harvesting. This usually occurs in late summer or early fall, depending on the variety and growing conditions. Once ready, collect the nuts from the ground and remove the husks promptly to prevent staining and spoilage. Allow the nuts to dry thoroughly before storing or cracking them open to enjoy their delicious kernels.

Step 10: Enjoying the Fruits of Your Labor

Congratulations on successfully growing your own walnuts! Now it’s time to reap the rewards of your hard work and patience. Whether you prefer to enjoy the nuts straight from the shell or incorporate them into your favorite recipes, homegrown walnuts offer a delicious and nutritious addition to your culinary endeavors. Share the bounty with friends and family or savor the satisfaction of enjoying your homegrown harvest all to yourself.

Walnut Tree Care - How To Grow A Walnut Tree | Gardening Know How

Embarking on the journey of “how to grow walnut” may seem daunting at first, but with the right knowledge, preparation, and care, anyone can successfully grow these delicious nuts at home. By following our comprehensive 10-step guide, you’ll be well-equipped to nurture healthy walnut trees and enjoy a bountiful harvest for years to come. Happy gardening!

Mastering Container Gardening: How to Grow Vegetables at Home in Pots

How to Grow Vegetables at Home in Pots

How to grow vegetables at home in pots, Container gardening offers a convenient and flexible way to grow vegetables right at home, regardless of space limitations. In this comprehensive guide, we’ll explore the step-by-step process of growing vegetables in pots, perfect for urban dwellers, balcony gardeners, and anyone looking to maximize their growing space.

How to grow vegetables at home in pots, Selecting the Right Containers:

As you begin your journey into container gardening, selecting the appropriate pots is paramount for success. It’s crucial to opt for containers that can adequately accommodate the root systems of your selected vegetables while also ensuring proper drainage to prevent waterlogging. Various options are available, such as terracotta pots, plastic containers, and fabric grow bags, each with its unique advantages and considerations. By choosing the right pots, you set a solid foundation for thriving vegetables in your home garden.

Vegetable Gardening: A Beginner's Guide | NC State Extension Publications

Choosing the Ideal Location:

Vegetables thrive in sunny locations, so select a spot that receives at least 6-8 hours of sunlight per day. If space is limited, consider utilizing vertical space or investing in adjustable plant stands to optimize sunlight exposure. Additionally, ensure easy access to water and consider factors like wind and temperature fluctuations when determining the placement of your pots.

Selecting the Right Vegetables:

When learning how to grow vegetables at home in pots, it’s important to choose varieties that thrive in confined spaces. Not all vegetables are well-suited for container gardening, so it’s essential to choose varieties that thrive in confined spaces. Ideal options include compact or dwarf varieties of tomatoes, peppers, cucumbers, lettuce, spinach, carrots, herbs, and more. Be mindful of the mature size of each plant and select vegetables that complement each other’s growth habits.

Preparing Potting Mix and Planting:

Use a high-quality potting mix specifically formulated for container gardening, as it provides excellent drainage and aeration for healthy root development. Fill your containers with the potting mix, leaving a few inches of space at the top for watering. Plant your vegetable seedlings or seeds according to the spacing and depth recommendations specific to each variety, ensuring proper airflow and room for growth.

How to Grow Vegetables in Containers for a Plentiful Garden

Watering and Maintenance:

Consistent watering is crucial for container-grown vegetables, as pots tend to dry out more quickly than traditional garden beds. Water your plants deeply whenever the top inch of soil feels dry to the touch, and be mindful of fluctuations in temperature and humidity that may affect watering needs. Additionally, regularly check for signs of pests, diseases, or nutrient deficiencies and take appropriate measures to address them promptly.

Feeding Your Plants:

How to grow vegetables at home in pots, Container-grown vegetables rely on regular fertilization to thrive, as nutrients leach out of the potting mix over time. Use a balanced, water-soluble fertilizer diluted to half strength and apply it every 2-4 weeks during the growing season. Avoid over-fertilizing, as it can lead to nutrient imbalances and damage to your plants. Consider incorporating organic fertilizers or compost tea to enrich the soil and promote healthy growth.

Harvesting and Enjoying Your Homegrown Vegetables:

One of the most rewarding aspects of container gardening is harvesting fresh, flavorful vegetables right from your own patio or balcony. As your plants mature, monitor them regularly for signs of readiness to harvest, such as vibrant color, firm texture, and mature size. Use sharp pruners or scissors to harvest your vegetables, and enjoy them fresh or incorporate them into your favorite recipes for a truly farm-to-table experience.

10 Container Vegetable Garden Ideas: Best Veggies to Grow

We have discussed above “How to grow vegetables at home in pots”. Container gardening offers a convenient and accessible way to grow vegetables at home, even in the smallest of spaces. By selecting the right containers, choosing suitable vegetables, providing proper care and maintenance, and harvesting your homegrown bounty, you can enjoy a bountiful harvest of fresh and flavorful vegetables right at your fingertips. With a bit of planning and dedication, anyone can experience the joys of homegrown produce, one pot at a time.

Cultivating Green Goodness: A Complete Guide on How to Grow Fenugreek at Home

how to grow fenugreek at home

How to grow Fenugreek at home, Fenugreek, with its distinctive flavor and nutritional benefits, is a versatile herb that can easily be grown at home. In this comprehensive guide on how to grow fenugreek at home, we’ll delve into the step-by-step process of cultivating fenugreek in your own garden or indoor space.

Understanding Fenugreek:

Fenugreek (Trigonella foenum-graecum) is an annual herb native to the Mediterranean region and South Asia. It belongs to the Fabaceae family and is prized for its edible leaves, seeds, and sprouts, which are commonly used in culinary dishes and traditional medicine. Fenugreek has a slightly bitter taste with hints of sweetness, making it a popular ingredient in Indian, Middle Eastern, and Mediterranean cuisines.

Amazon.com : Fenugreek Herb Seeds - Non-GMO - 1 Gram, Approximately 60 Seeds : Herb Plants : Patio, Lawn & Garden

How to grow Fenugreek at home, Selecting Fenugreek Seeds:

When growing fenugreek at home, it’s essential to start with high-quality seeds to ensure successful germination and healthy plant growth. Look for fenugreek seeds from reputable suppliers or nurseries that specialize in organic and heirloom varieties. Opt for seeds that are fresh, plump, and free from signs of damage or decay, as these are more likely to produce vigorous and productive plants.

Preparing the Growing Environment:

Before we learn how to grow Fenugreek at home we should have knowledge about growing condition.  Fenugreek thrives in well-drained soil with a neutral to slightly acidic pH and requires ample sunlight to flourish. Before planting, prepare the growing environment by selecting a sunny location with fertile, loamy soil. If planting in containers or pots, choose a well-draining potting mix enriched with organic matter such as compost or aged manure. Ensure adequate drainage to prevent waterlogging, which can lead to root rot and other issues.

Planting Fenugreek Seeds:

Fenugreek seeds can be directly sown into the ground or started indoors in seed trays or pots. If sowing directly outdoors, plant the seeds about 1/4 inch deep and space them 2 to 3 inches apart in rows or clusters. Water the seeds gently after planting and keep the soil consistently moist until germination occurs, typically within 7 to 10 days. If starting seeds indoors, plant them in seed trays filled with moist potting mix and place them in a warm, sunny location.

How to Plant and Grow Fenugreek | Gardener's Path

Caring for Fenugreek Plants:

Once germinated, fenugreek plants require minimal care to thrive. Water the plants regularly to keep the soil evenly moist but not waterlogged, especially during hot and dry periods. Avoid overwatering, as this can lead to root rot and other problems. Mulching around the base of the plants can help conserve moisture, suppress weeds, and regulate soil temperature.

Fertilizing Fenugreek Plants:

Fenugreek is a relatively low-maintenance herb that doesn’t require heavy fertilization. However, you can apply a balanced, water-soluble fertilizer diluted to half strength every 4 to 6 weeks during the growing season to promote healthy growth and development. Avoid over-fertilizing, as this can lead to excessive leafy growth at the expense of seed production.

Harvesting Fenugreek Leaves:

Fenugreek leaves, also known as methi, can be harvested when the plants reach a height of 6 to 8 inches and have developed several sets of true leaves. Use sharp scissors or pruning shears to snip off individual leaves or cut the entire plant down to ground level, leaving about 1 inch of stem intact. Fenugreek leaves are best harvested in the morning when they are fresh and tender, before the sun’s heat causes them to wilt.

Welcome to My Random Garden: Growing and harvesting Fenugreek(methi) leaves

Using Fenugreek Leaves in Cooking:

Apart from just learning “how to grow fenugreek at home,” it’s essential to understand its versatile uses in cooking.Fresh fenugreek leaves add a distinctive flavor and aroma to a wide range of culinary dishes, including curries, stews, salads, and soups. They can be used as a flavorful herb or cooked as a leafy green vegetable. Fenugreek leaves are rich in vitamins, minerals, and antioxidants, making them a nutritious addition to any meal. To preserve their freshness and flavor, store fenugreek leaves in the refrigerator in a plastic bag or container for up to one week.

Harvesting Fenugreek Seeds:

When learning how to grow fenugreek at home, understanding the harvesting process is crucial. Fenugreek seeds can be harvested when the plants begin to turn yellow and the seed pods turn brown and dry. Allow the seed pods to mature fully on the plant before harvesting to ensure maximum seed viability. Use sharp scissors or pruning shears to cut the seed pods from the plant, then spread them out in a single layer on a clean, dry surface to finish drying. Once dry, thresh the seeds from the pods and store them in a cool, dry place in an airtight container for future use.

Fenugreek | Description, Plant, Seeds, Uses, & Facts | Britannica

Growing fenugreek at home is a rewarding and satisfying experience that allows you to enjoy the fresh flavors and nutritional benefits of this versatile herb. By selecting high-quality seeds, preparing the growing environment, planting with care, and providing proper care and maintenance, you can cultivate healthy fenugreek plants in your own garden or indoor space. Whether used in cooking, medicine, or as a culinary herb, fenugreek adds a unique flavor and aroma to a wide range of dishes and enhances the overall enjoyment of process of “How to grow Fenugreek at home”.

From Seed to Spice: How to Grow Clove Plants at Home

How to Grow Clove Plants at Home

How to grow Clove plants at home, Clove, a versatile spice with a rich history and distinctive flavor, adds depth and aroma to a wide range of culinary dishes and beverages. While commonly associated with tropical regions, clove plants can also thrive in home gardens, providing an abundant supply of fresh cloves for culinary and medicinal purposes. In this comprehensive guide, we’ll explore the step-by-step process of growing clove plants at home, from selecting the right seeds to harvesting and beyond. Let’s embark on a journey from seed to spice and unlock the secrets of growing clove plants in your garden.

Clove seeds - Health Benefits & Uses of Clove seeds – Traya

Understanding Clove Plants:

How to grow Clove plants at home, Clove (Syzygium aromaticum) is a tropical evergreen tree native to the Moluccas (or Spice Islands) of Indonesia. It belongs to the Myrtaceae family and is valued for its aromatic flower buds, which are harvested and dried to produce cloves—a popular spice used in cuisines around the world. Clove plants thrive in warm, humid climates with well-drained soil and partial shade, making them suitable for cultivation in subtropical and tropical regions.

Selecting Clove Seeds:

When growing clove plants at home, it’s essential to start with high-quality seeds sourced from reputable suppliers or nurseries. Look for seeds that are fresh, plump, and free from signs of damage or disease. While clove seeds can be challenging to find commercially, they may be available through specialty spice shops, online retailers, or botanical gardens that specialize in tropical plants.

Preparing the Growing Environment:

Clove plants require specific growing conditions to thrive, including warm temperatures, high humidity, and well-drained soil with a slightly acidic to neutral pH. Before planting, prepare the growing environment by selecting a suitable location with partial shade and shelter from strong winds. Amend the soil with organic matter, such as compost or aged manure, to improve its texture and fertility.

Preparing Garden Soil for Planting: Soil Amendments, pH, Nutrients, and More | The Old Farmer's Almanac

How to Grow Clove Plants at Home, Planting Clove Seeds:

Clove seeds are best sown directly into the ground or in large containers, as they have a delicate root system that can be damaged during transplanting. Plant the seeds in well-prepared soil at a depth of approximately 1/2 inch, spacing them 8 to 10 feet apart to allow for proper growth and development. Water the seeds thoroughly after planting and keep the soil consistently moist but not waterlogged.

Caring for Clove Plants:

Once established, clove plants require regular care to ensure healthy growth and development. Provide consistent moisture, especially during dry periods, and mulch around the base of the plants to conserve moisture and suppress weeds. Fertilize clove plants annually in the spring with a balanced fertilizer to promote vigorous growth and abundant flowering.

How to Grow and Care for Clove Trees

Pruning and Training:

Pruning is essential for maintaining the shape and structure of clove plants and promoting optimal fruit production. Remove dead, diseased, or damaged branches as needed, and prune the plants to maintain an open canopy and improve air circulation. You can also train young clove plants to a central leader or desired shape to encourage upward growth and maximize fruit-bearing potential.

Protecting Against Pests and Diseases:

While relatively pest and disease-resistant, clove plants may occasionally encounter issues such as aphids, scale insects, or fungal infections. Monitor the plants regularly for signs of pests or disease, and take appropriate measures to control them if necessary. This may include using insecticidal soaps, neem oil, or organic fungicides to manage pests and maintain plant health.

Harvesting Cloves:

Clove plants typically begin flowering and producing flower buds after three to five years of growth. Harvest the flower buds when they reach their maximum size and are still tightly closed but showing a slight blush of color. Use sharp pruning shears or scissors to carefully cut the flower buds from the plant, taking care not to damage the surrounding foliage or stems.

Clove, a Spice That's Extra Nice — Solidago School of Herbalism

Drying and Storing Cloves:

After harvesting, dry the clove buds immediately to preserve their flavor and aroma. Spread the flower buds in a single layer on a clean, dry surface, such as a wire rack or screen, and place them in a warm, well-ventilated area away from direct sunlight. Allow the cloves to dry completely for several days to a week, depending on the humidity levels in your area. Once dry, store the cloves in airtight containers in a cool, dark place to maintain their freshness and potency.

Using Cloves in Cooking and Medicine:

Clove is a versatile spice with a wide range of culinary and medicinal uses. In cooking, cloves add warmth and depth to savory dishes, desserts, and beverages, such as curries, baked goods, mulled wine, and chai tea. Medicinally, cloves are valued for their analgesic, antimicrobial, and anti-inflammatory properties and are used to alleviate toothaches, sore throats, and digestive issues.

Clove Supplements: Benefits, Uses, Side Effects

How to grow Clove plants at home, Growing clove plants at home is a rewarding and fulfilling endeavor that allows you to experience the magic of cultivating your own spices from seed to spice. By selecting high-quality seeds, preparing the growing environment, planting with care, and providing proper care and maintenance, you can enjoy a bountiful harvest of fresh cloves for culinary and medicinal purposes. Whether used in cooking, medicine, or aromatherapy, cloves are sure to add warmth, flavor, and aroma to your home and garden.