Dwarf Azalea

Dwarf Azalea

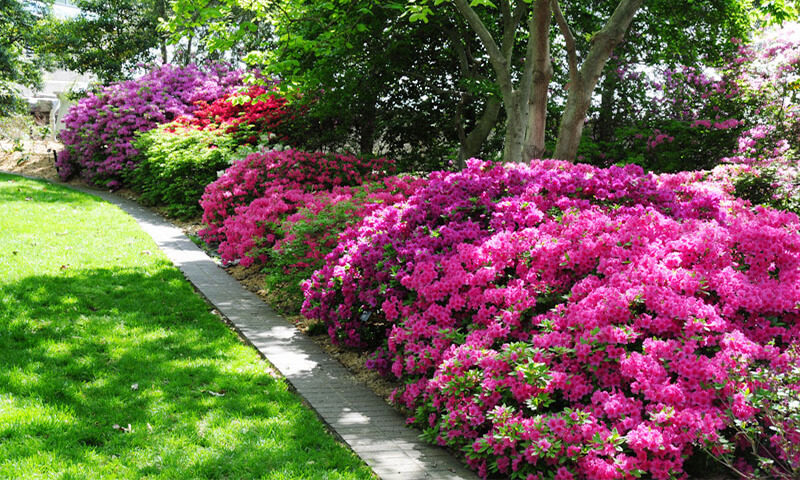
Dwarf azaleas are a popular choice of planting for those who have a limited area for gardening. Like other azaleas, the most popular varieties are the flame, fernleaf, and Darlene Grandiflora. The width of these plants should not exceed two feet (60 cm). Dwarf azaleas should be planted in fall or early spring. These plants must have well-drained soil and require little maintenance once established in their environment.

The hardiness ranges from zone 5 to zone 8. In regions with a warmer climate, the plant prefers temperatures of 18 to 20 degrees Fahrenheit (60 to 68 degrees Celsius). In areas with cooler weather, the plant is usually planted in early fall or in the spring. In some cases, zonal conditions include the fact that these plants can  

These plants can be propagated from cuttings. The cuttings should be placed in a container with a loose, well-drained soil and kept at least 20 °F (9 °C) for the first few weeks. For best results, the plant should have eight hours of direct sunlight every day. They can also be propagated by seed.

What are dwarf azaleas?

Dwarf azaleas are also known as “miniature azaleas.” These plants can be very small and have floppy, grayish-green leaves. The petals have white or pink edges and many varieties have some red coloring on the inside of the petals.

The most compact are dwarf azalea varieties that grow 2 to 3 feet. They include:

Dwarf azalea plants are very popular in many gardens. There are many different kinds of dwarf azalea plants, but these plants can also be propagated from cuttings.

  1. “Dwarf azalea”
  2. “Globemaster Azalea” (also known as “Azalea globemaster”)
  3. “Prairie Sunset Azalea” (also known as “Roughleaf Azalea”)
  4. “Silk-leaf Azalea” (also known as “Japanese Azalea”)
  5. “Waukegan Azalea” (also known as “American Azalea”)

How to Care for Dwarf Azaleas

Dwarf azalea care is low-maintenance. In part, this is because they do not require a lot of fertilizer or pruning. However, there are some things that you can do in order to care and make them grow to their full potential.

In the colder months, you can lay down a protective layer of mulch so that the plants are protected from frost and temperature changes. Make sure that the mulch is thin, so that the water can still reach the plants.

You can fertilize your dwarf azaleas once a year with a general fertilizer. It is very important to use an organic and natural fertilizer so that you do not harm the plants. This should be sprinkled over the soil and then lightly covered with more mulch. The mulch will keep it from washing away and also protect it from insects and pests.

How big do dwarf azaleas get?

 Many varieties of these plants can grow up to 2 feet tall. Some can grow taller, but a majority of them that are sold in the United States are only one- or two-foot tall plants.

What is the difference between miniature and dwarf azaleas?

Although there are some differences between the two types of azaleas, overall they both have similar characteristics. They are both small plants that are difficult to distinguish from one another.

Dwarf azaleas can be distinguished by their evergreen leaves and white flowers. It have needle-like leaves that have a green color and they grow in a plant with a variety of shapes.

Dwarf azaleas typically grow in one of the following shapes:

“Flame type”: These plants have a single trunk that flares out from the ground into a very broad canopy. The needles are all pointed and raised slightly above the base of the plant. These plants usually bloom during late spring and early summer.

“Fernleaf type”: These plants have small, evergreen leaves that twist around themselves. They tend to be smaller than the flame-type azaleas.

“Darlene Grandiflora type”: These plants are quite similar to the fernleaf-type azaleas. They have a very similar appearance, except that they are at the upper end of the scale. The leaves on these plants tend to be larger and more rounded.

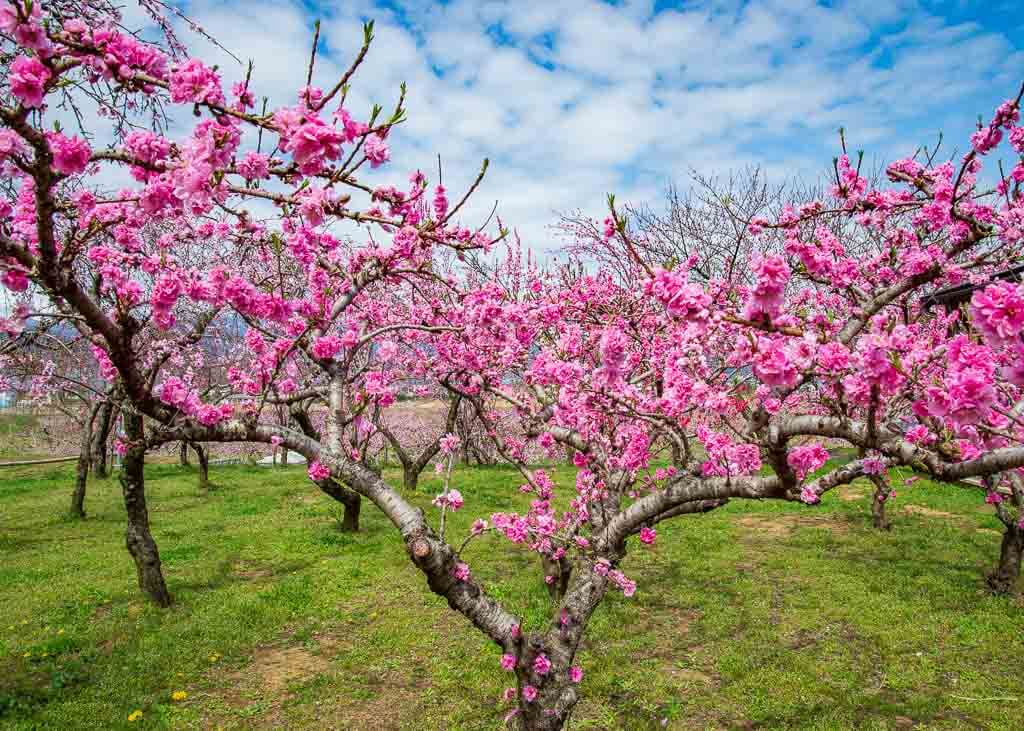
Most dwarf azaleas are evergreen and bloom during spring. A few varieties, like the “Prairie Sunset” bloom in the summer.

What time of year do dwarf azaleas bloom?

The flowering for most dwarf azaleas is during the spring. Therefore, if you are planting these flowers in your garden, you will want to plant them between September and October. You can also plant them in late fall to early winter. If you do this, they will often die back during the winter months and then reemerge during the spring.

These plants do not like to be transplanted and should be moved by using transplants or cuttings. These are delicate plants, often called “air plants” because they do not like it when moved. For this reason, an alternative to transplanting is to use a couple of inches of mulch around your plant and then plant the cutting in a pot with the mulch on top. This will allow your plant to grow up into the mulched area and then you can plant it in the ground eventually.

Are dwarf azaleas fragrant?

No, there are no dwarf azaleas that have an especially sweet fragrance to them. However, some of the semi-dwarf varieties do have scents that are not particularly sweet.

Are dwarf azaleas poisonous?

Dwarf azaleas can be poisonous to some animals, specifically cats and dogs. A lot of people use these kinds of plants to try and attract cats or dogs because they prefer to be near other animals. However, if a cat or dog consumes these plants, they may end up poisoning them.

All About Azaleas - Stauffers

What is the best time of year to plant dwarf azaleas?

Dwarf azaleas are good to plant in the fall and winter, but some opt for spring planting. If you are planting these plants in the spring, you will want to plant them about three months before your last frost. Spring planting is recommended because some of these plants can grow quite large, especially in colder climates.

If you like this article, please share it with your friends!


Cucumber Sprouts

Cucumber Sprouts

Cucumber Sprouts are a great food for those who live on the ketogenic diet. We’ll show you how to make them, what they taste like and give you a recipe!

With this post, we will go through everything you need to know about cucumber sprouts so that they can be your next staple dish on the ketogenic diet. By the end of reading this post, you will understand why it’s so important to have these in your fridge at all times. Enjoy!

What’s so great about Cucumber Sprouts?

First of all, Cucumber Sprouts are a great starter food for children on the Ketogenic Diet. This means that if you have a kid then this recipe is going to be perfect for you. But even if your child isn’t on the ketogenic diet, cucumbers are still an amazing vegetable to be eating at any time of the day. They’re easy to cut with a knife, and can be eaten raw in salads. However, the reason we are making sprouts out of them is because this is the best way to reap all the benefits of cucumber.

How to Grow Cucumbers from Seed

Sprouting your own food at home is a great way to be sure that all of the nutrients have been preserved. A lot of people prefer to buy their food from a supermarket and they do so because it’s easier. However, a lot of people go through their whole life without ever really knowing if what they’re eating is fresh or if it’s old.

What cucumber sprouts look like?

So, what do these cucumber sprouts look like? Well, the first thing you will notice is that they have a long green stem, and a yellowish head.

The head is going to be where most of the nutrients are found. The stem however doesn’t contain as many nutrients as the head, but it will still provide some useful substances. However, most of the vitamins and minerals are going to be found in the head. This is because the ideal conditions for growing cucumber sprouts are kept at a very cool temperature, so in order to keep the sprouts alive until you have time to eat them, it makes more sense to harvest them from the head.

How fast do cucumbers sprout?

The next thing you want to know is how fast do cucumbers sprout? Well, the answer is that it can take anywhere from 2 days to 10 days for your sprouts to grow. It all depends on the conditions of your home and when you will be eating them.

If you are going on vacation, then it makes sense for you to leave them growing for as long as possible so that you have more readily available food when you come back.

If you have some spare time on your hands, then you could also keep them growing and eating them throughout the entire time that you are away. The reason why it’s so great to eat them when they’re young is because they’re at their most nutritious, and also because as they get older, the taste doesn’t really change that much.

How do I make cucumber sprouts?

The recipe for making cucumber sprouts is very simple and easy to follow. The only thing you will need is a regular sized cucumber and some water.

The first step is to cut the ends off of the cucumber so that they are even and then you will using a sharp knife make around 5 or 6 slices into the cucumber, cutting it almost all the way through.

Then, place it into a glass of water with enough room so that as it gets bigger it has room to grow more. Then place this glass on your counter where you can see it everyday.

It will look like this after about 2 days.

After that time, you can eat your sprouts as you normally would. The most important thing to remember when growing these is to keep the sprouts at a very cool temperature. This means you should set them in the fridge with a water bowl until you are ready to eat them, and then just serve them raw. It is also important that the head of the cucumber be removed before eating because it contains a lot of beneficial nutrients that are not available in the stem.

So there you have it! This will be your guide to growing cucumber sprouts the easy way and providing your body with all the nutrients you need.

Just remember to keep them cool, and they should grow very quickly. Hope this was helpful, and thanks for reading our post!

Cucumber Sprouts  Nutrition Facts Serving Size: 1 cup Calories: 25 Calories Per Serving: 2 Total Fat: 0.9g Saturated Fat: 0g Trans Fat: 0g Cholesterol: 0mg Sodium: 80mg Carbohydrates: 2.9g Dietary Fiber: 0.1g Sugars: 1.7g Protein: 2.6g 2.6kcal Total Carbs = 2.

How long after flowering do cucumbers appear?

When cucumbers are harvested from the vine, the green fleshy part of the plant is visible. The plant produces large numbers of tiny seeds, and these are mostly found in or near the stem or leaves. As the plant matures in preparation for reproductive growth, one to two months after flowering, the fruits (cucurbits) begin to develop. Depending on how long a particular variety has been allowed to grow before harvesting, they may have a week or more of rapid fruit development time before they are ready to pick.

Cucumber Growth Stages: How Fast Does Cucumber Grow?

How to grow a cucumber plant indoors?

If you do not have an outdoor garden, you can grow a cucumber plant indoors in containers or tubs. As with any other vegetable you must start seed indoors. Place seeds in a small glass of water and place this inside propagation tray filled with potting soil. When cucumbers have sprouted, transplant them into the garden or outdoors after all danger of frost has past.

How to cure the 5 most common cucumber problems?

A cucumber is an excellent source of water and nutrients, but if it gets infested with insects or fungal diseases, the rest of the cucumber plant can suffer. To cure these problems, it is necessary to know what to watch out for.

Cucumber problems:

  1. The pea aphid: can be found on the cucumber leaves by scouting in early morning or after a rain shower. The aphids suck the juice and cause distortion in the leaves. To get rid of them, clean up the garden, removing all old plant debris. Spray the plants with soapy water and then spray with a pesticide that can be purchased at a garden store.
  2. Powdery mildew: This is a fungus that appears on the cucumber after rain or when humidity is high. The fungus will spread quickly through the garden and replace leaf surfaces with white powder that stops photosynthesis from occurring in the plant leaves. If you notice white powdery spots on the leaves, remove the affected leaves and spray with a spray with fungicide.
  3. Slugs: A snail is a predator that lives on the surface of the soil, in and under decaying materials, or in moist places like gardens. The slugs eat off cucumber plants and keep them from growing properly. To protect against this, make sure a slug barrier is constructed around the garden to keep these pests out.
  4. Fungus: This disease most commonly affects the cucumber plant when it is succumbing to drought. To cure this, spray with a fungicide and apply it regularly to prevent the cucumber plants from succumbing to this disease.
  5. Leaf spot: A fungus can also affect the leaves and produce yellow spots on the leaves of your cucumber plant. Spray with fungicide regularly to treat this disease and boost production levels.


How to Grow Cucumbers | Gardener's Path

Are Cucumbers Fruits or Vegetables?

Cucumbers are a member of the cucurbit family, which includes squash, zucchini, pumpkin and cucumbers. Each plant produces a large flower, which can be green or yellow or both. The fruit that results from this flower is the cucumber.

Cucumbers have a mild flavor and are very versatile in their use as they can be eaten raw, pickled or pickling spices used to create special sauces and relishes.


Peach Tree Blooms

Peach Tree Blooms

This blog post is about a neighborhood peach tree Blooms that flowers every year and the people who love to watch it.

What’s blooming in your neighborhood? If you have a fruit tree, check for blossoms. They’re a sure sign that spring has sprung and summer is not too far away! Talk to your neighbors and make a plan to keep the tree watered with buckets, hoses, or rain barrels over water-troughs if there are no nearby water sources near enough.

Even if your tree doesn’t look like it’s ready to bloom and you don’t want to wait, you can visit it in the spring for a free sample! Pick one ripe peach from the tree—and then share the fruit with your friends, family, and neighbors. 

Beautiful Full Bloom Cherry Blossom Trees In The Early Spring Season Pink Sakura Japanese Flower In Japanese Garden With Green Grass Stock Photo - Download Image Now - iStock


When Do Peach Trees Bloom?

Peach trees generally bloom in the spring, when it is time for pollen to be released.

The blooming peach tree is really a plant in a constant state of blooming. The female part of the tree (the flowering zone) produces flowers and then produces a seed to produce another tree. This means that peach blossoms are produced every year—and they can be quite abundant.

What month do peach trees blossom?

Because peach trees can be so abundant with blossoms, when do peach trees blossom varies from year to year. But on average, peach trees blossom in May and early-June.

Peach Tree Blooms: A Neighborhood Story

When is the best time of year to see Peach Tree Blooms? It’s a question that people have been asking for years. People come from all over the city just to see it.

If you live in a neighborhood that has a peach tree—or any fruit tree—you are really lucky. Your tree may not have blossoms now, but if you have a tree, there is always the possibility that it will blossom in the future.

By doing some research, planting your own fruit trees and watching what happens, you can see your own Peach Tree Blooms at any time.

Do peach trees bloom before leaves?

Peach trees don’t just produce blossoms. The flowers also smell really good and produce pollen, which is often called “the luckiest dust”. It looks like the pollen is dropping from the tree like little snowflakes. But does it fall before or after the leaves?

When Do Peach Tree Leaves Grow? Peaches don’t usually have blossoms in the early summer, when most other flowers have already bloomed. Instead, you’ll see blossoms, and then you’ll see little green leaves growing out of them. After the leaves are finished growing, they will be covered in small white fuzz that grows into a blossom.

Elberta Peach Tree – Prized Peaches Aplenty - PlantingTree

What Do Peach Leaves Look Like?

The peach tree has soft fuzzy colored leaves that grow a long time before it has blossoms—that’s why people love them so much! They can grow up to five inches long. These leaves are different shapes, too. Some are round like a teardrop shape. Others are longer and narrow like a pencil. And many of the spring leaves look like a heart shape!

What do peach blossoms look like?

The blossoms can sometimes be pink or white, but in most cases they’re just white. They have a unique little shape with five petals that look like little pointed stars. And they smell really, really great! This smell attracts bees, birds and butterflies to the tree.

Pollen is the part of your fruit tree that is like the seeds from other plants. When other plants sprout from your peach tree, they come from the pollen dropping on top of them because it was spread by wind or a bee or a bird.

Why is my peach tree not blooming?

The amazing thing about your peach tree is that it can blossom even though it doesn’t have any leaves. The flowers are really just the fruit, which we eat and digest into fertilizer for the tree.

If your tree doesn’t have blossoms and you want to see them, here’s a few things that might help:

1.) Add more water! If you don’t live in an area with a lot of rain, make sure to add enough water every day. You might have to give the trees a little extra water—this is because peach blossoms use up a lot of water. But this is a good idea, even if your tree doesn’t look ready to bloom.

2.) Feed the tree! Feeding your peach produces blooms even when you don’t want them. Apple trees and peaches are two examples of trees that don’t need fertilizer, but still produce fruits with blossoms on them. Why? Because they have a lot of fertilizer on them in the form of flowers.

3.) Check your fruit tree for pests! A pest attack might prevent your peach tree from blooming at all, or it might prevent it from blooming in the way that you want. This is why it’s important to know what is going on around you. Maybe one of your trees has a problem with bugs and another one doesn’t—and that could be causing the difference between a bloom and no bloom.

4.) Get a dwarf variety! Dwarf peach trees have blossoms, too. And they have even more blossoms than regular ones. If your tree is just not producing any flowers, maybe it’s time to look into getting a new one.

5.) Water top to bottom! Are you watering your peach tree? If you’re just filling the pit, or giving the trunk a little bit of water every day—you might not be doing enough. Peach trees use water like crazy during blooming season.

Peach Blossoms: Japan's Other Spring Flower Blossoms

How do I know if my peach tree is fruiting?

Peach trees are very early in the fruiting process. When it is time for them to start blooming, they have already started. So if you live far away but want to see blossoms, you might be too late. But don’t worry! It’s not too late! Here are a few things that will help:

1.) Pruning your peach trees! Having more fruit on your peach tree means you’ll get more food each year from the flowers and the fruit!

2.)Find a dwarf variety! If you live in a city, you might be able to grow dwarf peach trees. They may not bloom as much, but they take up less room and produce more fruit—so it’s a good idea if the space is limited!

3.) Or grow two trees together. You can even combine two trees on separate branches to make one tree! This is kind of like the dwarf variety—except it really works. Two trees that are very close together will form new roots and start growing together.

If you like this blog post, we would love for you to share it. You can join our family of fans on Facebook and on Twitter! We are always trying to grow our community!


Garden Hose Lowes

Garden Hose Lowes

When was the last time you watered your garden? Maybe a few weeks ago. Maybe a few months ago. Now it might be in need of some serious attention, again. If that’s the case, then you better head over to Garden Hose Lowes! You’ll find perfect replacement hoses, sprinklers, and other tools at an affordable price.

No matter what you need, you’ll be able to find it here. You’ll also be able to buy a wide variety of products there. Another great thing about Garden Hose Lowes is the customer service. You can feel free to ask questions about their products and services. They’ll let you know everything that you need to know as well as how much each product will cost. 


Are Garden Hoses Recyclable? (And 11 Uses For Old Garden Hose) - Conserve Energy Future


The staff is always friendly, even if you have a million questions for them. They never get tired of answering your questions about their services. That’s one thing that you might have a problem with when you’re checking out other stores. You’ll find the staff to be more than helpful at Garden Hose Lowes.

There are also helpful guides and brochures just like some of the other retailers in this industry. You can read through those guides and see what you need to know in order to find the right products. If you’re looking for a watering system or other item, then this store is definitely the place to go.

Find the Right Garden Hose

Why do people need garden hoses in their homes? Well, everyone needs them for one reason or another. It’s nice to be able to water your garden when you want to and not when you have to. If you decide that a hose is what you need, then go ahead and check out the best deals on hoses from Garden Hose Lowes.

With their wide variety of products, chances are that they’ll have just what you’re looking for. You’ll be able to find everything from garden hoses to faucets as well as other items that can help you with your gardening needs. Another great thing about Garden Hose Lowes is that their prices are really good.

You’ll be able to find things like sprinklers, hose boxes and more at a very reasonable price. It’s always nice when you find a good deal on the things that you need. This is definitely the case with Garden Hose Lowes.

Flexzilla 3/4-in x 75-ft Premium-Duty Kink Free Hybrid Polymer Green Hose in the Garden Hoses department at Lowes.com

Materials

Nylon is one of the most popular materials for water hose lowes. The reason behind this is because it is a very durable material that can withstand temperatures as low as -10 degrees and as high as 140 degrees.

These hoses are also very flexible, so they can easily be stored in small spaces. They’re also lightweight, so they won’t drag you down when you need to use them around your yard. Nylon is just one of many different materials that are used to make gardening and other water hoses.

Ply

Ply is the measure of how many times the material has been twisted around itself. Most hoses are made with three ply, which makes them incredibly strong and durable so that you can use them in tough conditions year round.

Size

The size of your hose is going to be determined by its diameter, as well as its length. If you have a large space that needs to be watered, or you have a water reservoir nearby, then it’s important to get a hose that’s longer in length.

If you’re only using your hose for small gardens, then you can go with a smaller diameter and smaller hose that’s easier to store.

Length

The length of your hose is not something that you want to take too lightly. You need to make sure that you have enough hose to connect your water source with the area that needs to be watered without kinking up.

If the hose is too long, then it can be difficult to control and unwind when you don’t really need it. On the other hand, if you get a hose that’s too short, then you won’t have enough length to reach areas on your property where water might be needed.

Garden Hose Nozzles

If you want to get the most out of your Hose Lowes, then you need a good nozzle that’ll produce a spray that can properly water your plants. You might not realize it, but not all nozzles are created equally. Some of them won’t work for certain tasks like watering flower beds or watering your lawn. So, knowing what types of nozzles are available is important if you want to get the most from your hose.

Hose Reels

A hose reel can help you get more done in less time. It’s actually a device that’ll wind up your hose so that you don’t have to really bend over and struggle with it. This can seriously save your back and make it easier for you to get a good grip on the hose without banging up your back.

Garden Hose Connectors

You don’t want to end up spending unnecessary money on hoses that aren’t going to work for what you’re trying to do. One of the best ways to ensure that your hoses are going to work is to purchase hose connectors. These connectors are designed specifically with your hose in mind and they can be used with any type of hose that you have.

Why PVC Water Pipes are The Best Choice for Your Garden? - Vectus

Garden Hose Lowes – How To Make Your Garden Grow

Gardening and plants go hand in hand. If you’re going to plant plants, then you need to know how to make them grow. One of the best ways to make your plants grow is with a good watering system. If you have the right tools, then it will be easy for you to water your garden every time that it needs some attention. There are all kinds of watering systems that you can use to make sure that your plants are hydrated, but the best choices will be those made by Garden Hose Lowes.

There are several types of watering systems available, ranging from garden sprinklers to overhead sprinklers. Each type has its own set of pros and cons.

So if you enjoy this blog post on Garden Hose Lowes, then you may want to read our article on Garden Hose Lowes as well:


Crepe Myrtle Diseases Pictures

Crepe Myrtle Diseases Pictures

Crepe myrtles, also known as American or clumping myrtles and, are deciduous trees that are native to the southeastern United States. As an evergreen plant, crepe myrtles are especially prone to disease. That’s why it’s crucial for gardeners and homeowners to take precautionary measures when planting these beautiful trees. Edible Crepes Myrtle Disease is a particular ailment of crepe myrtle that can cause leaves on the plants to turn brown and ultimately die off. The leaves that turn brown can look similar to the leaves of Basil. If this happens, it is best to avoid touching and picking these leaves as they are highly infectious.

What's Wrong With My Crepe Myrtle? 5 Common Problems | Southern Living

Symptoms of Edible Crepes Myrtle Disease

  1. Brown spots on the crepe myrtle leaves.
  2. Stripes that look like “C”s in the crepe myrtle leaf centers. Sometimes the “C” shapes hold together when broken off from the rest of the leaf leaving a clear break in between them.
  3. Edges of the crepe myrtle leaves look blotched, with brown spots appearing among the green color.
  4. Mottling of the leaves of a crepe myrtle tree where they turn yellow and brown.
  5. Browning of the leaves
  6. Leaves form a waxy sheath on portions of itself with dead zones underneath.
  7. Leaves curl inward, giving an “orcid” appearance.
  8. Many leaflets on one stem, meaning more than 5 leaflets per stem is considered diseased as well as branches that have more than 15 leaflets is considered diseased as well.
  9. Any crepe myrtle leaves with a “wet look” are likely to die.
  10. Leaves that are wilted or drooping, meaning the leaves hang down without support.
  11. Sunken centers on the its leaves can be a sign of disease as well as discoloration in the middle of the leaf.

Crepe myrtles can eventually die if infected by this disease.

The American crepe myrtle is a deciduous shrub whose scientific name is Lagerstroemia indica and it is native to the southeastern United States. Crepe myrtles are usually medium to large trees. Crepe myrtle are deciduous plants, meaning they go dormant during the winter and wake up in spring once the weather is warm again, their leaves appear in spring. The growth of this crepe myrtle is different than a typical shrub. This plant grows at a slow rate compared to other shrubs, due to its evergreen nature it can take up to 50 years for a tree to grow from seedling to full-size tree.

It commonly have flowers of white, pink, or red. These flowers are what make it an ideal plant for landscaping. Crepe myrtles are used in landscaping because of their ability to grow in a variety of soil types and their hardiness. This plant is especially great for regions that have high heat and drought, as well as low soil acidity. It is also a broad-leaved deciduous shrub with male and female flowers on different trees.

What Is the Black Residue on My Crepe Myrtle Trees - What Can I Do About It?

What does a diseased crepe myrtle look like?

Edible crepe myrtle disease was first documented in Houston, Texas. Crepe myrtles have a waxy and tough outer coating to protect themselves from extreme weather. The main pollinators of this tree are bees, not just any bees but the carpenter bees will come and pollinate the tree. The crepe myrtle is also known for their flowers that attract hummingbirds as well as butterflies.

How To Solve Common Crepe Myrtle Problems From Diseases To Pests

What is wrong with my crape myrtle?

Edible crepe myrtle disease can cause loss of leaves, and branches that can lead to the eventual death of the tree. The disease causes dark lines that snake across the leaves, giving them a striped appearance. These stripes appear on both sides of the leaf and eventually cause the leaf to die. This disease is spread by way of insects, specifically carpenter bees. The infected bees go to a healthy crepe myrtle and then pollinate the flowers of that tree. Once the pollination is complete, the bees will then fly to the diseased tree and pollinate it as well. Due to the nature of this disease, it is crucial to remove any dead or dying plants from your garden in order to prevent spreading of this issue.

Why are the leaves on my crepe myrtle curling?

Leaves on this plant begin to curl because the plant affects the chlorophyll in the leaves. Chlorophyll is what gives the leaves their green color, and this disease causes them to lose their color. Without chlorophyll, the leaves turn pale or yellow and eventually die off.

Crape Myrtle tree looks like its dying.???

What are these brown spots on my crepe myrtle?

The brown spots are most likely a form of blight disease. The disease is caused by fungi that form under the bark of your trees. These spots can cause your trees to become vulnerable to other infections.

Act decisively to stop crape myrtle bark scale problems | Mississippi State University Extension Service

What are these stripes on my crepe myrtle?

The stripes are most likely caused by a plant disease known as leaf spot. The leaf spot is an infectious disease that can cause leaves to die and often spreads fast, due to the nature of crepe myrtles being a shrub.

Once the leaves of the crepe myrtle are infected, it is likely that your tree will experience permanent foliage loss. This disease spreads rapidly, so it is important to make sure that your plants do not come into contact with any diseased plants.

Evidence in controlling disease in garden areas is highly limited and thus any control efforts are largely speculative. Some evidence suggests the presence of ants and their effect on biological control. Ants are oftentimes an indicator that a healthy environment is present and thus other organisms associated with a healthy environment will prosper as well. If ants are present in its natural habitat, they may be helping to prevent disease by eating diseased foliage, thus reducing the likelihood of infection. The benefits that help keep plants healthy are called ecosystem services, and studies have shown that these services can increase overall crop yields as well as reduce the need for pesticides.

Can you overwater a crape myrtle?

These are very drought tolerant plants and can survive lengthy periods of no watering. Watering should be done deeply, allowing the water to sink 2-4 feet into the soil; rather than pouring water on the surface which causes the water to run off, thus driving nutrients away from the plant. Crepe myrtles are highly responsive to fertilizer. They take up nutrients quickly when given inorganic fertilizers but slow down once they reach their maximum absorption level.


Hope you enjoy this blog . Thanks for reading


Low Acid Tomatoes

Low Acid Tomatoes

Many people suffer from stomach ailments, such as heartburn, that are worsened by certain foods. The problem is, it can be hard to figure out what your triggers are – all food tastes the same coming back up. Luckily there’s a solution: eat more low acid tomatoes!

Tomatoes With Low Acidity

Low acid tomatoes have less of an effect on the stomach and intestines, meaning that they’re not as likely to cause painful digestive problems for those who suffer from IBS or ulcers. Tomatoes contain an important antioxidant called lycopene. Blood cholesterol can be reduced by 11%, the risk of a stroke is lowered by 30% and of course, the acid that exacerbate heartburn is absent.

We’ve all heard that acid reflux is a leading cause of heartburn in America, so why not take a few steps to avoid it altogether? Start by adding low acid tomatoes to your diet!

“Low acid tomatoes,” as the name implies, usually come from the New World . They may be as small as golf-ball sized or as big as normal size tomatoes. There are more than 100 varieties of low acid tomatoes out there so you can probably find one that suits your tastes.

Here's Why You Should Consider Eating More Tomatoes

They’re Non-GMO

You’ll have to peel them. That’s okay, though. To take out most of the acid, cover them with water and put them to sleep for a few hours. Drain the water, add some salt and use as you would any other tomato.

What to Avoid

As it turns out, there’s a reason why most recipes for low acid tomatoes call for cooking them: in order to survive the acid and bacteria that can cause food-borne illness, the low acid tomato needs to be cooked.

If you are concerned about your stomach, then you should cook your tomato before eating it.

Low Acid Tomatoes Do Not Contain High Fructose Corn Syrup (There’s a Way Around That)

You’ll have to peel them. That’s okay, though.

Benefits

Benefit of low acid tomatoes is that they’re delicious. Some of the more common low acid varieties are Roma, Passport, and Blue Lake. These tomatoes have a stronger flavor than regular tomatoes, but they’re great for making sauces, ketchups, and even soups!

I like to peel them and add them to sandwiches for some extra flavor. They’re also great in salads when you’re looking for a little extra bite!

According to “Food Processing Magazine,” low acid tomatoes are also good for preserving quality because they aren’t exposed to as much bacteria during storage and shipping. Benefits of Low Acid Tomatoes Include Weight Loss

You’ll be in for some other surprises if you switch to low acid tomatoes. One study shows that the risk of skin cancer decreases with increased tomato consumption. The reason is thought to be beta carotene, found in tomatoes and related vegetables.

Of course, people avoid low acid tomatoes because they think that the lack of acid will make the tomato not taste as good.

If you want to enjoy tasty tomato treats without worrying about heartburn or ulcers, start eating low acid tomatoes today! All you need to do is check your local supermarket or farmer’s market. The low acid varieties tend to be in the front of the store, so you should be able to find them easily.

More Growing Tips for Tomatoes

There are certain things a tomato plant needs in order to grow. The first is the soil; if it’s too acidic, it can reduce the tomatoes’ lycopene content, which may affect its flavor.

But what, then, is an optimal pH level for tomatoes? To answer this question, experts have conducted tests. They examined the pH levels of domestic tomatoes in different countries. In one case, it was found that tomatoes grown in Japan had a pH level of 6.6 and were therefore acidic, whereas domestic ones grown in India had a level of 7.4 and were alkaline . In other words, the lower the pH level of fruit or vegetables are who grow them and expend most of their nutrients on growth rather than on absorption .

Second is the weather; tomatoes don’t do well in cold climates. This may be a problem for you if you’re living in a blizzard-prone area of the world (or close to it) during the spring and early summer where temperatures remain below 50 degrees F.

The third problem is soil moisture. You need to water your tomato plants regularly, but not too much or they may get root rot (a common problem with tomatoes).

The Best Tomatoes for Low Acid | ehow

How to Grow Low Acid Tomatoes?

So as you can see, there are many factors that affect the growth of tomato plants and whether they have a low acid content. With this in mind, how do you go about producing low acid tomatoes? The first thing is to choose a suitable growing region . In temperate areas such as the U.S. and U.K., the best time to grow tomatoes from seed is from March to September.

If you want to grow low acid tomatoes, don’t plant them in soil that’s too rich as it will make them more prone to sun scald . Also keep the plants thinned out so the remaining ones have sufficient access to nutrients.

For a longer growing season, start growing your tomato plants indoors in March and transplant them outside once the weather warms up in late May or early June.

Tomatoes and Acid Reflux: Why Do Tomatoes Trigger Heartburn?

Here are some of their key findings:

The risk of food-borne illness is reduced when tomatoes are ripening in the daytime, and the risk is increased when the fruits are ripe at night.

When tomatoes have reached full maturity, their pH level drops . This acidification makes them more susceptible to bacteria and fungi .

Soil with high organic matter was found to be slightly more acidic than soil low in organic matter . The same was true for high nitrogen levels.

Low acid tomatoes are one of the most heartburn-inducing foods. It’s only natural to want to avoid them if you suffer from acid reflux.

While some people enjoy the flavor of low acid tomatoes, they can cause problems for others. The best course of action is to avoid them altogether so you don’t have to worry about what your stomach may be feeling for a few hours after you’ve eaten them.


Hope you like this blog post! for more, please follow us.


Drip Irrigation Vs Soaker Hose

Drip Irrigation Vs Soaker Hose

The words “drip irrigation” might sound like some kind of foreign language, but they’re actually just a clever way to water plants. Drip irrigation is an alternative to using a soaker hose or even a sprinkler system, and while it can be more expensive to set up at first, it has many advantages over the more traditional methods.

In this article, we’ll compare drip irrigation versus soaker hose in detail, revealing their respective pros and cons as well as explaining how you can choose the best option for your garden.

What is Drip Irrigation?

Drip irrigation is a watering system that delivers water directly to the roots of your plants by way of a network of hoses and emitters.

Drip Irrigation: Full Guide │ Function │ Parts - AGRIVI

How Does it Work?

The basic setup consists of three main components: the main line – also known as the “emitter line,” water source, and distribution tubes or stakes. The emitter line delivers water at low pressure to emitters – or drip emitters – which then drip water slowly onto your plants’ root systems.

Drip emitters are available in a variety of shapes and sizes. Some are underground while others are above ground, and they come in a selection of lengths and diameters. Emitters can be connected either individually or together with line tubing so that they’re evenly spaced out across the entire garden area.

The water source for a drip system is typically located near where you’ll find the main emitter line, but if it’s too far to run a hose, consider getting an on-demand system instead.

Advantages of Drip Irrigation

Drip irrigation has the upper hand when it comes to many of its key advantages:

Efficient: Drip irrigation delivers water in a slow, even manner that evenly saturates your plants’ root systems. When you’re watering from above, the water can get stuck in the hose and run off all over your garden area. This can cause wasted water and nutrients, leading to a lack of root uptake.

Permanent: Drip irrigation is installed permanently, so it can’t be easily uninstalled. Soaker hoses, on the other hand, can be taken down and reinstalled whenever you feel the need to change your watering schedule.

No Clogging: The emitters on a drip system are spaced far enough apart that they don’t clog, even if it hasn’t been used in a while. Soaker hoses can be clogged by mud, which prevents the water from flowing where it needs to go.

Disadvantage of Drip Irrigation

Cost: When you’re setting up a drip irrigation system, you’ll have to buy lines, accessories, and emitters while also digging holes and installing stakes. The cost is more than just the materials – it’s also the time it will take to put the system together.

When you’re setting up a drip irrigation system, you’ll have to buy lines, accessories, and emitters while also digging holes and installing stakes. The cost is more than just the materials – it’s also the time it will take to put the system together.

Rate of Water Flow: If you’re used to watering with a soaker hose, then drip irrigation might seem too slow. If you’re watering a big area, you’ll have to put in more time and work to get the same results.

Maintenance: To prevent clogging and other issues, it’s important that you clean your drip system regularly. This includes cleaning the emitters, unclogging them, and ensuring that there are no blockages along the main line.

What is Soaker Hose?

Soaker hoses are a great alternative to drip irrigation because they’re inexpensive, easy to install and maintain, and have many of the same advantages as their more expensive counterpart.

How Does it Work?

Soaker hoses are individual watering tubes made from polyethylene that you attach to an underground water source (often a hose), run through the garden area, and then plug into an electrical outlet.

DIY soaker hose · Tiny Trash Can

Advantages of Soaker Hose?

Soaker hoses are quick and easy to install. You’ll rarely have to dig holes or set stakes, which means that it can be done quickly, on a whim.

Durable: Soaker hoses are produced from durable materials that will last a long time without needing to be replaced. The only issue is that the hose can eventually become worn out and need to be replaced, which can get expensive over time.

Low Cost: Soaker hoses won’t break the bank. You can get a basic system that works well for smaller areas, or you can splurge and get one that’s made from higher-quality materials.

Disadvantage of Soaker Hose

They’re not permanent, so they have to be maintained regularly. If you don’t clean them often enough, then the water supply will run out before the hose does. When this happens, you’ll need to set up a new system.

Drip Irrigation Vs Soaker Hose – Which is Best for Your Garden?

Drip irrigation can provide you with a more efficient watering system, but it’s probably cost-prohibitive for most gardeners. On the other hand, a soaker hose is quick and easy to install and maintain. If you need more flexibility in your watering schedule or need to water larger areas, then a drip irrigation system might be worth the extra cost.

If you like this blog, please share it with your friends. If you have any questions or comments, please leave them in the section below. Thank you for reading!


Some Facts You Need to Know About the Pincher Bug

Pincher bug

The Pincher bug or Reduviid, also known as the Assassin bug or Diving Beetle, is a species of assassin bug in the genus Phalangium. They are found in tropical and subtropical regions. It is mainly a predator but will occasionally feed on pollen and nectar when it has nothing else to eat.

This bug can pierce the skin with its mouth parts when disturbed and inject toxic saliva into wherever they bite their prey so they don’t have to chew long. They are in the same family as bed bugs, wolf spiders, and kissing bugs.

As a large adult they can grow to around 3 cm long. They have a red and black pattern that helps them blend in with the environment around them when resting on trees or plants. The blood of the pincher bug is extremely toxic to humans; when you are bitten by one you should seek medical attention immediately.

Country diary: one lone earwig stands her ground in the logpile | Insects | The Guardian

Where The Bug Found?

This bug is commonly found hanging from trees, sometimes on branches that get little to no sunlight. They are also frequently found out in the open anywhere from the ground and up to a couple of meters above the ground. They will often spin a flower or leaf into a shelter for themselves when they sleep.

Pincher Attack

The pincher bug will attack other bugs in order to fend off predators. They will also attack bigger prey such as beetles, spiders and even birds when they get hungry enough. They are known to use the same kind of hunting techniques that other bugs use.

Eating

The pincher bug is sometimes seen eating pollen and nectar. They will also hunt smaller animals such as caterpillars to eat. They will even feed on liquid honey that has been contaminated by dead honeybees, though they do not die from this.

Climates

The pincher bug can be found in climates all over the world but it does best in tropical areas with a lot of humidity and rain.

Facts You Need to Know About the Pincher Bug

1.They have a shell-like protection over their bodies that makes it harder for predators to eat them.

2.They deal with pain by creating a very vile smelling substance from their blood to repel predators and attract predators of other bugs.

3.They can survive without food for up to a year depending on the temperature and environment in which they live in.

4.The pincher bug is in the same family as bed bugs, wolf spiders and kissing bugs. They are mainly predators.

5.An adult pincher bug can grow to around 3 cm long and has a red and black pattern to help them blend in with their surroundings.

6.When bitten by one it is best to seek medical attention immediately because their blood is toxic to humans. They will inject it into their prey whenever they bite them, preventing them from having to chew long on whatever they are attacking.

7.They are found up to a couple meters above the ground in trees and plants.

8.The pincher bug can be found in climates all over the world but it does best in tropical areas with a lot of humidity and rain.

9.When you see this bug hanging from a tree or plant’s flower or leaf it is resting so it is not hungry or looking for prey as you might think. It will make itself a home there when it sleeps and feed on whatever they choose to eat that day.

The pincher bug gets its name from its piercing mouth parts which allow it to deliver a very toxic substance into the skin of its prey. It will inject a clear, oily like substance with its venomous saliva that causes pain, itching and burning by damaging the nerve endings on their body. It is in their nature to defend itself and this only makes them stronger. The worst part about this bug’s venomous saliva is that it can stop a person’s breathing and cause severe damage to their heart and lungs.

Earwig Control: Identification, Remediation and Prevention


Why are they called earwigs?

The earwig is a kind of parasitic insect that lays its eggs in the ear of another insect. Its name comes from the fact that it can burrow into the auditory canal, which is also known as an ear canal, and lay its eggs along the auditory nerve while they are still alive. These eggs will then hatch when their host dies, and another parasitic insect will then start to feed on it.

What do Pincher Bug do?

A variety of creatures, sometimes called assassin bugs, of the order Hemiptera (true bugs) feed on nectar and pollen. These insects have piercing and sucking mouthparts, which are adapted for piercing the skin of their prey and sucking out the hemolymph (blood), digestive juices, and sometimes also suck out the juices in their intestines. Many species possess no form of defense except to trigger a kind of hypnosis upon contact with humans or other animals which diminishes their energy instead of allowing it to defend themselves.

How to control earwigs in the garden - Leaf, Root & Fruit Gardening Services

How long do earwigs live?

Earwigs are good at protecting themselves for their size, but it is difficult for them to move quickly. Even though they live for a year, much of their time is spent hiding from predators. Since they usually don’t move quickly, they can easily be killed by larger and faster insects that prey on them. Earwigs also lose a lot of energy when they try to defend themselves from predators, so it would be better for them if they just crawl away instead of fighting back.

What kills earwigs?

The good news is that earwigs are not known to carry any dangerous diseases that humans or other animals can catch. The bad news is that earwigs may get into human homes and cause a lot of damage. These insects can be hard to get rid of, so it is best to not allow them into your home in the first place. There are many different insecticides available today, but they can all be very dangerous to humans if they are handled improperly.

Hope, this blog will help you. For more amazing blog visit our website and read informative blog